Data Transfer To and From NERC OpenShift
OpenShift containers are ephemeral. Files written only to a container's local filesystem can be lost when the pod is restarted, replaced, or deleted.
Store important data on a PersistentVolumeClaim (PVC) or in object storage using Minio.
See Storage Overview for more information about OCP storage.
OpenShift users normally transfer data through the OpenShift API to a pod. Durable data should be placed on a PVC or in object storage rather than in the pod's container filesystem.
For most transfers between your computer and OpenShift, use oc rsync. For large datasets or transfers that must continue after your computer disconnects, use NERC object storage, rclone, or another managed data-transfer service.
Prerequisites
Before proceeding, confirm that you have:
-
Set up the OpenShift CLI (
oc) tools locally and configure the OpenShift CLI to enableoccommands. Refer to this user guide. -
From a terminal on your laptop/desktop, log in to the NERC OpenShift cluster and switch to your project namespace:
For example:
-
Select your project.
Information
Some users may have access to multiple projects. Run the following command to switch to a specific project space:
oc project <your-project-namespace>. -
Confirm you have selected the correct project by running
oc project, as shown below: -
Identify the pod, container, PVC, source directory, and destination directory.
To list the containers in a pod:
To see the volumes and mount locations used by a pod:
Use Persistent Storage
A container filesystem is not persistent. Unless a file is needed only temporarily, transfer data into a directory backed by a PVC as described here.
For example, an application might mount its PVC at:
Confirm the correct mount path before transferring files:
You can also examine the pod configuration:
OpenShift mounts storage requested through a PVC into one or more containers in a pod. The PVC remains available independently of a particular pod, subject to its storage class and access-mode configuration.
Using oc rsync
Rsync is a fast, versatile, remote (and local) file-copying tool. It is famous for its delta-transfer algorithm, which reduces the amount of data sent over the network by sending only the differences between the source files and the existing files in the destination. This can often lead to efficiencies in repeat-transfer scenarios, as rsync only copies files that are different between the source and target locations (and can even transfer partial files when only part of a file has changed). This can be very useful in reducing the number of copies you may perform when synchronizing two datasets.
oc rsync is the recommended method for transferring directories between your computer and a running OpenShift pod and vice-versa.
The basic syntax is:
A pod path is written as:
oc rsync transfers directories rather than individual files.
When native rsync is unavailable in the container, the command may fall back to a tar-based copy, provided that tar is available. The fallback does not provide all normal rsync behavior, such as transferring only changed files.
Copy a Local Directory to OpenShift
For example:
The trailing slash on ./research-data/ means to copy the directory's contents.
Without the trailing slash:
the research-data directory itself is copied into /data.
Copy Data from OpenShift to Your Computer
For example:
Select a Container
A pod can contain more than one container. Specify the container using -c:
For example:
Select a Different Project
Use -n when the pod is in a project other than your currently selected project:
Synchronize Changes
When both the local computer and container have rsync installed, subsequent runs generally transfer only changed data:
To remove files from the destination that no longer exist in the source:
Be careful with this option!
Use --delete carefully. Files in the destination directory that are not present in the source directory can be permanently deleted.
To continuously synchronize local changes:
Copying a Single File
Although oc rsync operates on directories, oc cp can be convenient for copying a single file.
Copy a File to OpenShift
When using the currently selected project:
Copy a File from OpenShift
For a multi-container pod:
Important Note
oc cp requires the tar command to be available inside the container. It can fail with minimal or distroless container images that do not contain tar.
Using tar with oc exec
For directories containing many small files, streaming a compressed tar archive can be more efficient than transferring each file individually.
Copy a Directory to OpenShift
For a particular container:
Copy a Directory from OpenShift
Create the local destination first if necessary:
Both the local computer and the container must have tar available.
Transferring Data Directly to a PVC
Sometimes an application container does not contain tar, rsync, or other transfer utilities. In that case, create a temporary transfer pod and mount the application's PVC into it.
First identify the PVC:
Note the name of your PVC, i.e., <your-pvc-name>.
Create a file named data-transfer-pod.yaml:
apiVersion: v1
kind: Pod
metadata:
  name: data-transfer
spec:
  restartPolicy: Never
  containers:
    - name: data-transfer
      image: registry.access.redhat.com/ubi9/ubi:latest
      command:
        - /bin/sh
        - -c
        - sleep infinity
      volumeMounts:
        - name: data
          mountPath: /data
  volumes:
    - name: data
      persistentVolumeClaim:
        claimName: <your-pvc-name>
Replace <your-pvc-name> with the PVC name and create the pod:
Copy the data:
Verify the transfer:
Delete the transfer pod when finished:
Deleting the transfer pod does not delete the PVC.
Important Note
A ReadWriteOnce PVC might not be mountable by the application pod and transfer pod simultaneously, depending on the storage system and where the pods are scheduled.
You may need to stop or scale down the application before starting the transfer pod.
For example:
After the transfer:
NOTE: Stop applications before copying live database files or other data that must remain internally consistent.
Transferring Between Two PVCs
Create a temporary pod that mounts both PVCs:
apiVersion: v1
kind: Pod
metadata:
  name: pvc-transfer
spec:
  restartPolicy: Never
  containers:
    - name: transfer
      image: registry.access.redhat.com/ubi9/ubi:latest
      command:
        - /bin/sh
        - -c
        - sleep infinity
      volumeMounts:
        - name: source
          mountPath: /source
          readOnly: true
        - name: destination
          mountPath: /destination
  volumes:
    - name: source
      persistentVolumeClaim:
        claimName: <source-pvc>
    - name: destination
      persistentVolumeClaim:
        claimName: <destination-pvc>
Create the pod:
Copy the files:
For directories containing many small files, use tar:
Verify the destination:
Delete the pod after verification:
Important Note
This procedure copies the contents. It does not transfer ownership of the source PVC or delete its data.
To delete the PVC completely, run:
For Object Storage Setup on NERC OCP
Using Minio
If you are using object storage set up with MinIO as explained here, you can transfer data through it.
Once successfully initiated, click on the MinIO deployment and select the "Resources" tab to review created Pods, Services, and Routes.
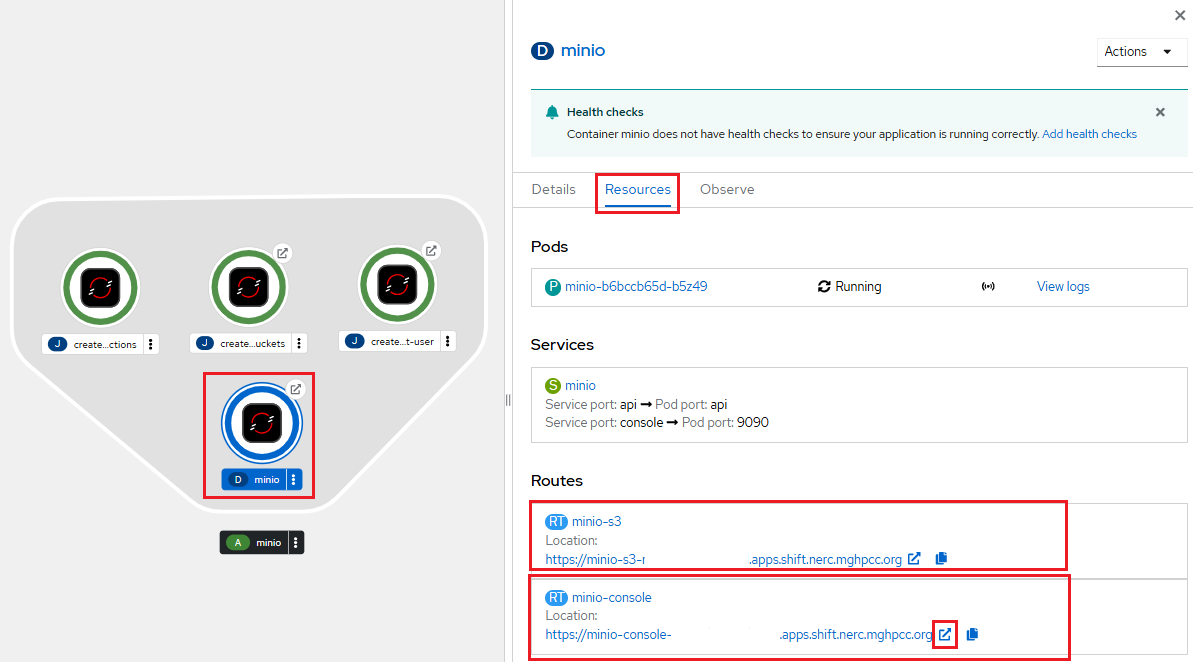
The minio-s3 route URL (found under "Routes" -> minio-s3 -> Location path) is used to interact with the MinIO API programmatically and will serve as the S3_ENDPOINT. Make sure to note this S3_ENDPOINT, as it will be required when configuring Rclone later.
Please note the minio-console route URL, also under "Routes" section under the Location path. When you click on the minio-console route URL, it will open the MinIO web console as shown below:
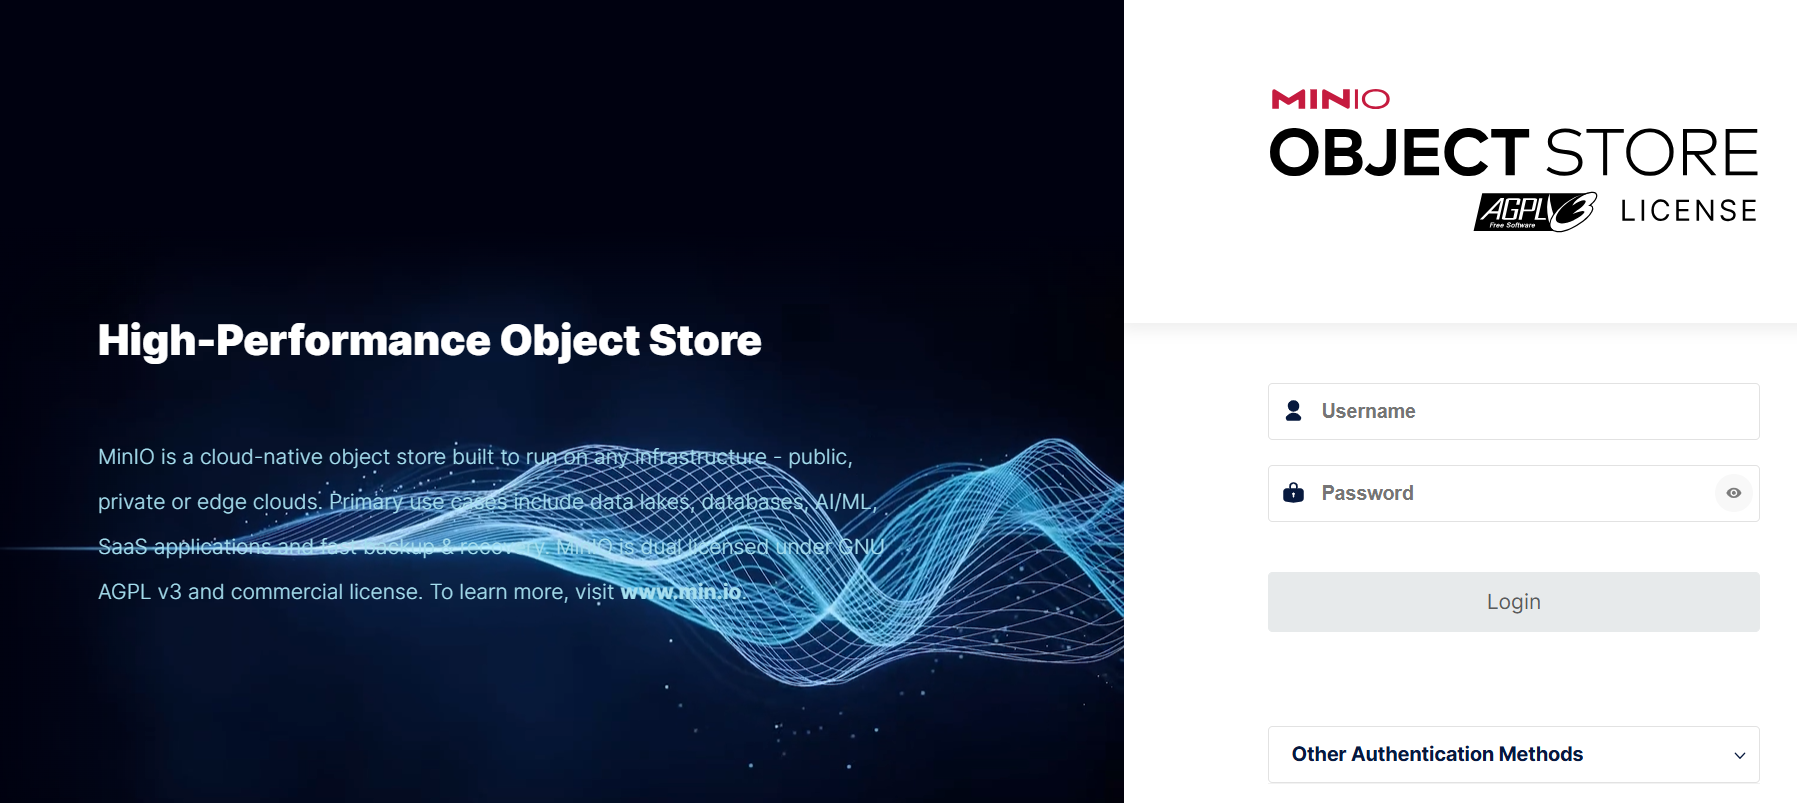
MinIO Web Console Login Credential
For this, you need to install and configure the OpenShift CLI by following the setup instructions.
Once the OpenShift CLI is set up, the username and password for the MinIO web console can be retrieved by running the following oc commands:
i. To get Access key run:
oc get secret minio-root-user -o template --template '{{.data.MINIO_ROOT_USER}}' | base64 --decode
ii. And to get Secret key run:
oc get secret minio-root-user -o template --template '{{.data.MINIO_ROOT_PASSWORD}}' | base64 --decode
Return to the MinIO Web Console using the provided URL. Enter the Access Key as the Username and the Secret Key as the Password.
This will open the Object Browser, from where you will be able to upload/download data using a web browser.
Using Rclone
Rclone is a convenient and performant command-line tool for transferring files and synchronizing directories directly between your local file systems and NERC's containers. Rclone is mature, open-source software originally inspired by rsync and written in Go.
Using RHOAI Rclone Workbench
You can also set up an Rclone-based RHOAI workbench and connect it to your object storage as explained here.
Using Rclone CLI
Alternatively, you can use the rclone command line tool locally.
Prerequisites:
To run the rclone commands, you need to have:
rcloneinstalled, see Downloading and Installing the latest version of the Rclone for more information.
Configuring Rclone
First, you'll need to configure rclone. Since object storage systems have quite complicated authentication, these credentials are kept in a config file.
If you run rclone config file you will see where the default location is for you.
Note
For Windows users, you may need to specify the full path to the rclone executable file if it is not included in your system's PATH variable.
The S3_ENDPOINT, Access Key, and Secret Key that you previously noted from MinIO deployed routes can then be plugged into rclone config file.
Edit the config file at the path shown by rclone config file and add the following entry with the remote name nerc:
[nerc]
type = s3
env_auth = false
provider = Other
endpoint = <S3_ENDPOINT>
acl = public-read
access_key_id = <ACCESS_KEY>
secret_access_key = <SECRET_KEY>
location_constraint =
server_side_encryption =
See rclone S3 configuration for more information.
Important Information
If env_auth is set to true, rclone will read credentials from environment variables, so you should not insert them directly in the config.
Or you can copy this content to a new config file and then use the --config flag to override the config location, e.g. rclone --config=FILE
Interactive Configuration
Run rclone config to setup. See rclone config docs for more details.
Using Rclone Subcommands
rclone supports many subcommands (see the complete list of Rclone subcommands). A few commonly used subcommands (assuming you configured the NERC Object Storage as nerc):
Once your object storage has been configured in rclone, you can list all buckets with the lsd command
rclone lsd "nerc:"
Once an object-storage is configured with the name "nerc:", common rclone commands include the following.
List available buckets or directories:
Upload a directory:
Download a directory:
Preview a synchronization:
Review the dry-run output, then run:
Very Important
rclone sync can delete destination objects that do not exist in the source. Use rclone copy when you do not want deletion behavior.
Do not place object-storage credentials directly in a container image or commit them to Git. Store them in an OpenShift Secret and mount the Secret into the transfer pod.
Verifying a Transfer
Compare directory sizes:
Compare file counts:
For important datasets, create checksums locally:
Transfer the checksum file with the data and verify it in the pod:
Troubleshooting
Permission Denied
Check the destination permissions:
Check the identity used by the container:
OpenShift containers commonly run with a dynamically assigned, non-root user ID. Do not assume that the container can write to every directory.
Use the application's designated writable directory or PVC mount. Do not change the container to run as root merely to complete a transfer.
Pod Not Found
Confirm the active project and pod name:
Or specify the project explicitly:
Multiple Containers
List the containers:
Then add the following option to the transfer command:
rsync or tar Is Missing
Use a temporary transfer pod with the same PVC mounted, as described in Transferring Data Directly to a PVC.
Transfer Stops When the Pod Restarts
Transfer data to a PVC, not to the container's local filesystem.
If the application pod is frequently replaced, use a dedicated transfer pod.
Transfer Is Too Slow or Frequently Interrupted
Avoid transferring a very large dataset through oc rsync or oc cp.
Use object storage, rclone, or another managed transfer mechanism that supports retries and resumable transfers.
Choosing a Transfer Method
| Situation | Recommended method |
|---|---|
| One small file | oc cp |
| Small or medium directory | oc rsync |
| Repeated synchronization | oc rsync with native rsync |
| Many small files | tar through oc exec |
| Application image lacks transfer tools | Temporary transfer pod |
| Copy between PVCs | Pod mounting both PVCs |
| Large or resumable transfer | Object storage, rclone |
| Database backup | Database-native backup tool followed by transfer of the backup file |