User Account Types
NERC offers two types of user accounts: a Principal Investigator (PI) Account and a General User Account. All General Users must be assigned to their project by an active NERC PI or by one of the delegated project manager(s), as described here. Then, those project users can be added to the resource allocation during a new allocation request or at a later time.
Principal Investigator Eligibility Information
-
MGHPCC consortium members, whereby they enter into an service agreement with MGHPCC for the NERC services.
-
Non-members of MGHPCC can also be PIs of NERC Services, but must also have an active non-member agreement with MGHPCC.
-
External research focused institutions will be considered on a case-by-case basis and are subject to an external customer cost structure.
A PI account can request allocations of NERC resources, grant access to other general users enabling them to log into NERC's computational project space, and delegate its responsibilities to other collaborators from the same institutions or elsewhere as managers using NERC's ColdFront interface, as described here.
Getting Started
Any faculty, staff, student, and external collaborator must register a user account through the MGHPCC Shared Services (MGHPCC-SS) Account Portal, also known as "RegApp". This is a web-based, single point-of-entry to the NERC system that displays a user welcome page. The welcome page of the account registration site displays instructions on how to register a General User account on NERC, as shown in the image below:
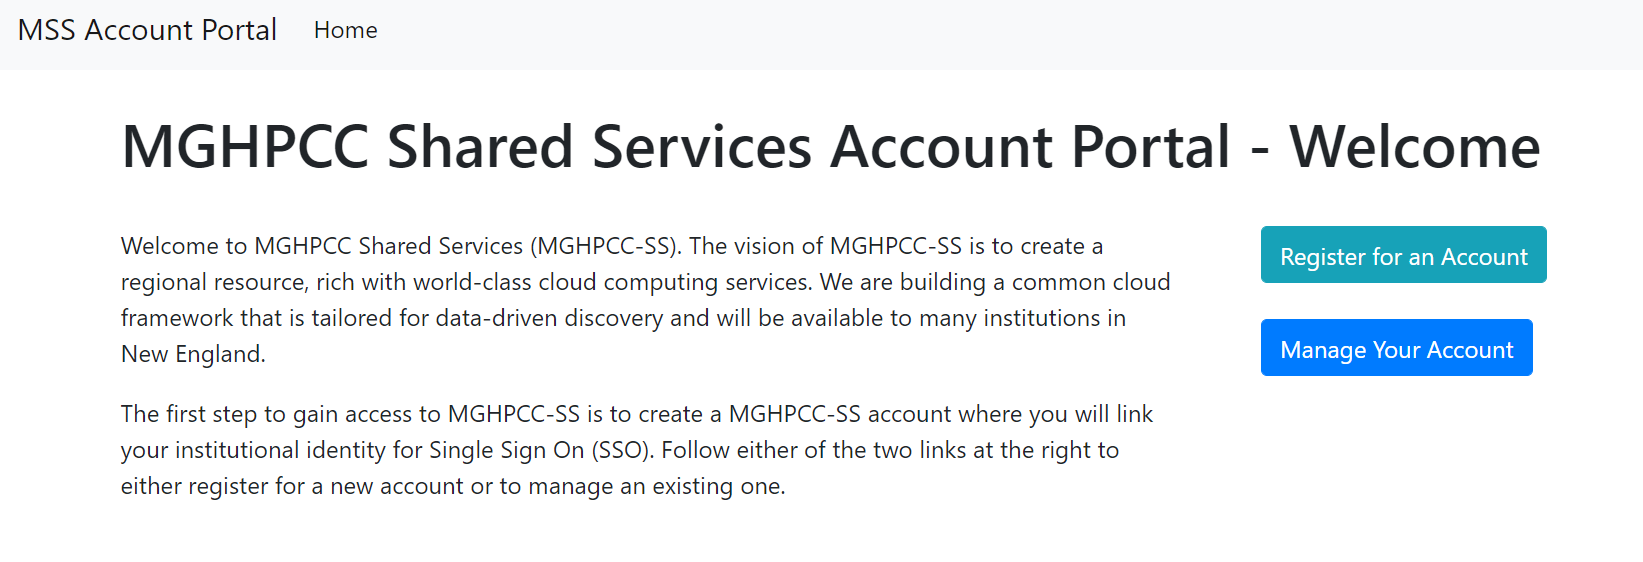
There are two options: either register for a new account or manage an existing one. If you are new to NERC and want to register as a new MGHPCC-SS user, click on the "Register for an Account" button. This will redirect you to a new web page which shows details about how to register for a new MGHPCC-SS user account. NERC uses CILogon that supports login either using your Institutional Identity Provider (IdP).
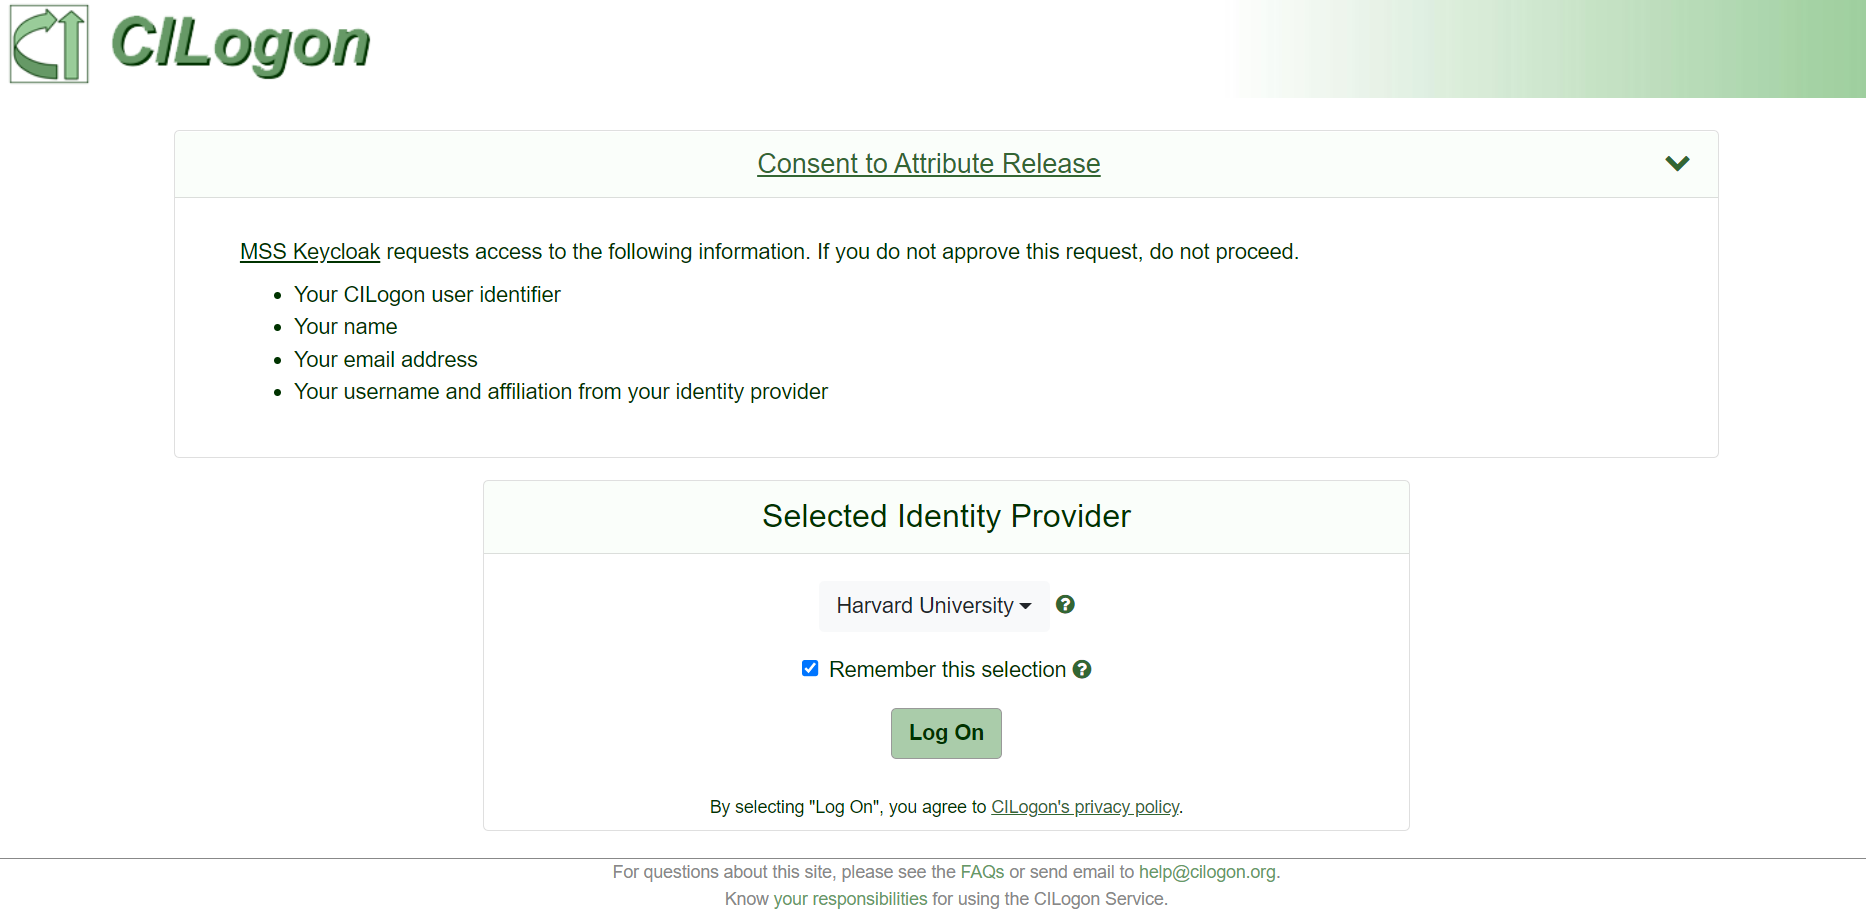
Clicking the "Begin MGHPCC-SS Account Creation Process" button will initiate the account creation process. You will be redirected to a site managed by CILogon where you will select your institutional or commercial identity provider, as shown below:
If you are not able to see the CILogon landing page
If the default CILogon login page does not appear, it may be because you are already logged in through another identity provider supported by CILogon. Since CILogon provides authentication and authorization using institutional credentials, this can sometimes cause session conflicts.
To resolve this issue, you can reset your CILogon session by following these steps:
-
Visit the CILogon cookie management page: https://cilogon.org/me.
-
Click the Delete ALL button to remove all CILogon related data from your current browser session.
-
Once the CILogon data has been cleared, go back to the RegApp.
-
Log in again using your institutional credentials.
If you continue to experience issues, try clearing your browser's cache and cookies, or use a different browser.
Once selected, you will be redirected to your institutional or commercial identity provider, where you will log in, as shown here:

After a successful log on, your browser will be redirected back to the MGHPCC-SS Registration Page and ask for a review and confirmation of creating your account with fetched information to complete the account creation process.
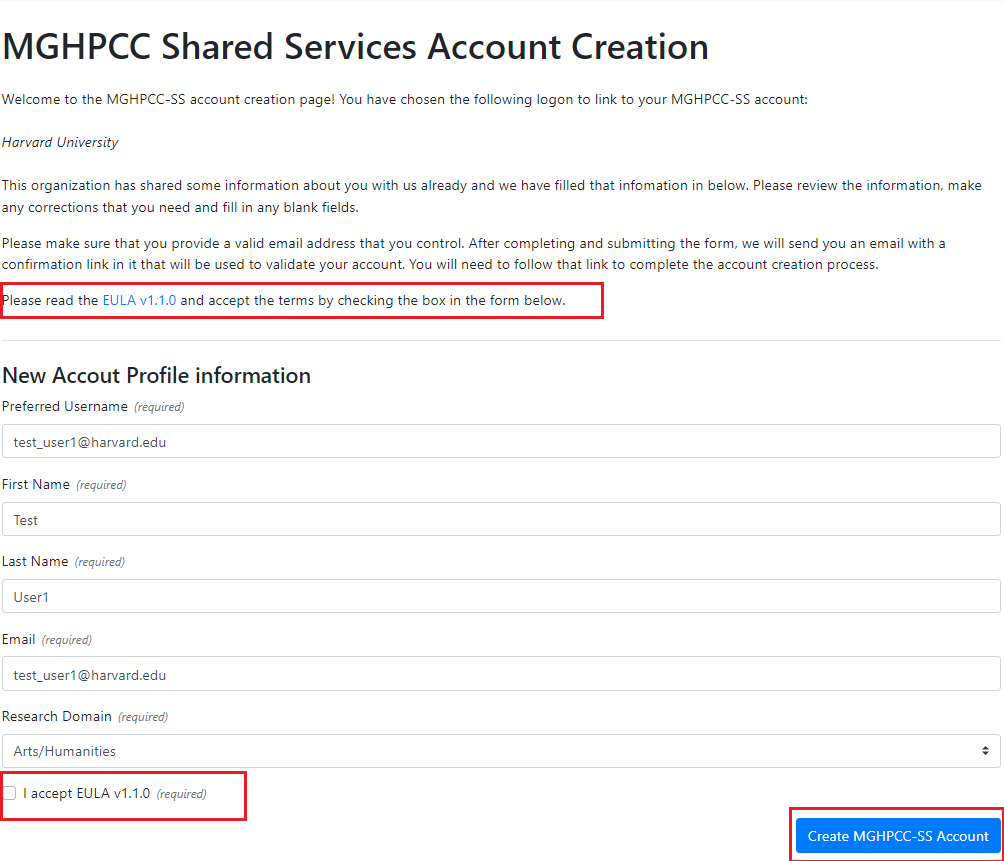
Very Important
If you don't click the "Create MGHPCC-SS Account" button, your account will not be created! So, this is a very important step. Review your information carefully and then click on the "Create MGHPCC-SS Account" button to save your information. Please review the information, make any corrections that you need and fill in any blank/ missing fields such as "Research Domain". Please read the End User Level Agreement (EULA) and accept the terms by checking the checkbox in this form.
Once you have reviewed and verified that all your user information in this form is correct, only then click the "Create MGHPCC-SS Account" button. This will automatically send an email to your email address with a link to validate and confirm your account information.
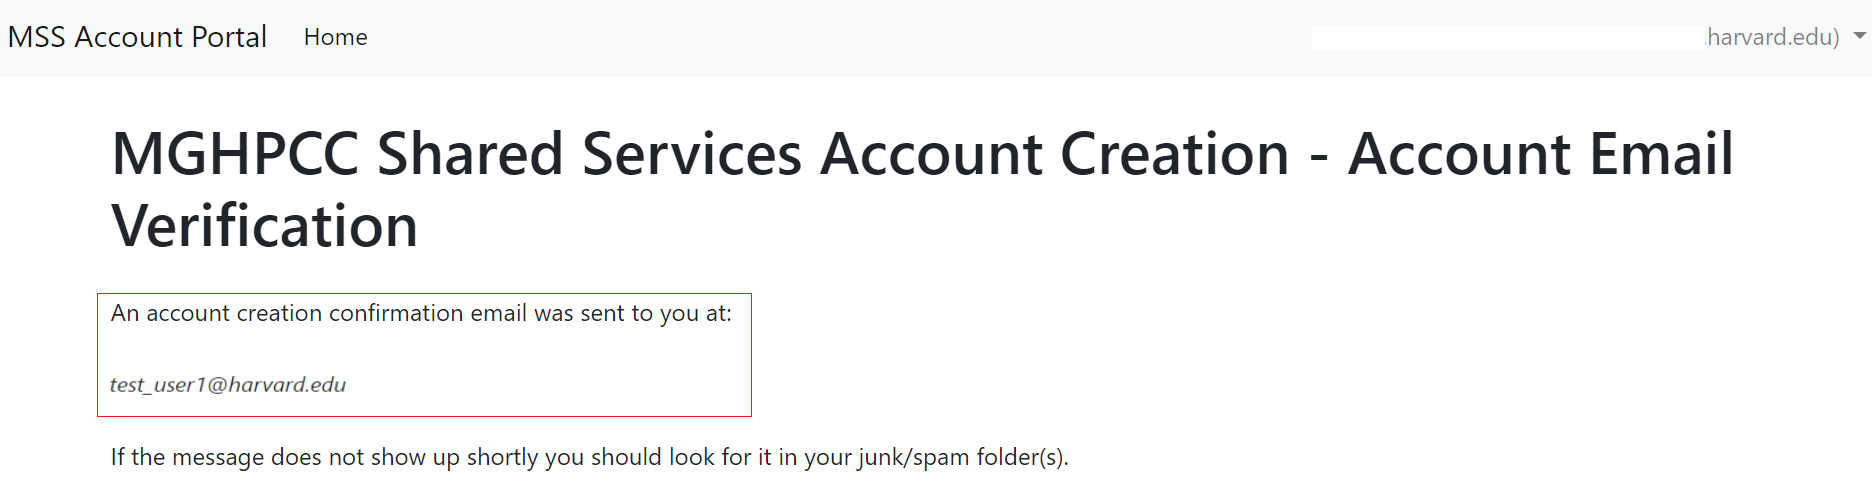
Once you receive an "MGHPCC-SS Account Creation Validation" email, review your user account information to ensure it is correct. Then, click on the provided validation web link and enter the unique account creation Confirmation Code provided in the email as shown below:

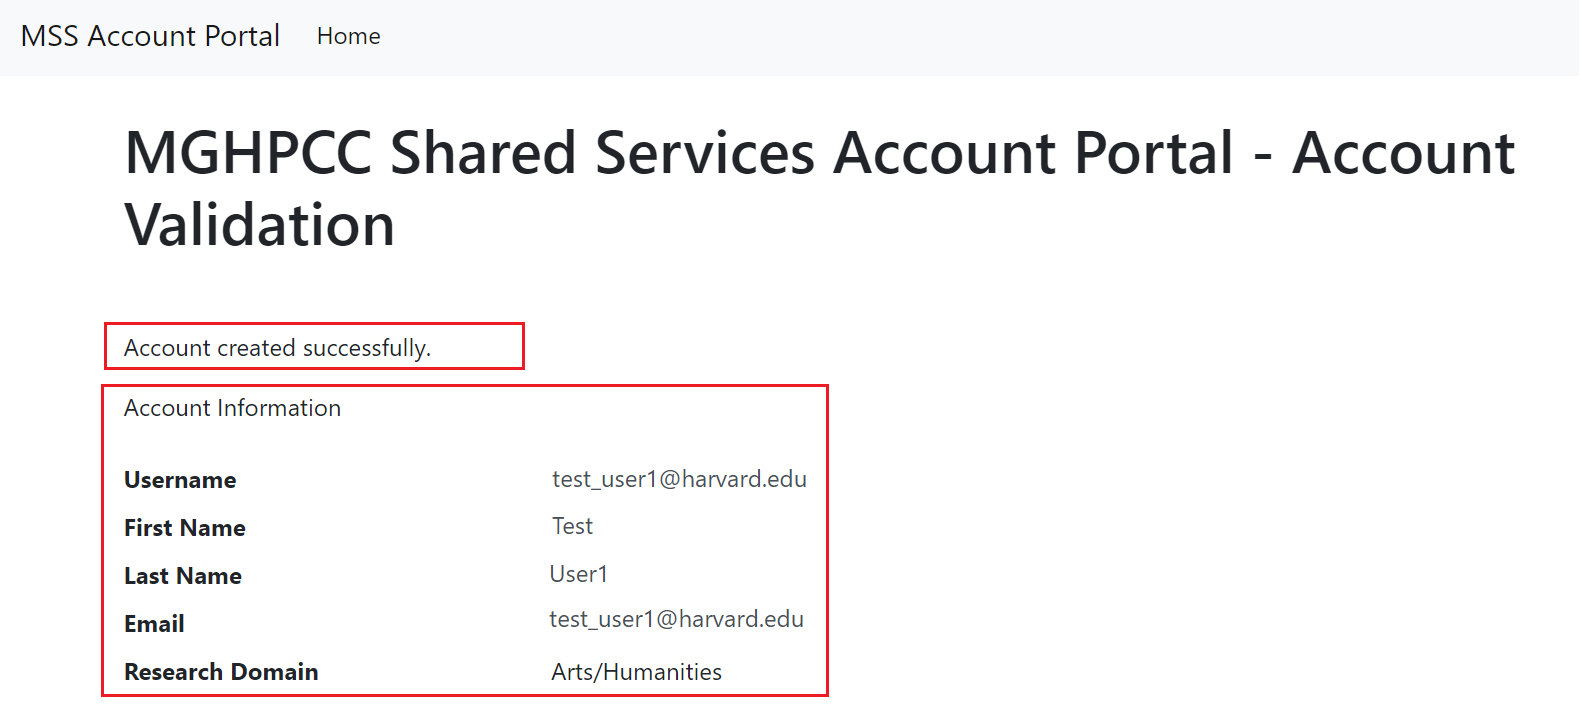
Once validated, you need to ensure that your user account is created and valid by viewing the following page:
Important Note
If you have an institutional identity, it's preferable to use that identity to create your MGHPCC-SS account. Institutional identities are vetted by identity management teams and provide a higher level of confidence to resource owners when granting access to resources. You can only link one university account to an MGHPCC-SS account; if you have multiple university accounts, you will only be able to link one of those accounts to your MGHPCC-SS account. If, at a later date, you want to change which account is connected to your MGHPCC-SS identity, you can do so by contacting help@mghpcc.org.
How to update and modify your MGHPCC-SS account information?
-
Log in to the RegApp using your MGHPCC-SS account.
-
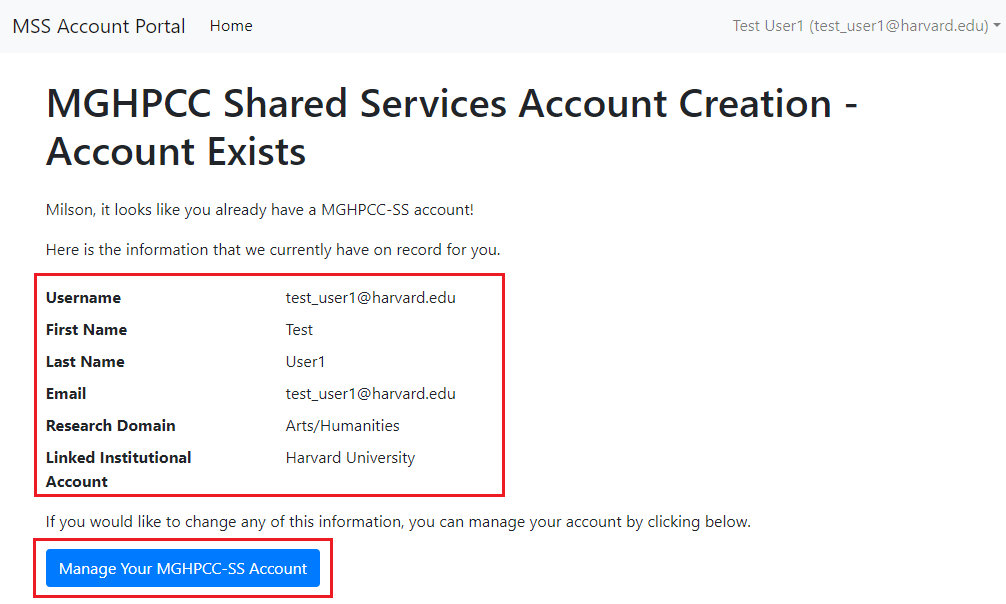
Click on "Manage Your MGHPCC-SS Account" button, as shown below:
-
Review your currently saved account information, make any necessary corrections or updates to fields, and then click on the "Update MGHPCC-SS Account" button.
-
This will send an email to verify your updated account information, so please check your email address.
-
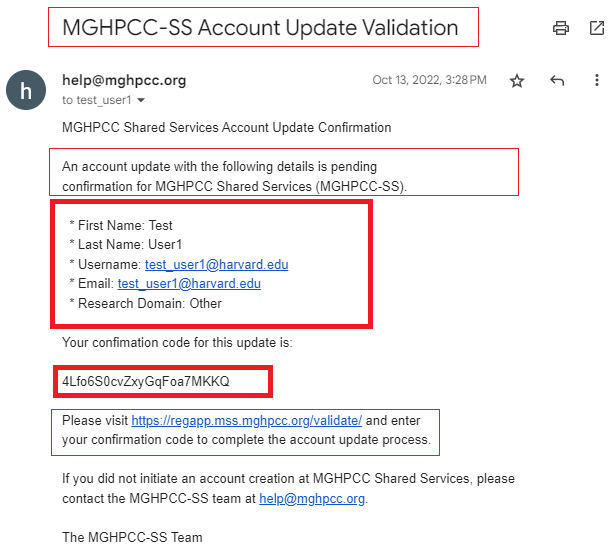
Confirm and validate the new account details by clicking the provided validation web link and entering the unique Confirmation Code provided in the email as shown below:
How to request a Principal Investigator (PI) Account?
The process for requesting and obtaining a PI Account is relatively simple. You can fill out this NERC Principal Investigator (PI) Account Request form to initiate the process.
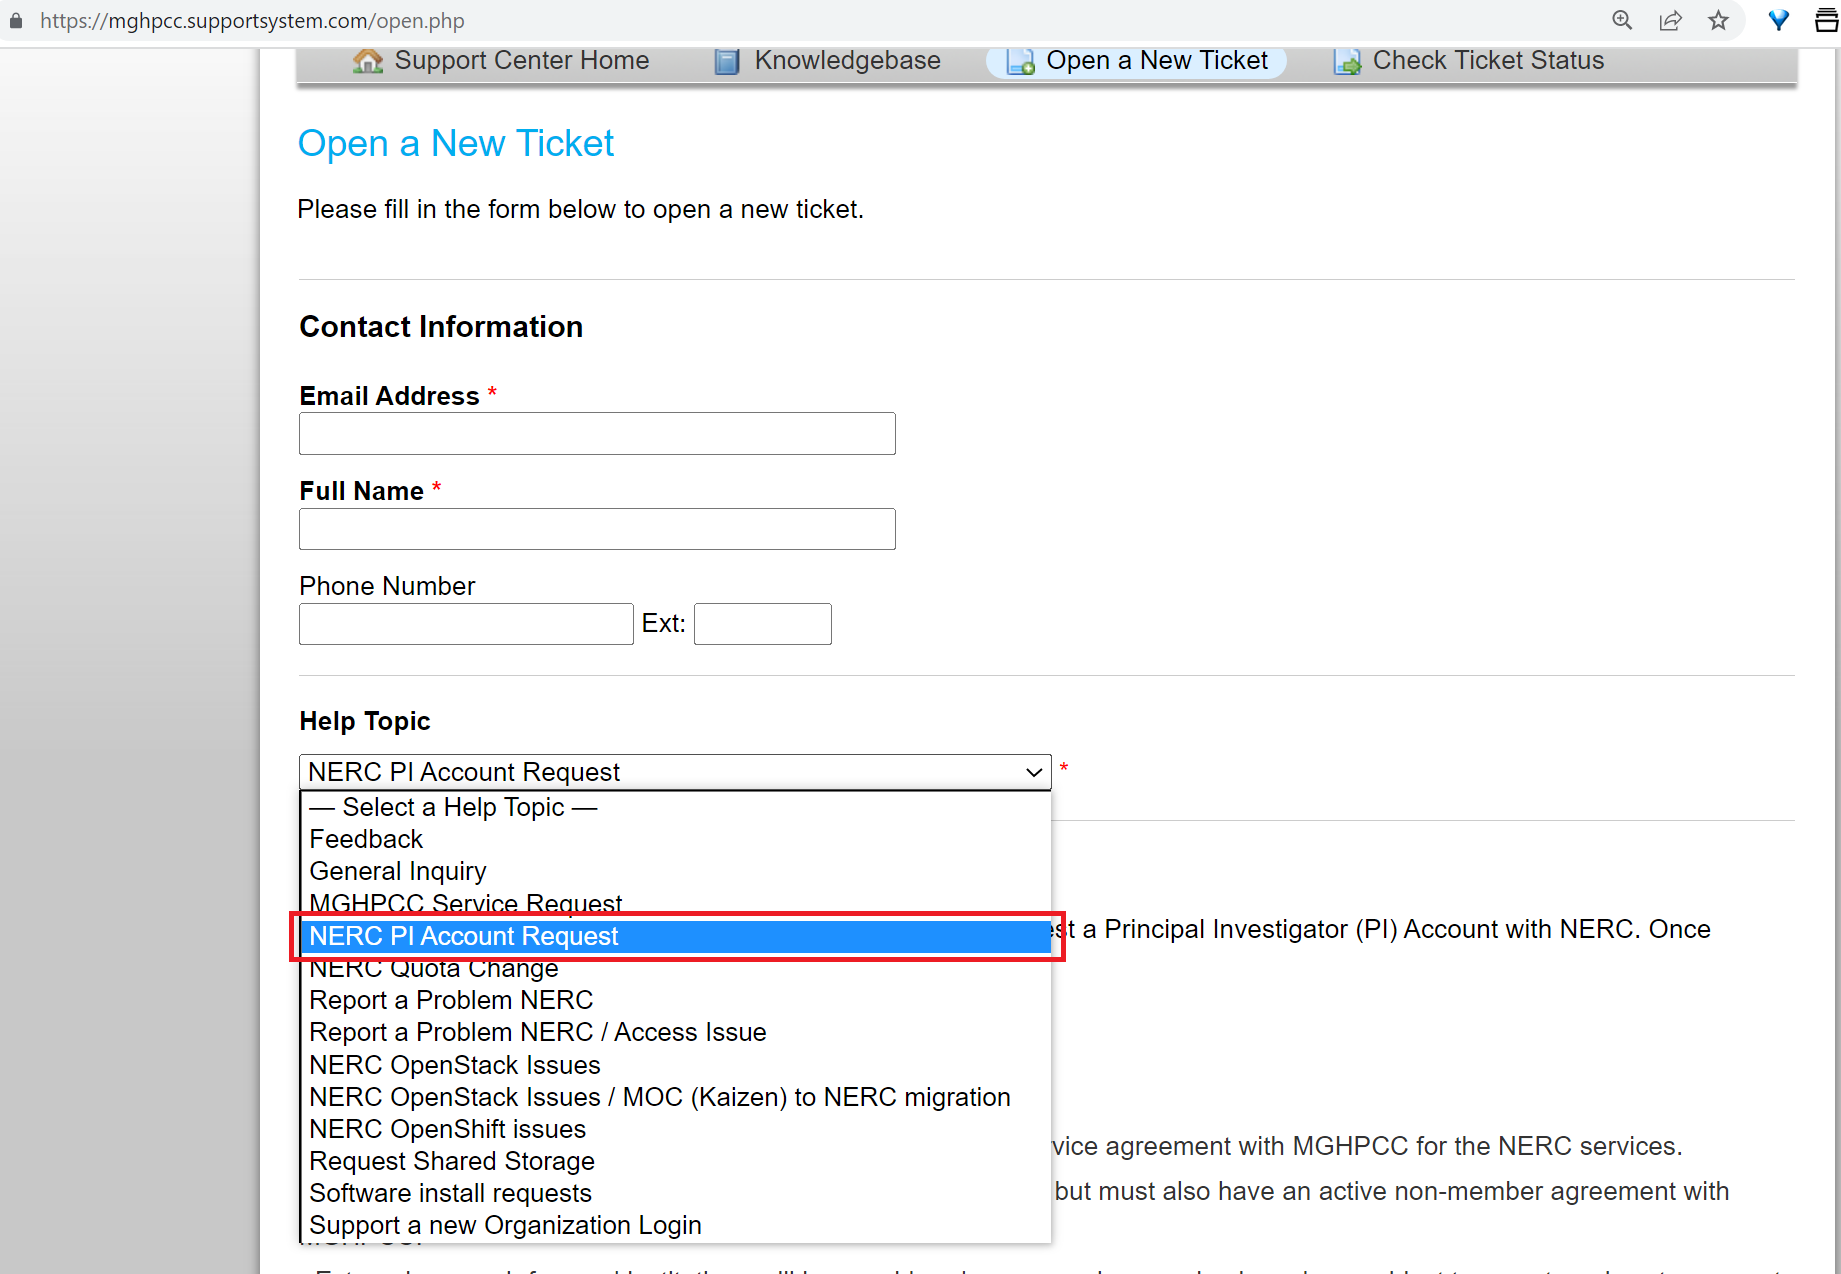
Alternatively, users can request a Principal Investigator (PI) user account by submitting a new ticket at the NERC's Support Ticketing System under the "NERC PI Account Request" option in the Help Topic dropdown menu, as shown in the image below:
Information
Once your PI user request is reviewed and approved by the NERC's admin, you will receive an email confirmation from NERC's support system, i.e., help@nerc.mghpcc.org. Then, you can access NERC's ColdFront resource allocation management portal using the PI user role, as described here.