Minikube
Minimum system requirements for minikube
- 2 GB RAM or more
- 2 CPU / vCPUs or more
- 20 GB free hard disk space or more
- Docker / Virtual Machine Manager – KVM & VirtualBox. Docker, Hyperkit, Hyper-V, KVM, Parallels, Podman, VirtualBox, or VMWare are examples of container or virtual machine managers.
Pre-requisite
We will need 1 VM to create a single node kubernetes cluster using minikube. We are using following setting for this purpose:
-
1 Linux machine for master,
ubuntu-22.04-x86_64or your choice of Ubuntu OS image,cpu-su.2flavor with 2vCPU, 8GB RAM, 20GB storage - also assign Floating IP to this VM. -
setup Unique hostname to the machine using the following command:
For example:
Install Minikube on Ubuntu
Run the below command on the Ubuntu VM:
Very Important
Run the following steps as non-root user i.e. ubuntu.
-
SSH into minikube machine
-
Update the repositories and packages:
-
Install
curl,wget, andapt-transport-https
Download and install the latest version of Docker CE
-
Download and install Docker CE:
-
Configure the Docker daemon:
Install kubectl
-
Install kubectl binary
kubectl: the command line util to talk to your cluster.
This outputs:
-
Now verify the kubectl version:
Install the container runtime i.e. containerd on master and worker nodes
To run containers in Pods, Kubernetes uses a container runtime.
By default, Kubernetes uses the Container Runtime Interface (CRI) to interface with your chosen container runtime.
-
Install container runtime - containerd
The first thing to do is configure the persistent loading of the necessary
containerdmodules. This forwarding IPv4 and letting iptables see bridged trafficis is done with the following command: -
Ensure
net.bridge.bridge-nf-call-iptablesis set to1in your sysctl config: -
Apply sysctl params without reboot:
-
Install the necessary dependencies with:
-
The
containerd.iopackages in DEB and RPM formats are distributed by Docker. Add the required GPG key with:curl -fsSL https://download.docker.com/linux/ubuntu/gpg | sudo apt-key add - sudo add-apt-repository "deb [arch=amd64] https://download.docker.com/linux/ubuntu $(lsb_release -cs) stable"It's now time to Install and configure containerd:
sudo apt update -y
sudo apt install -y containerd.io
containerd config default | sudo tee /etc/containerd/config.toml

# Reload the systemd daemon with
sudo systemctl daemon-reload

# Start containerd
sudo systemctl restart containerd
sudo systemctl enable --now containerd
You can verify
containerdis running with the command:
Installing minikube
-
Install minikube
curl -LO https://storage.googleapis.com/minikube/releases/latest/minikube_latest_amd64.deb
sudo dpkg -i minikube_latest_amd64.deb
OR, install minikube using
wget: -
Verify the Minikube installation:
-
Install conntrack:
Kubernetes 1.26.1 requires conntrack to be installed in root's path:
-
Start minikube:
As we are already stated in the beginning that we would be using docker as base for minikue, so start the minikube with the docker driver,
Note
-
To check the internal IP, run the
minikube ipcommand. -
By default, Minikube uses the driver most relevant to the host OS. To use a different driver, set the
--driverflag inminikube start. For example, to use others or none instead of Docker, runminikube start --driver=none. To persistent configuration so that you to run minikube start without explicitly passing i.e. in global scope the--vm-driver dockerflag each time, run:minikube config set vm-driver docker. -
Other start options:
minikube start --force --driver=docker --network-plugin=cni --container-runtime=containerd -
In case you want to start minikube with customize resources and want installer to automatically select the driver then you can run following command,
minikube start --addons=ingress --cpus=2 --cni=flannel --install-addons=true --kubernetes-version=stable --memory=6g
Output would like below:
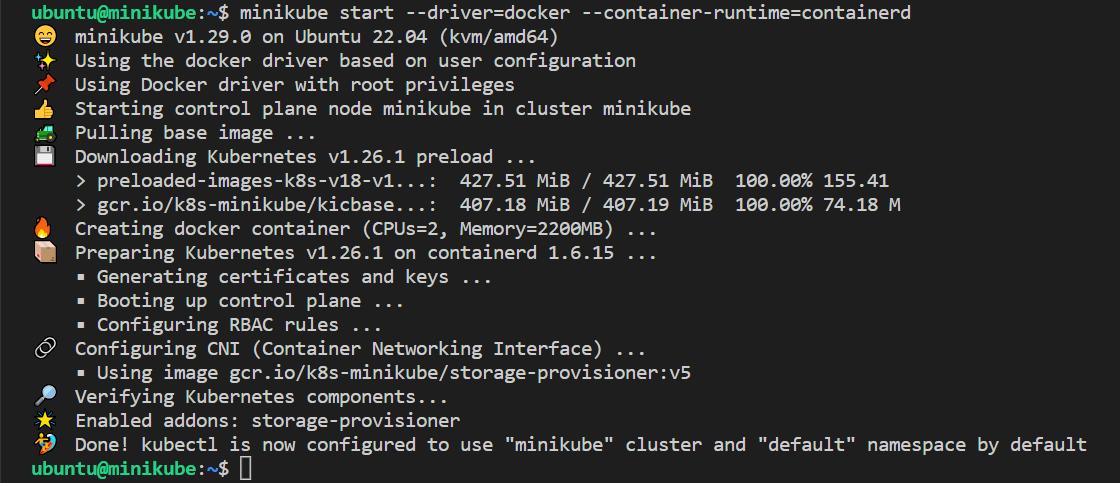
Perfect, above confirms that minikube cluster has been configured and started successfully.
-
-
Run below minikube command to check status:
-
Run following kubectl command to verify the cluster info and node status:
-
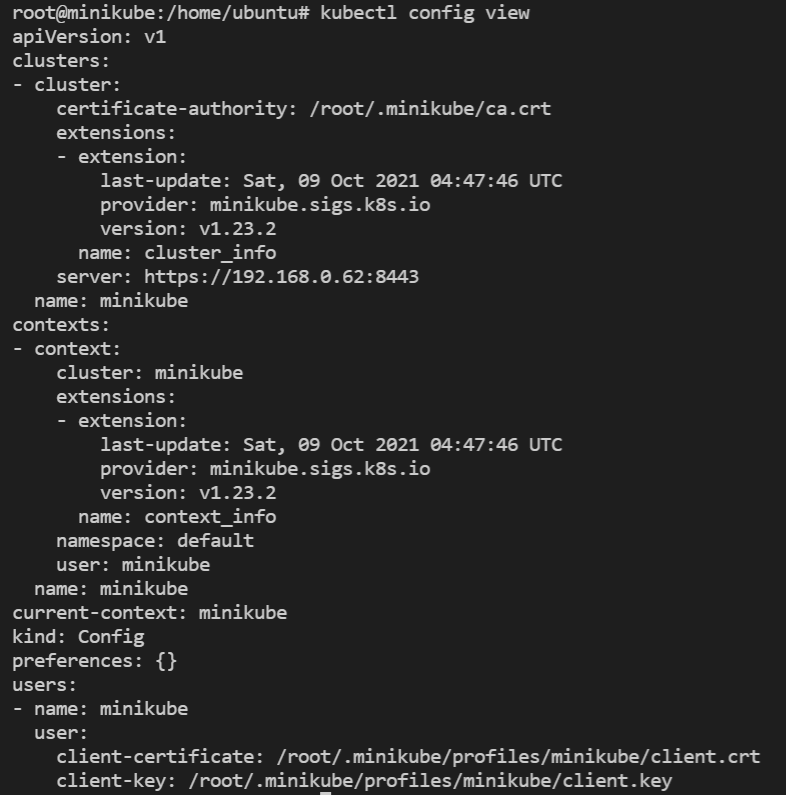
To see the kubectl configuration use the command:
The output looks like:
-
Get minikube addon details:
The output will display like below:

If you wish to enable any addons run the below minikube command,
-
Enable minikube dashboard addon:
minikube dashboard 🔌 Enabling dashboard ... ▪ Using image kubernetesui/metrics-scraper:v1.0.7 ▪ Using image kubernetesui/dashboard:v2.3.1 🤔 Verifying dashboard health ... 🚀 Launching proxy ... 🤔 Verifying proxy health ... http://127.0.0.1:40783/api/v1/namespaces/kubernetes-dashboard/services/http:kubernetes-dashboard:/proxy/ -
To view minikube dashboard url:
-
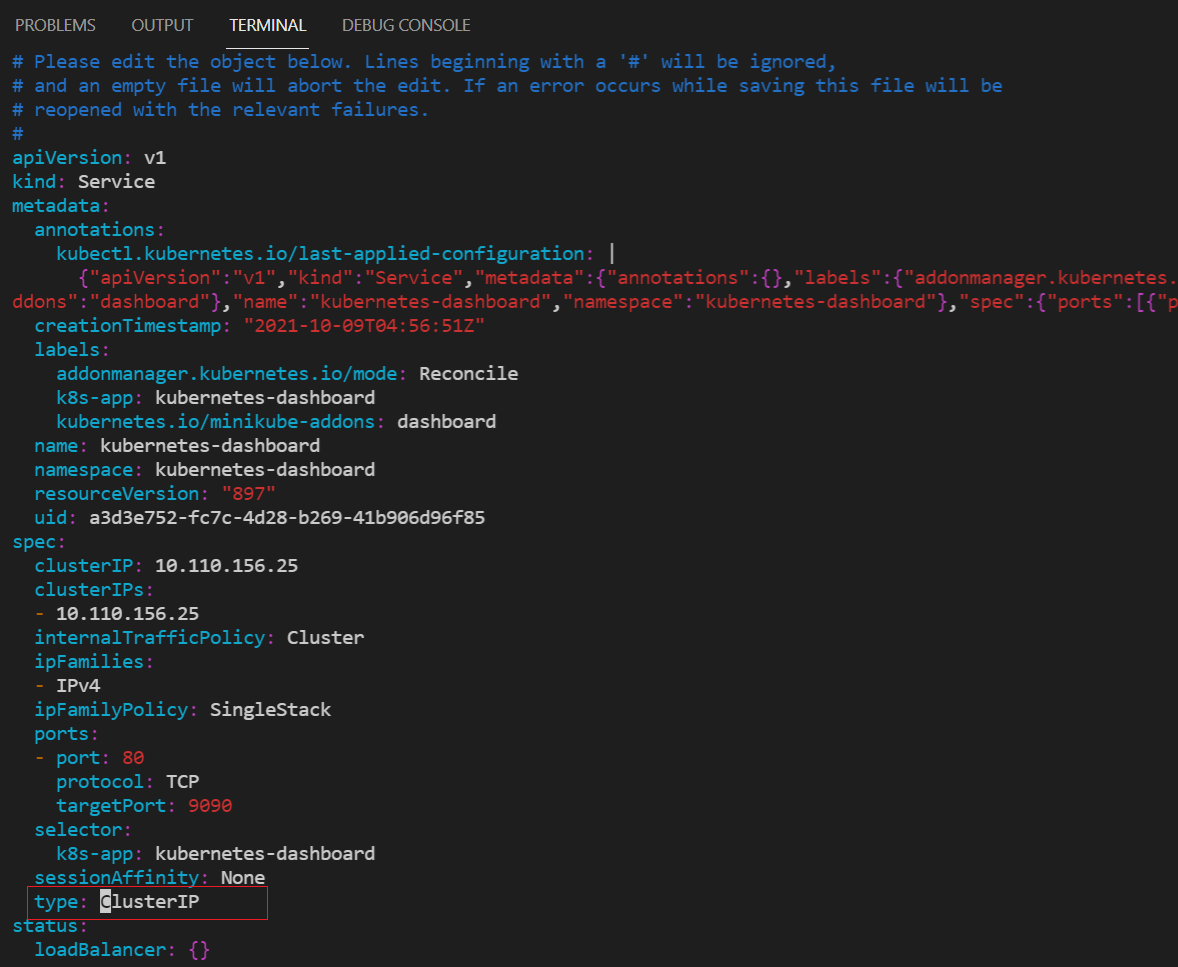
Expose Dashboard on NodePort instead of ClusterIP:
-- Check the current port for
kubernetes-dashboard:The output looks like below:

-- Replace type: "ClusterIP" to "NodePort":
-- After saving the file: Test again:
kubectl get services -n kubernetes-dashboardNow the output should look like below:

So, now you can browser the K8s Dashboard, visit
http://<Floating-IP>:<NodePort>i.e. http://140.247.152.235:31881 to view the Dashboard.
Deploy A Sample Nginx Application
-
Create a deployment, in this case Nginx:
A Kubernetes Pod is a group of one or more Containers, tied together for the purposes of administration and networking. The Pod in this tutorial has only one Container. A Kubernetes Deployment checks on the health of your Pod and restarts the Pod's Container if it terminates. Deployments are the recommended way to manage the creation and scaling of Pods.
-
Let's check if the Kubernetes cluster is up and running:
-
To access the deployment we will need to expose it:
To check which NodePort is opened and running the Nginx run:
The output will show:

OR,
minikube service list

|----------------------|---------------------------|--------------|-------------|
|      NAMESPACE       |           NAME            | TARGET PORT  |       URL   |
|----------------------|---------------------------|--------------|-------------|
| default              | kubernetes                | No node port |
| default              | my-nginx                  |           80 | http:.:31081|
| kube-system          | kube-dns                  | No node port |
| kubernetes-dashboard | dashboard-metrics-scraper | No node port |
| kubernetes-dashboard | kubernetes-dashboard      |           80 | http:.:31929|
|----------------------|---------------------------|--------------|-------------|
OR,
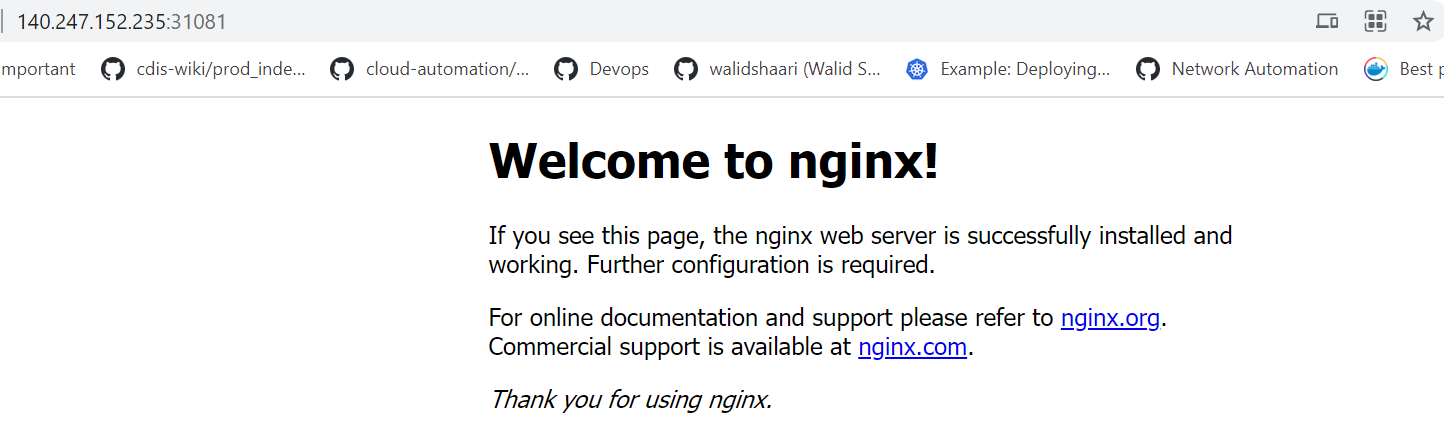
Once the deployment is up, you should be able to access the Nginx home page on the allocated NodePort from the node's Floating IP.
Go to browser, visit
http://<Floating-IP>:<NodePort>i.e. http://140.247.152.235:31081/ to check the nginx default page.For your example,
Deploy A Hello Minikube Application
-
Use the kubectl create command to create a Deployment that manages a Pod. The Pod runs a Container based on the provided Docker image.
-
View the port information:
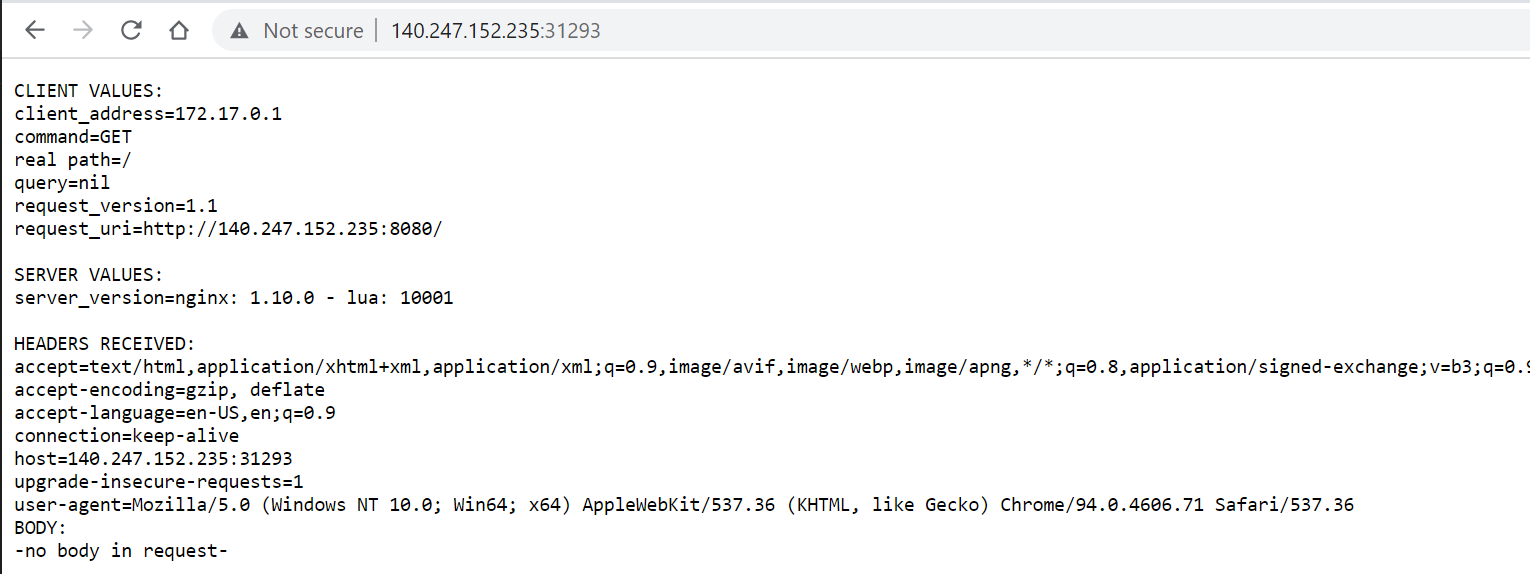
Go to browser, visit
http://<Floating-IP>:<NodePort>i.e. http://140.247.152.235:31293/ to check the hello minikube default page.For your example,
Clean up
Now you can clean up the app resources you created in your cluster:
kubectl delete service my-nginx
kubectl delete deployment my-nginx

kubectl delete service hello-minikube
kubectl delete deployment hello-minikube
Managing Minikube Cluster
-
To stop the minikube, run
-
To delete the single node cluster:
-
To Start the minikube, run
-
Remove the Minikube configuration and data directories:
-
If you have installed any Minikube related packages, remove them:
-
In case you want to start the minikube with higher resource like 8 GB RM and 4 CPU then execute following commands one after the another.