OpenVPN
OpenVPN is a full-featured SSL VPN which implements OSI layer 2 or 3 secure network extension using the industry standard SSL/TLS protocol, supports flexible client authentication methods based on certificates, smart cards, and/ or username/password credentials, and allows user or group-specific access control policies using firewall rules applied to the VPN virtual interface.
OpenVPN offers a scalable client/server mode, allowing multiple clients to connect to a single OpenVPN server process over a single TCP or UDP port.
Installing OpenVPN Server
You can read official documentation here.
You can spin up a new instance with "ubuntu-22.04-x86_64" or any available Ubuntu OS image, named "openvpn_server" on OpenStack, with "default" and "ssh_only" Security Groups attached to it.

Also, attach a Floating IP to this instance so you can ssh into it from outside.
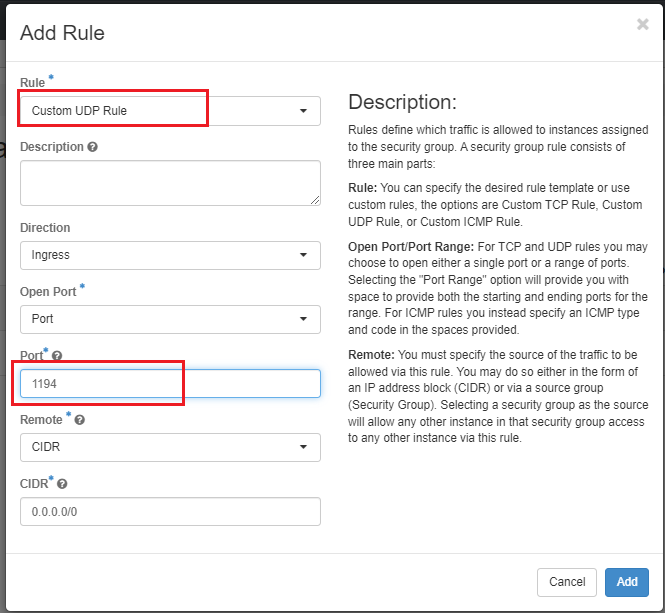
Create a new Security Group i.e. "openvpn" that is listening on UDP port 1194 as shown below:
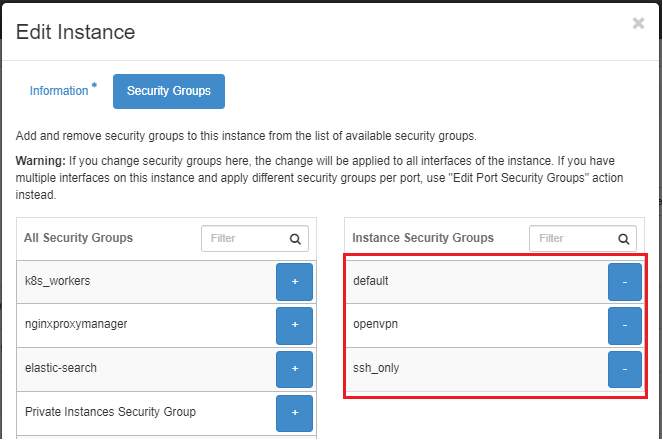
The Security Groups attached to the OpenVPN server should look similar to the image below:
The Security Groups attached to the OpenVPN server includes "default", "ssh_only" and "openvpn". It should look similar to the image shown below:
Finally, you'll want to configure the setting for the remote instances in your SSH configuration file (typically found in ~/.ssh/config). The SSH configuration file might include entry for your newly created OpenVPN server like this:
-
Then you can ssh into the OpenVPN Server running:
ssh openvpn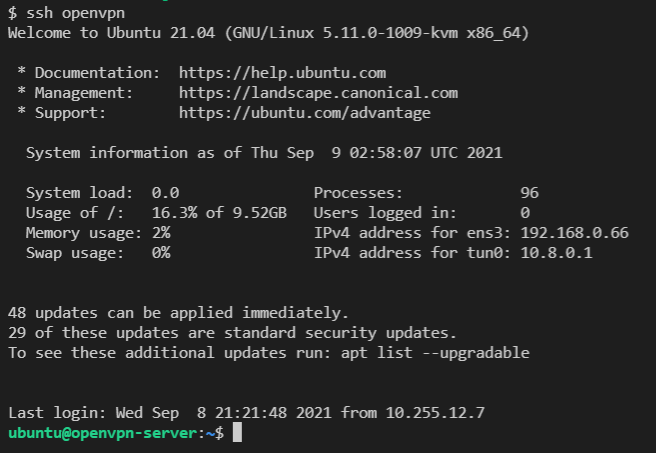
-
Also note that OpenVPN must be installed and run by a user who has administrative/root privileges. So, we need to run the command:
sudo su -
We are using this repo to install OpenVPN server on this ubuntu server.
For that, run the script and follow the assistant:
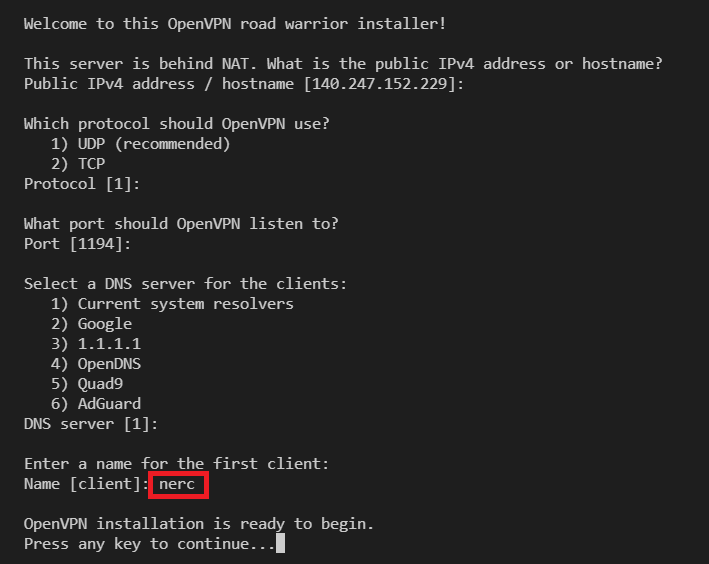
You can press Enter for all default values. And, while entering a name for the first client you can give "nerc" as the client name, this will generate a new configuration file (.ovpn file) named as "nerc.ovpn". Based on your client's name it will name the config file as "
.ovpn "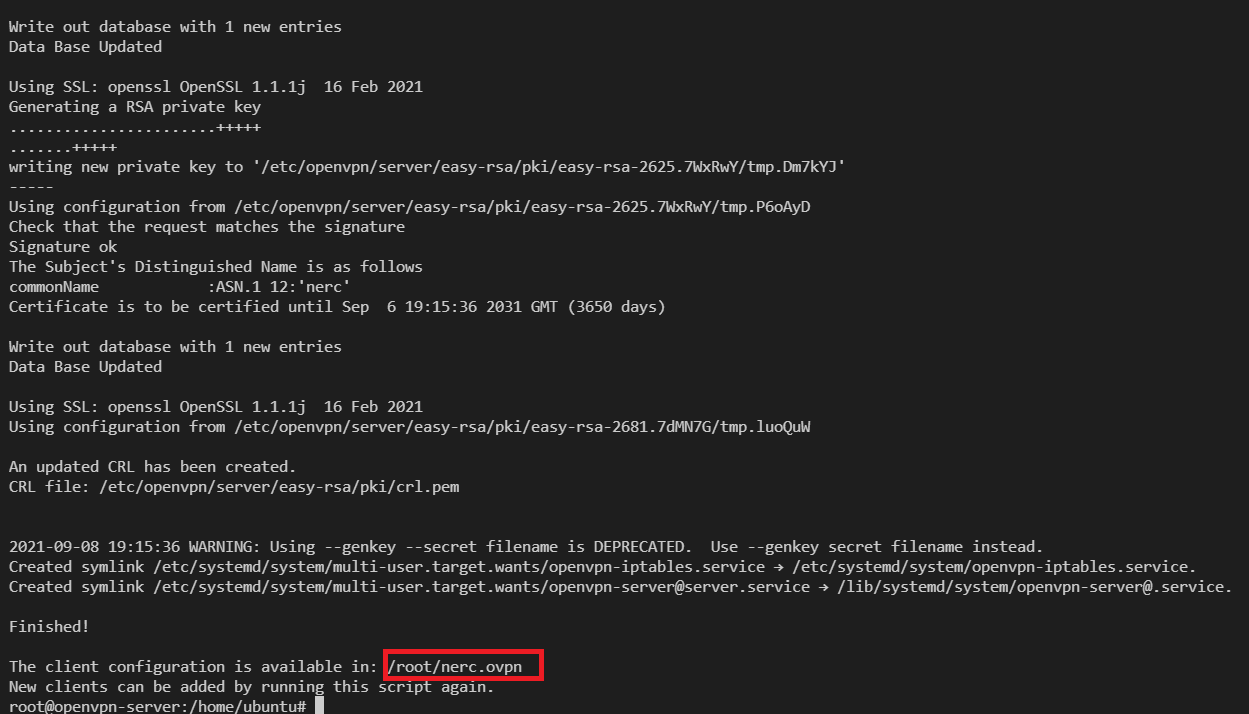
-
Copy the generated config file from "/root/nerc.ovpn" to "/home/ubuntu/ nerc.ovpn" by running:
cp /root/nerc.ovpn . -
Update the ownership of the config file to ubuntu user and ubuntu group by running the following command:
chown ubuntu:ubuntu nerc.ovpn -
You can exit from the root and ssh session all together and then copy the configuration file to your local machine by running the following script on your local machine's terminal:
scp openvpn:nerc.ovpn .
To add a new client user
Once it ends, you can run it again to add more users, remove some of them or even completely uninstall OpenVPN.
For this, run the script and follow the assistant:
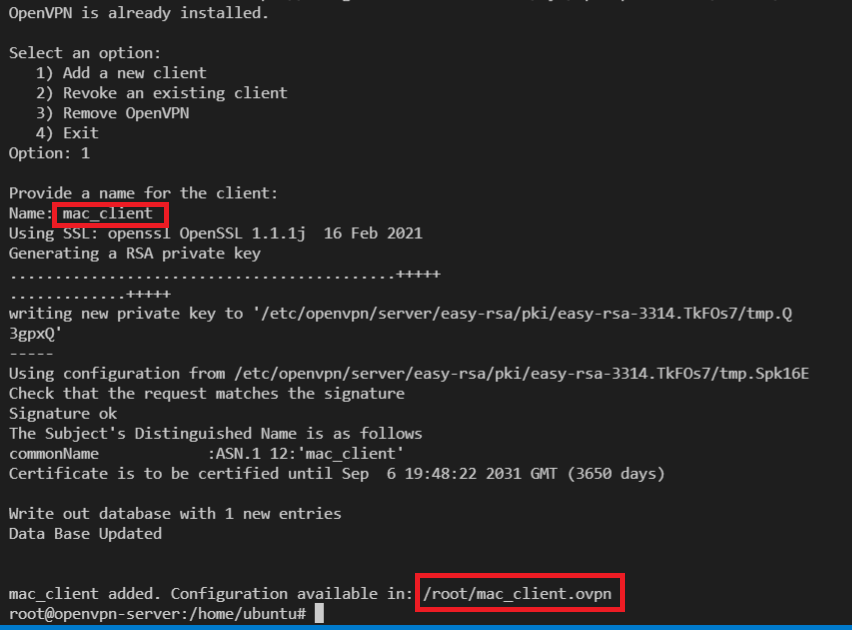
Here, you are giving client name as "mac_client" and that will generate a new configuration file at "/root/mac_client.ovpn". You can repeat above steps: 4 to 6 to copy this new client's configuration file and share it to the new client.
Important Note
You need to contact your project administrator to get your own OpenVPN configuration file (file with .ovpn extension). Download it and Keep it in your local machine so in next steps we can use this configuration client profile file.
A OpenVPN client or compatible software is needed to connect to the OpenVPN server. Please install one of these clients depending on your device. The client program must be configured with a client profile to connect to the OpenVPN server.
Windows
OpenVPN source code and Windows installers can be downloaded here. The OpenVPN executable should be installed on both server and client machines since the single executable provides both client and server functions. Please see the OpenVPN client setup guide for Windows.
Mac OS X
The client we recommend and support for Mac OS is Tunnelblick. To install Tunnelblick, download the dmg installer file from the Tunnelblick site, mount the dmg, and drag the Tunnelblick application to Applications. Please refer to this guide for more information.
Linux
OpenVPN is available through the package management system on most Linux distributions.
On Debian/Ubuntu:
On RedHat/Rocky/AlmaLinux:
Then, to run OpenVPN using the client profile:
Move the VPN client profile (configuration) file to /etc/openvpn/ :
Restart the OpenVPN daemon (i.e., This will start OpenVPN connection and will automatically run on boot):
OR,
Checking the status:
Alternatively, if you want to run OpenVPN manually each time, then run:
OR,