Create a Windows virtual machine
Launch an Instance using a boot volume
In this example, we will illustrate how to utilize a boot volume to launch a Windows virtual machine, similar steps can be used on other types of virtual machines. The following steps show how to create a virtual machine which boots from an external volume:
-
Create a volume with source data from the image
-
Launch a VM with that volume as the system disk
Recommendations
-
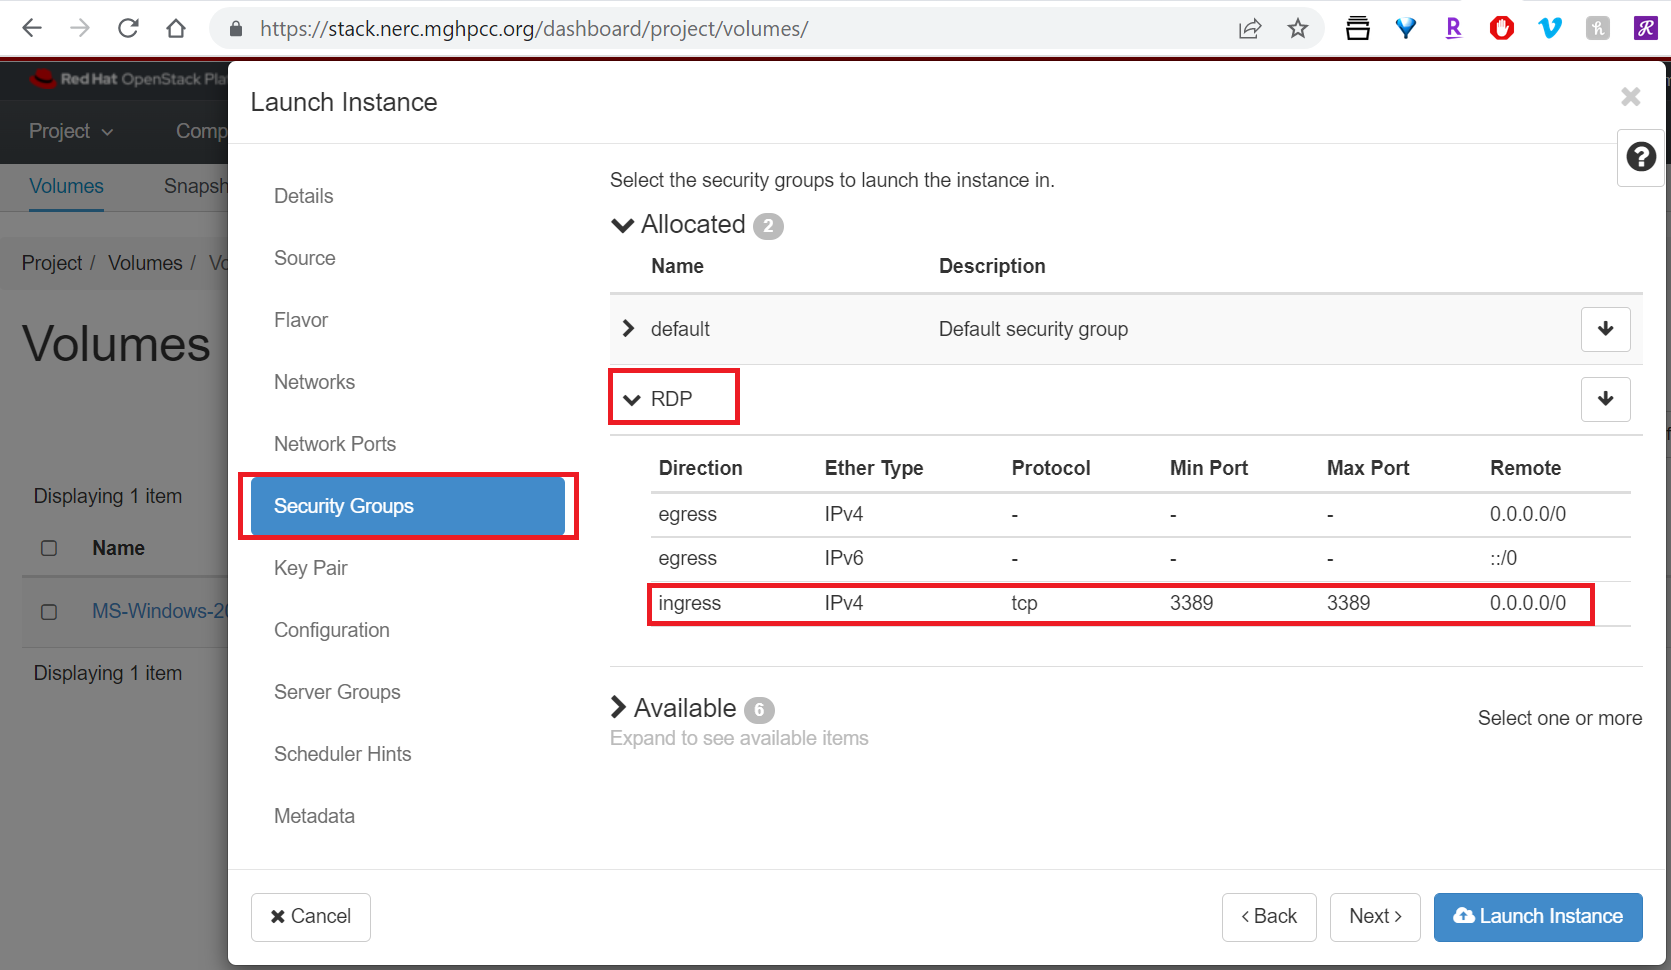
The recommended method for creating a Windows desktop virtual machine is to boot from volume. However, you can also launch a Windows-based instance using the standard boot from image method, as described here. When launching a Windows VM using boot from image, please ensure that you have configured a Security Group that allows RDP (port 3389), as shown below:
To access the Windows VM, you must log in via Remote Desktop, as described here.
To configure a password for the Administrator user account:
-
Go to the Configuration section during instance launch.
-
Enter the following PowerShell-based custom script:
-
Replace
<Your_Own_Admin_Password>with your desired password.
Note: Ensure that your script in the "Configuration" section resembles the format shown below:
This enables Remote Desktop login for the Administrator user account.
-
To ensure smooth upgrade and maintenance of the system, select at least 100 GiB for the size of the volume.
-
Make sure your project has sufficient storage quotas.
Create a Bootable Volume from the Existing Windows Image
1. Using NERC's Horizon dashboard
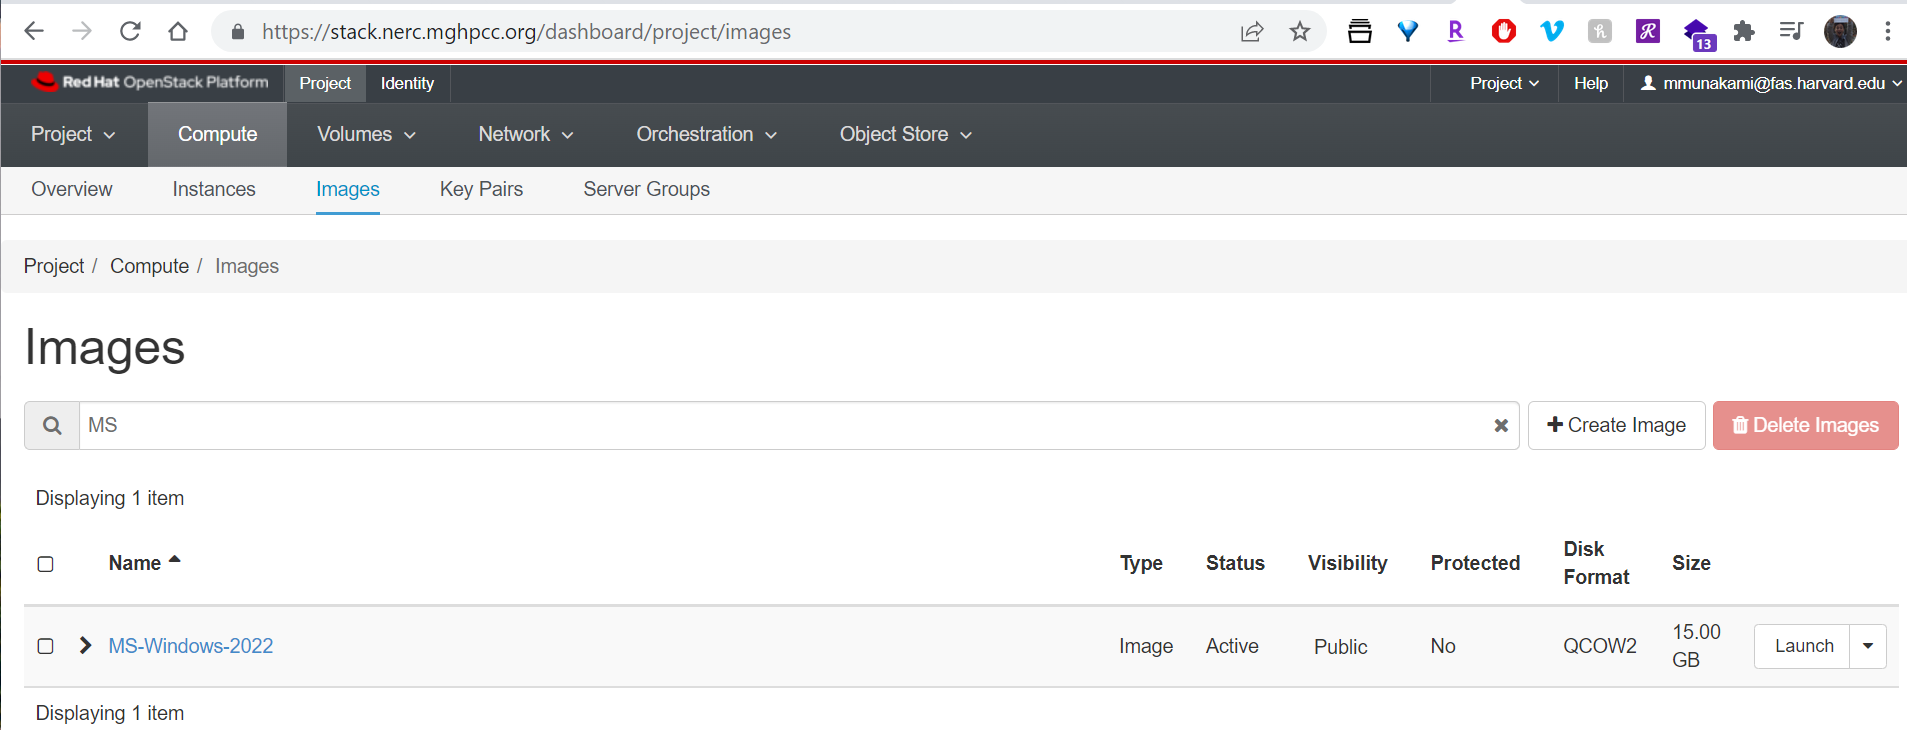
Navigate: Project -> Compute -> Images.
Make sure you are able to see MS-Windows-2022 is available on Images List for your project as shown below:
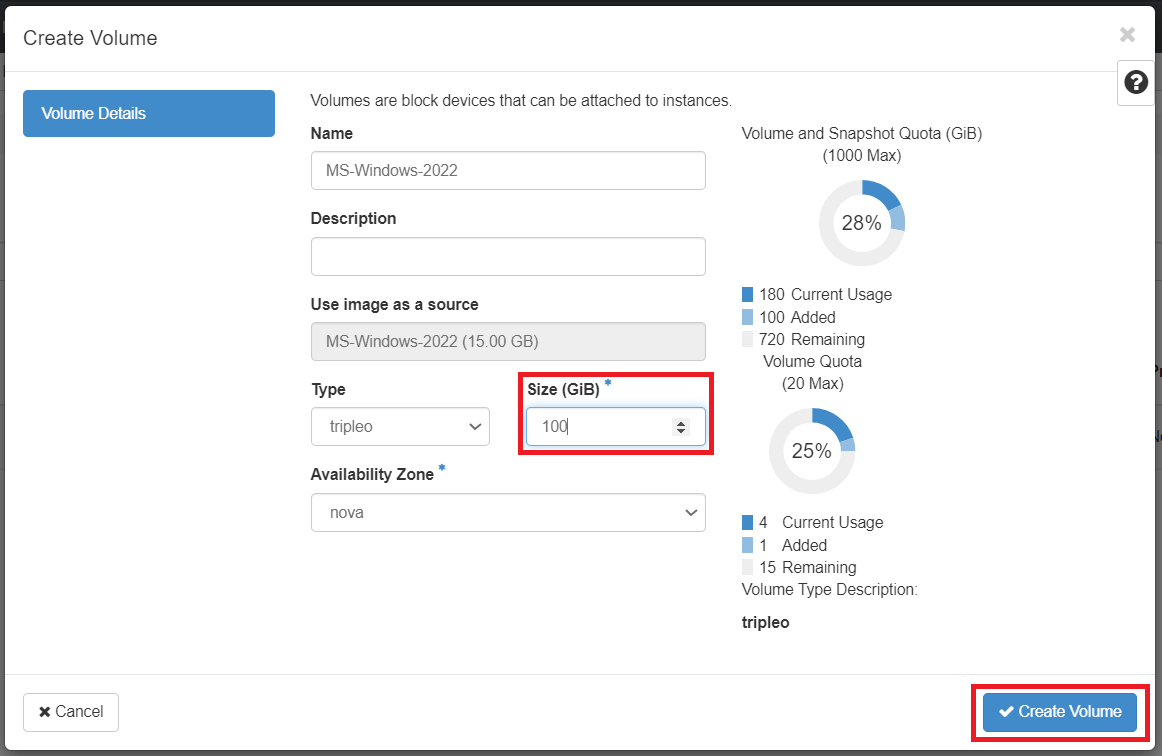
Create a Volume using that Windows Image:
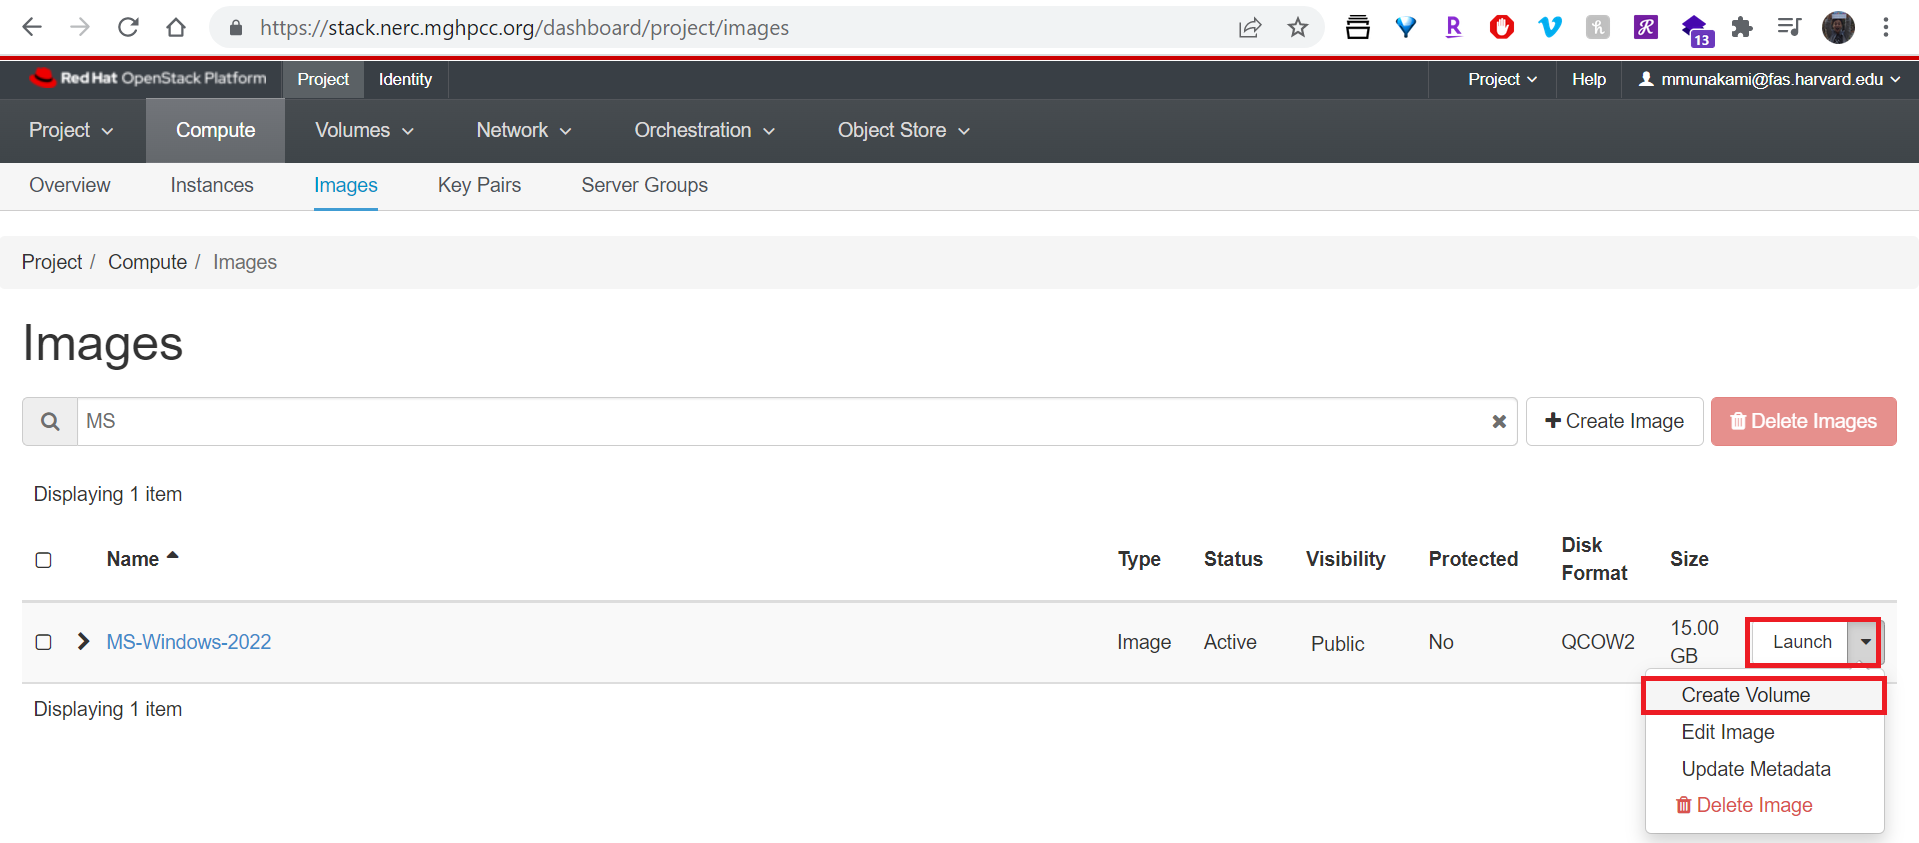
To ensure smooth upgrade and maintenance of the system, select at least 100 GiB for the size of the volume as shown below:
2. Using the OpenStack CLI
Prerequisites:
To run the OpenStack CLI commands, you need to have:
- OpenStack CLI setup, see OpenStack Command Line setup for more information.
To create a volume from image using the CLI, do this:
Using the openstack client commands
Identify the image for the initial volume contents from openstack image list.
openstack image list
+--------------------------------------+---------------------+--------+
| ID | Name | Status |
+--------------------------------------+---------------------+--------+
| a9b48e65-0cf9-413a-8215-81439cd63966 | MS-Windows-2022 | active |
...
+--------------------------------------+---------------------+--------+
In the example above, this is image id a9b48e65-0cf9-413a-8215-81439cd63966 for MS-Windows-2022.
Creating a disk from this image with a size of 100 GiB named "my-volume" as follows.
openstack volume create --image a9b48e65-0cf9-413a-8215-81439cd63966 --size 100 --description "Using MS Windows Image" my-volume
+---------------------+--------------------------------------+
| Field | Value |
+---------------------+--------------------------------------+
| attachments | [] |
| availability_zone | nova |
| bootable | false |
| consistencygroup_id | None |
| created_at | 2024-02-03T23:38:50.000000 |
| description | Using MS Windows Image |
| encrypted | False |
| id | d8a5da4c-41c8-4c2d-b57a-8b6678ce4936 |
| multiattach | False |
| name | my-volume |
| properties | |
| replication_status | None |
| size | 100 |
| snapshot_id | None |
| source_volid | None |
| status | creating |
| type | tripleo |
| updated_at | None |
| user_id | 938eb8bfc72e4cb3ad2b94e2eb4059f7 |
+---------------------+--------------------------------------+
Checking the status again using openstack volume show my-volume will allow the volume creation to be followed.
"downloading" means that the volume contents is being transferred from the image service to the volume service
"available" means the volume can now be used for booting. A set of volume_image meta data is also copied from the image service.
Launch instance from existing Bootable Volume
1. Using Horizon dashboard
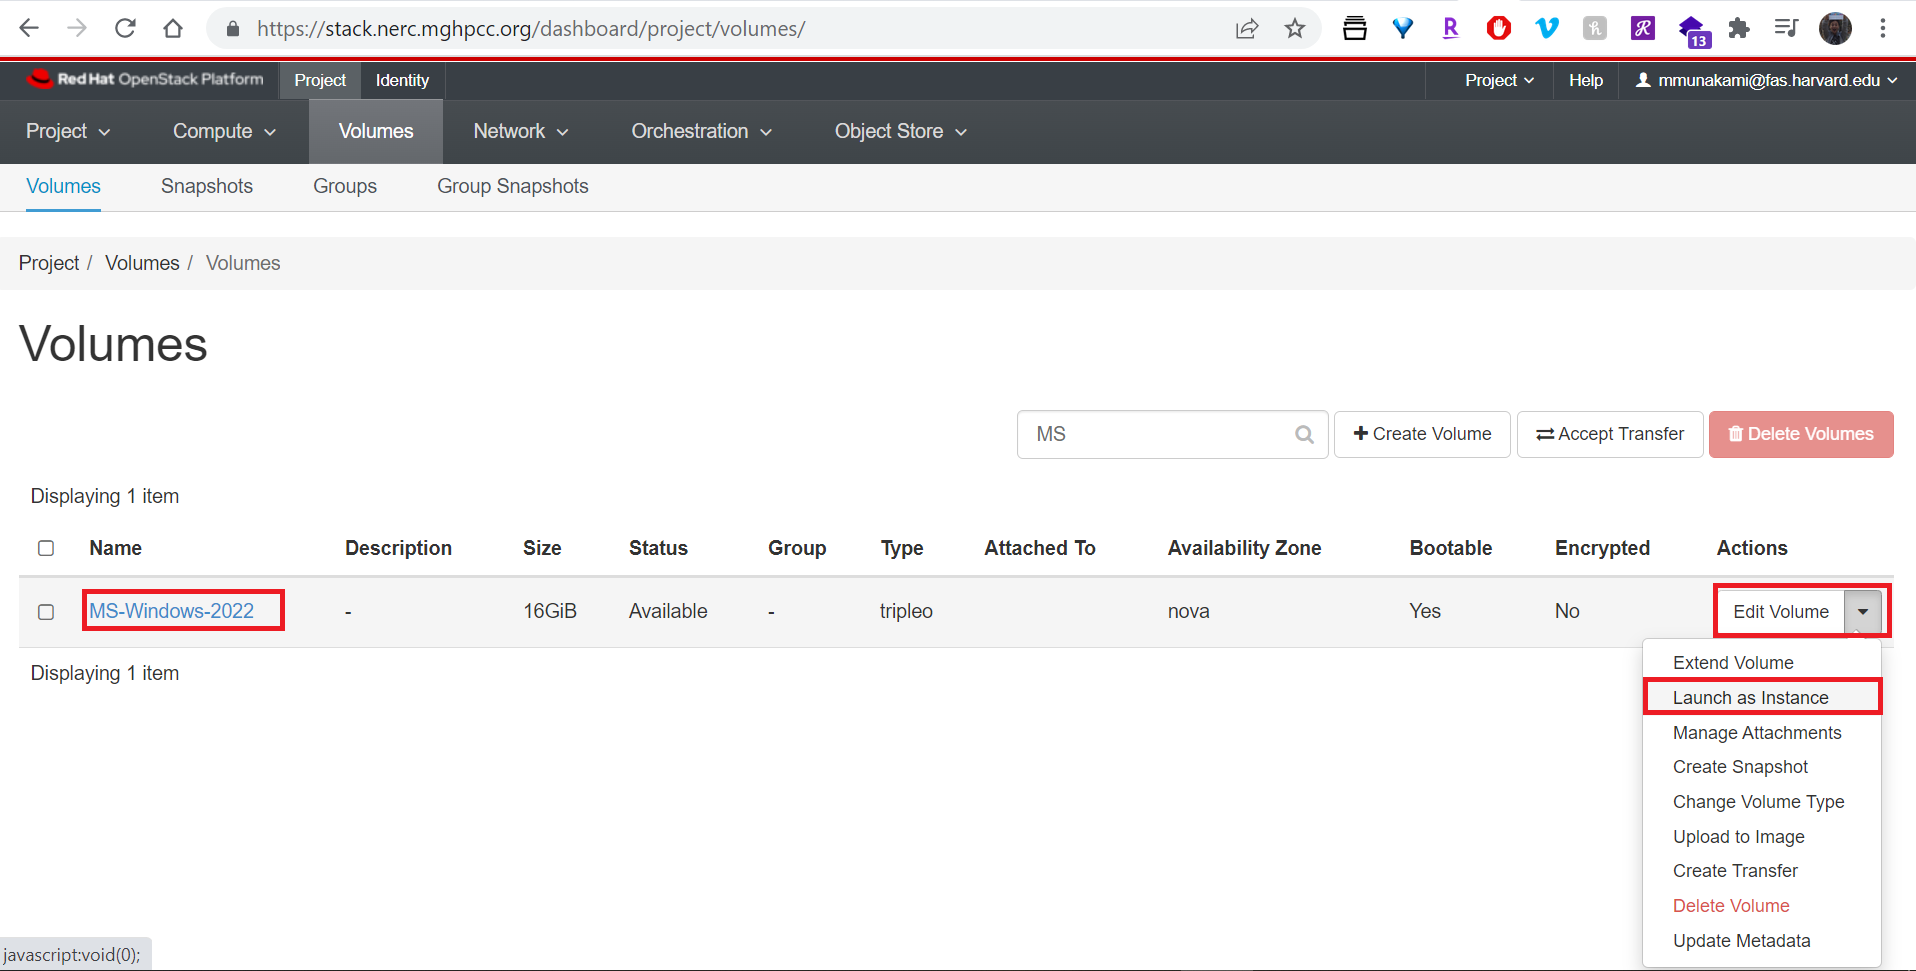
Navigate: Project -> Volumes -> Volumes.
Once successfully Volume is created by following this, we can use the Bootable Volume to launch an Windows instance as shown below:
How do you make your VM setup and data persistent?
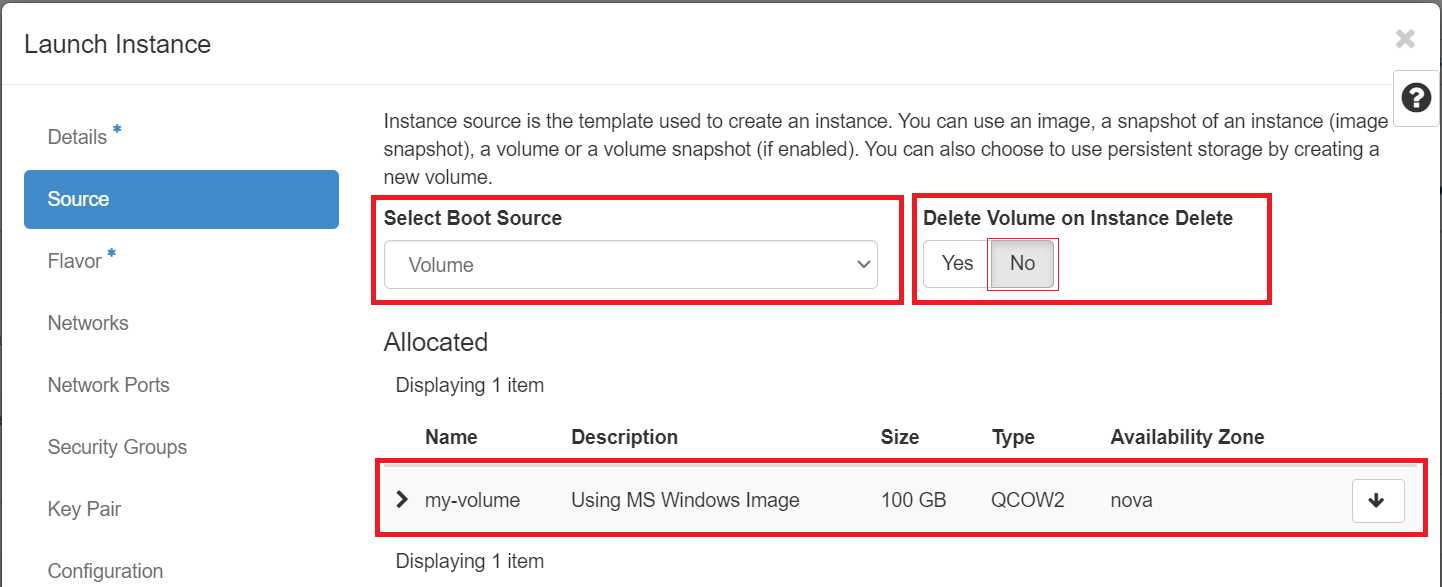
Only one instance at a time can be booted from a given volume. Make sure "Delete Volume on Instance Delete" is selected as No if you want the volume to persist even after the instance is terminated, which is the default setting, as shown below:
NOTE: For more in-depth information on making your VM setup and data persistent, you can explore the details here.
Add other information and setup a Security Group that allows RDP (port: 3389) as shown below:
Very Important: Setting Administrator Credentials to Log into Your VM.
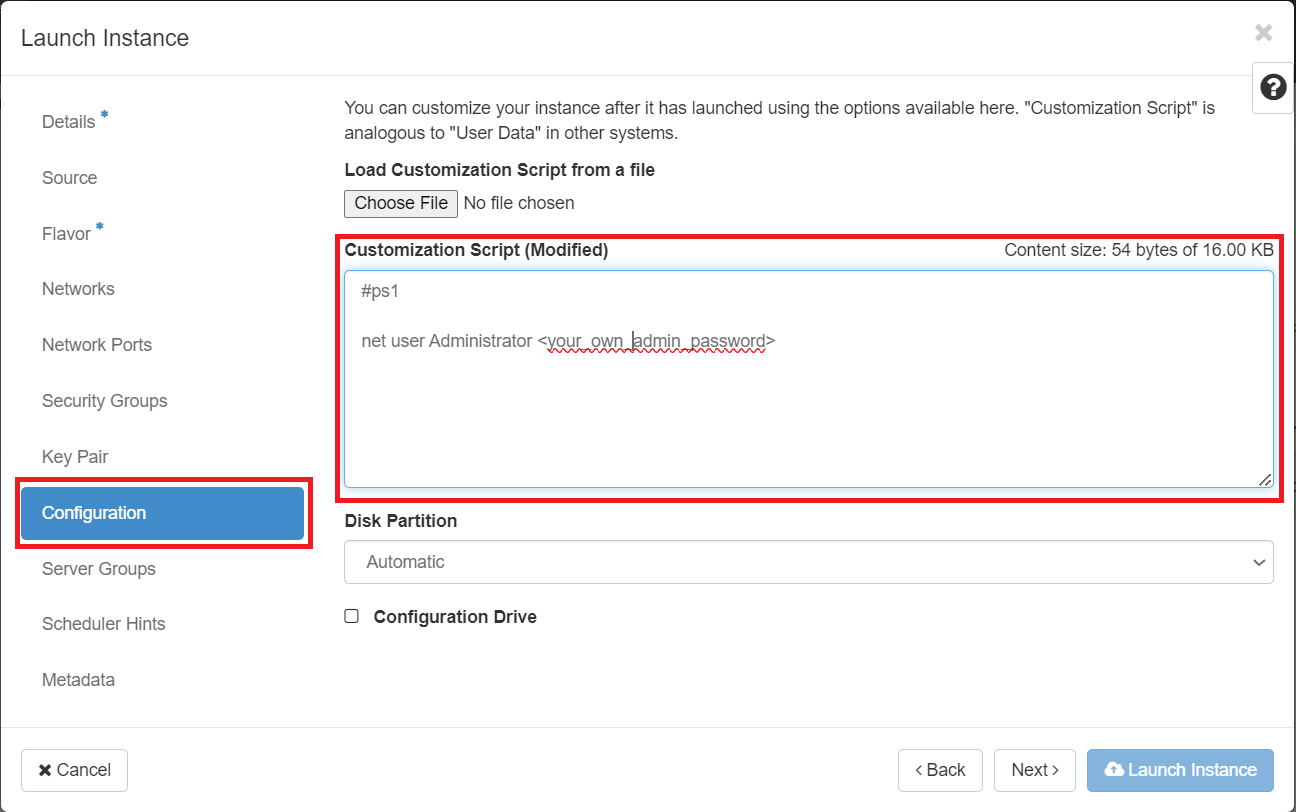
To access this Windows VM, you must log in using Remote Desktop, as described here. To configure a password for the "Administrator" user account, proceed to the "Configuration" section and enter the supplied PowerShell-based Customized Script. Make sure to substitute <Your_Own_Admin_Password> with your preferred password, which will enable Remote Desktop login to the Windows VM.
Please ensure that your script in the "Configuration" section resembles the following syntax:
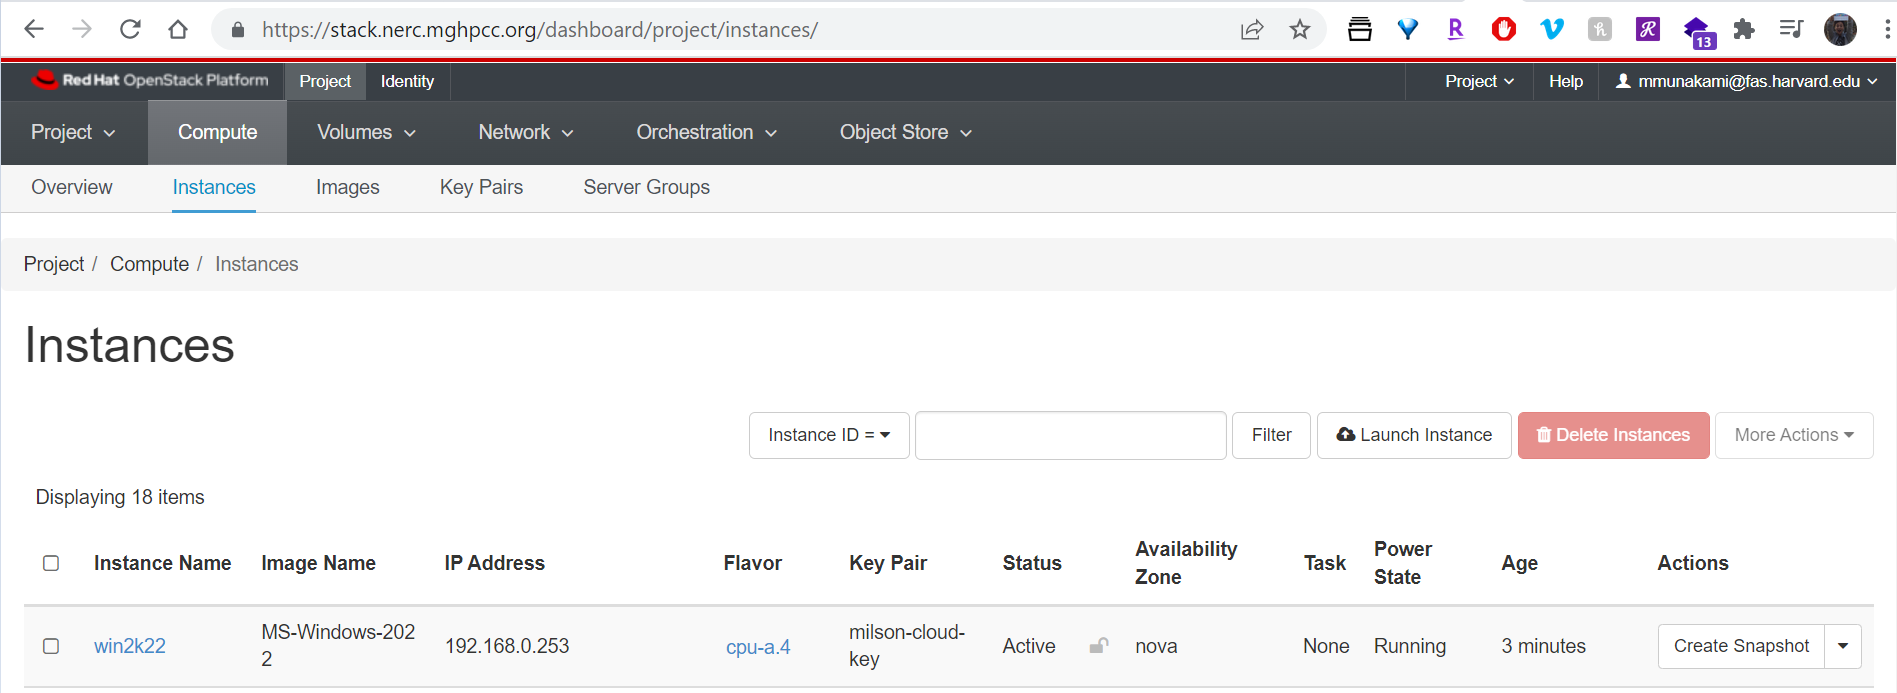
After some time the instance will be Active in Running state as shown below:
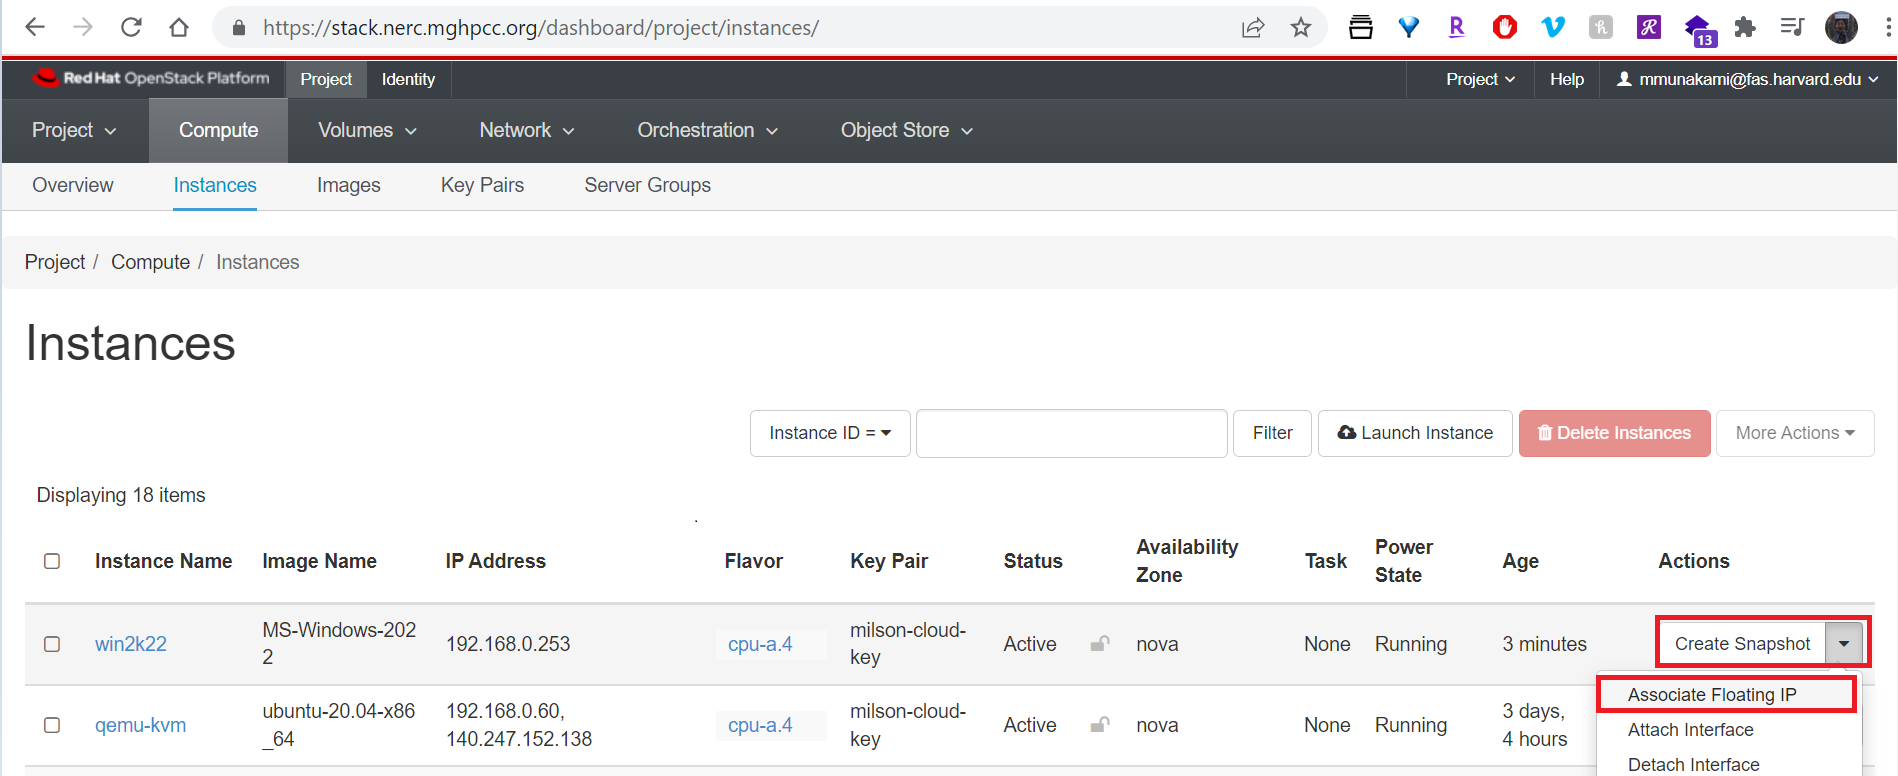
Attach a Floating IP to your instance:
2. Using the OpenStack CLI from the terminal
Prerequisites:
To run the OpenStack CLI commands, you need to have:
- OpenStack CLI setup, see OpenStack Command Line setup for more information.
To launch an instance from existing bootable volume using the CLI, do this:
Using the openstack client commands from terminal
Get the flavor name using openstack flavor list:
openstack flavor list | grep cpu-su.4
| b3f5dded-efe3-4630-a988-2959b73eba70 | cpu-su.4 | 16384 | 20 | 0 | 4 | True |
To access this Windows VM, you must log in using Remote Desktop, as described here. Before launching the VM using the OpenStack CLI, we'll prepare a PowerShell-based Customized Script as "user-data".
What is a user data file?
A user data file is a text file that you can include when running the openstack server create command. This file is used to customize your instance during boot.
You can place user data in a local file and pass it through the --user-data <user-data-file> parameter at instance creation. You'll create a local file named admin_password.ps1 with the following content. Please remember to replace <Your_Own_Admin_Password> with your chosen password, which will be used to log in to the Windows VM via Remote Desktop.
#ps1

net user Administrator '<Your_Own_Admin_Password>'
Setup a Security Group named "rdp_test" that allows RDP (port: 3389) using the CLI, use the command openstack security group create <group-name>:
openstack security group create --description 'Allows RDP' rdp_test

openstack security group rule create --protocol tcp --dst-port 3389 rdp_test
To create a Windows VM named "my-vm" using the specified parameters, including the flavor name "cpu-su.4", existing key pair "my-key", security group "rdp_test", user data from the file "admin_password.ps1" created above, and the volume with name "my-volume" created above, you can run the following command:
openstack server create --flavor cpu-su.4 \
    --key-name my-key \
    --security-group rdp_test \
    --user-data admin_password.ps1 \
    --volume my-volume \
    my-vm
To list all Floating IP addresses that are allocated to the current project, run:
openstack floating ip list

+--------------------------------------+---------------------+------------------+------+
| ID                                   | Floating IP Address | Fixed IP Address | Port |
+--------------------------------------+---------------------+------------------+------+
| 760963b2-779c-4a49-a50d-f073c1ca5b9e | 199.94.60.220       | 192.168.0.195    | None |
+--------------------------------------+---------------------+------------------+------+
More About Floating IP
If the above command returns an empty list, meaning you don't have any available floating IPs, please refer to this documentation on how to allocate a new Floating IP to your project.
Attach a Floating IP to your instance:
openstack server add floating ip INSTANCE_NAME_OR_ID FLOATING_IP_ADDRESS
For example:
openstack server add floating ip my-vm 199.94.60.220
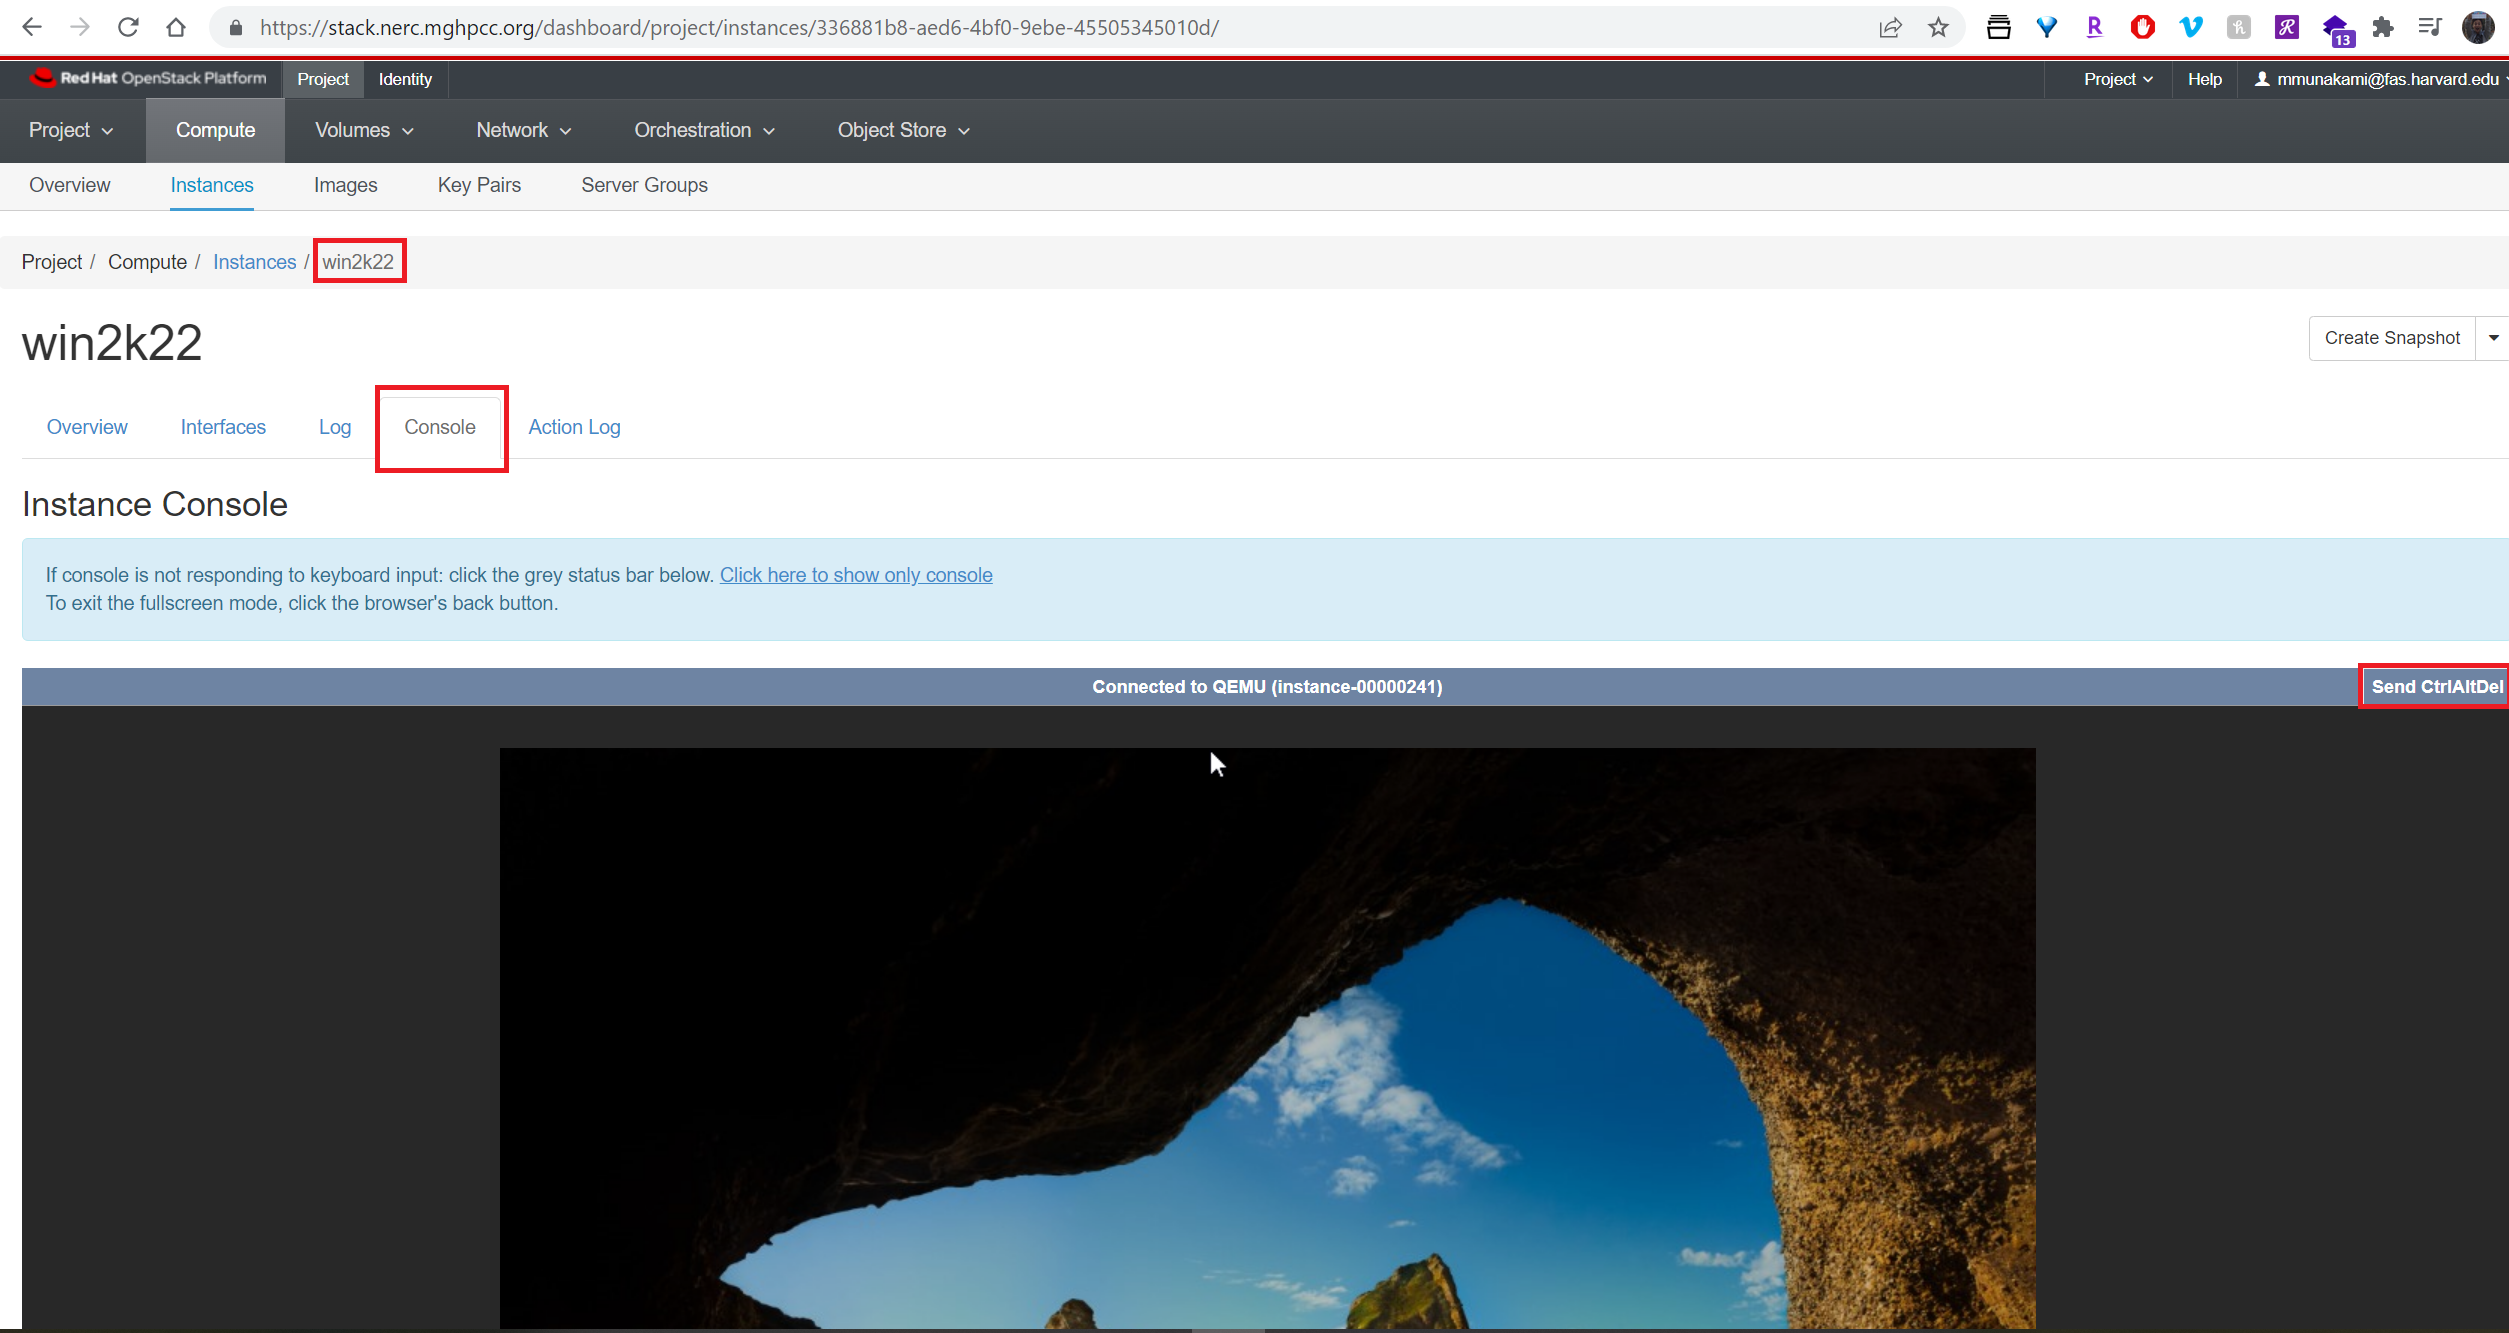
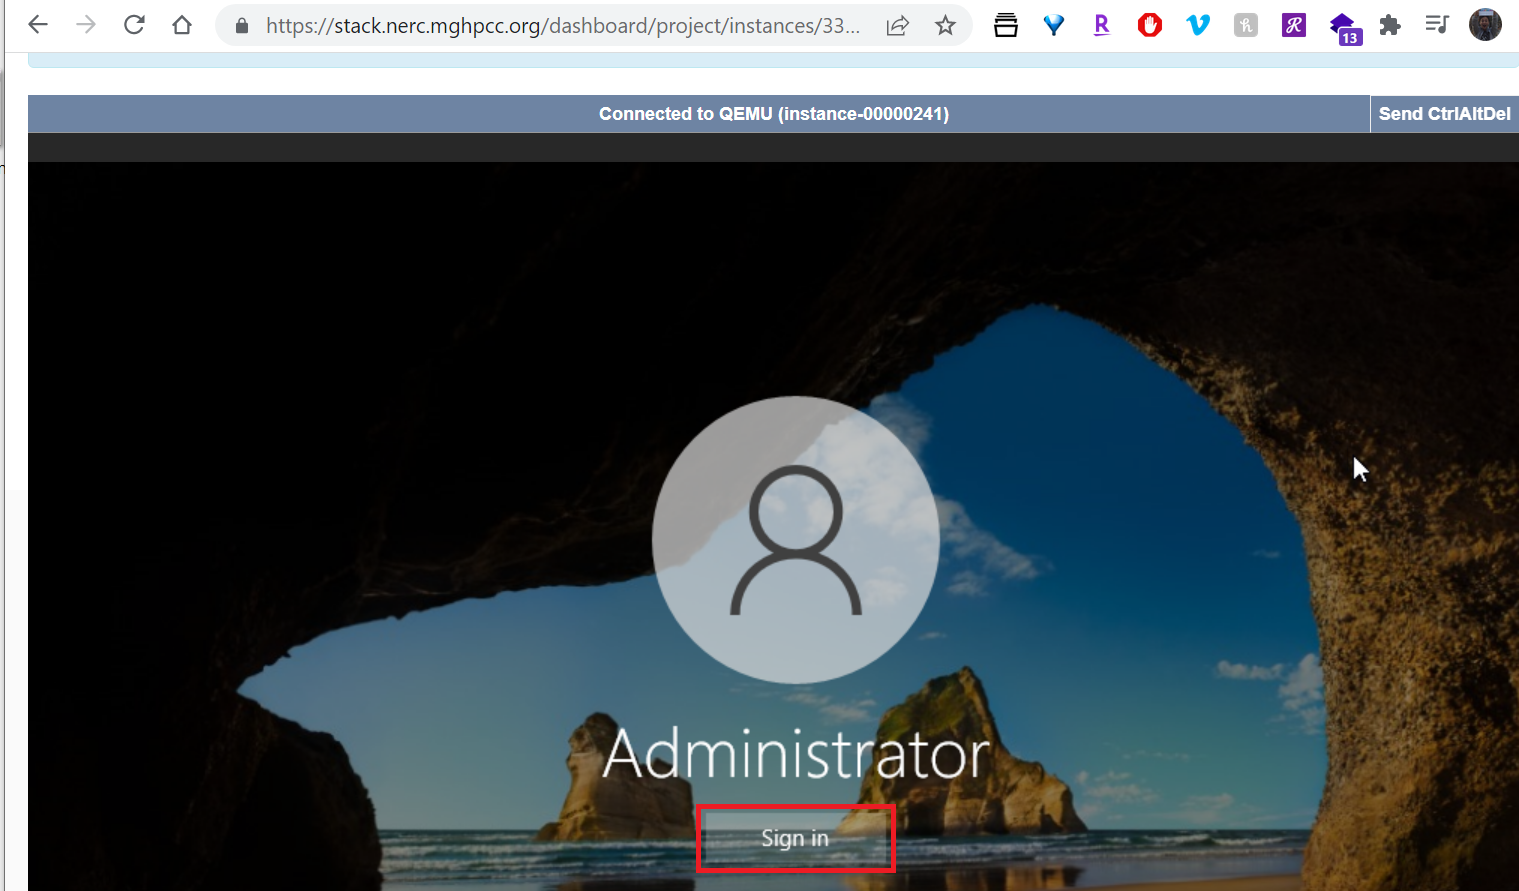
Accessing the graphical console in the Horizon dashboard
You can access the graphical console using the browser once the VM is in status ACTIVE. It can take up to 15 minutes to reach this state.
The console is accessed by selecting the Instance Details for the machine and the 'Console' tab as shown below:
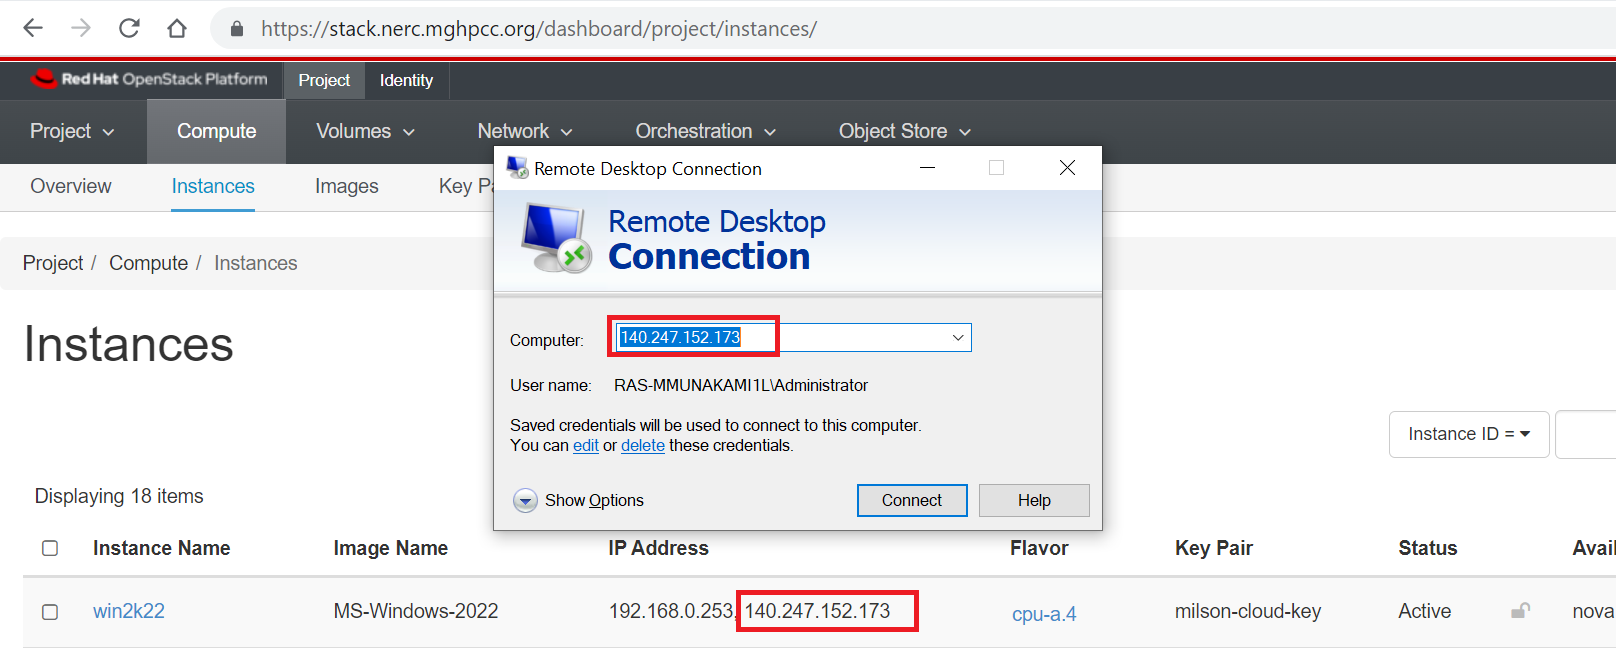
How to add Remote Desktop login to your Windows instance
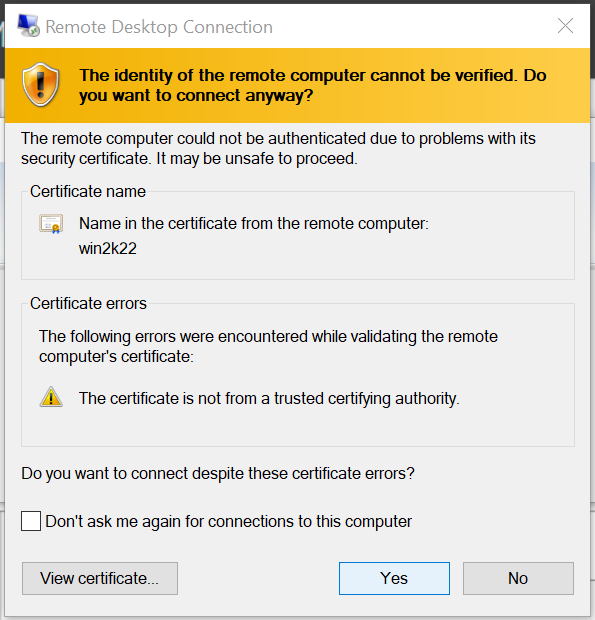
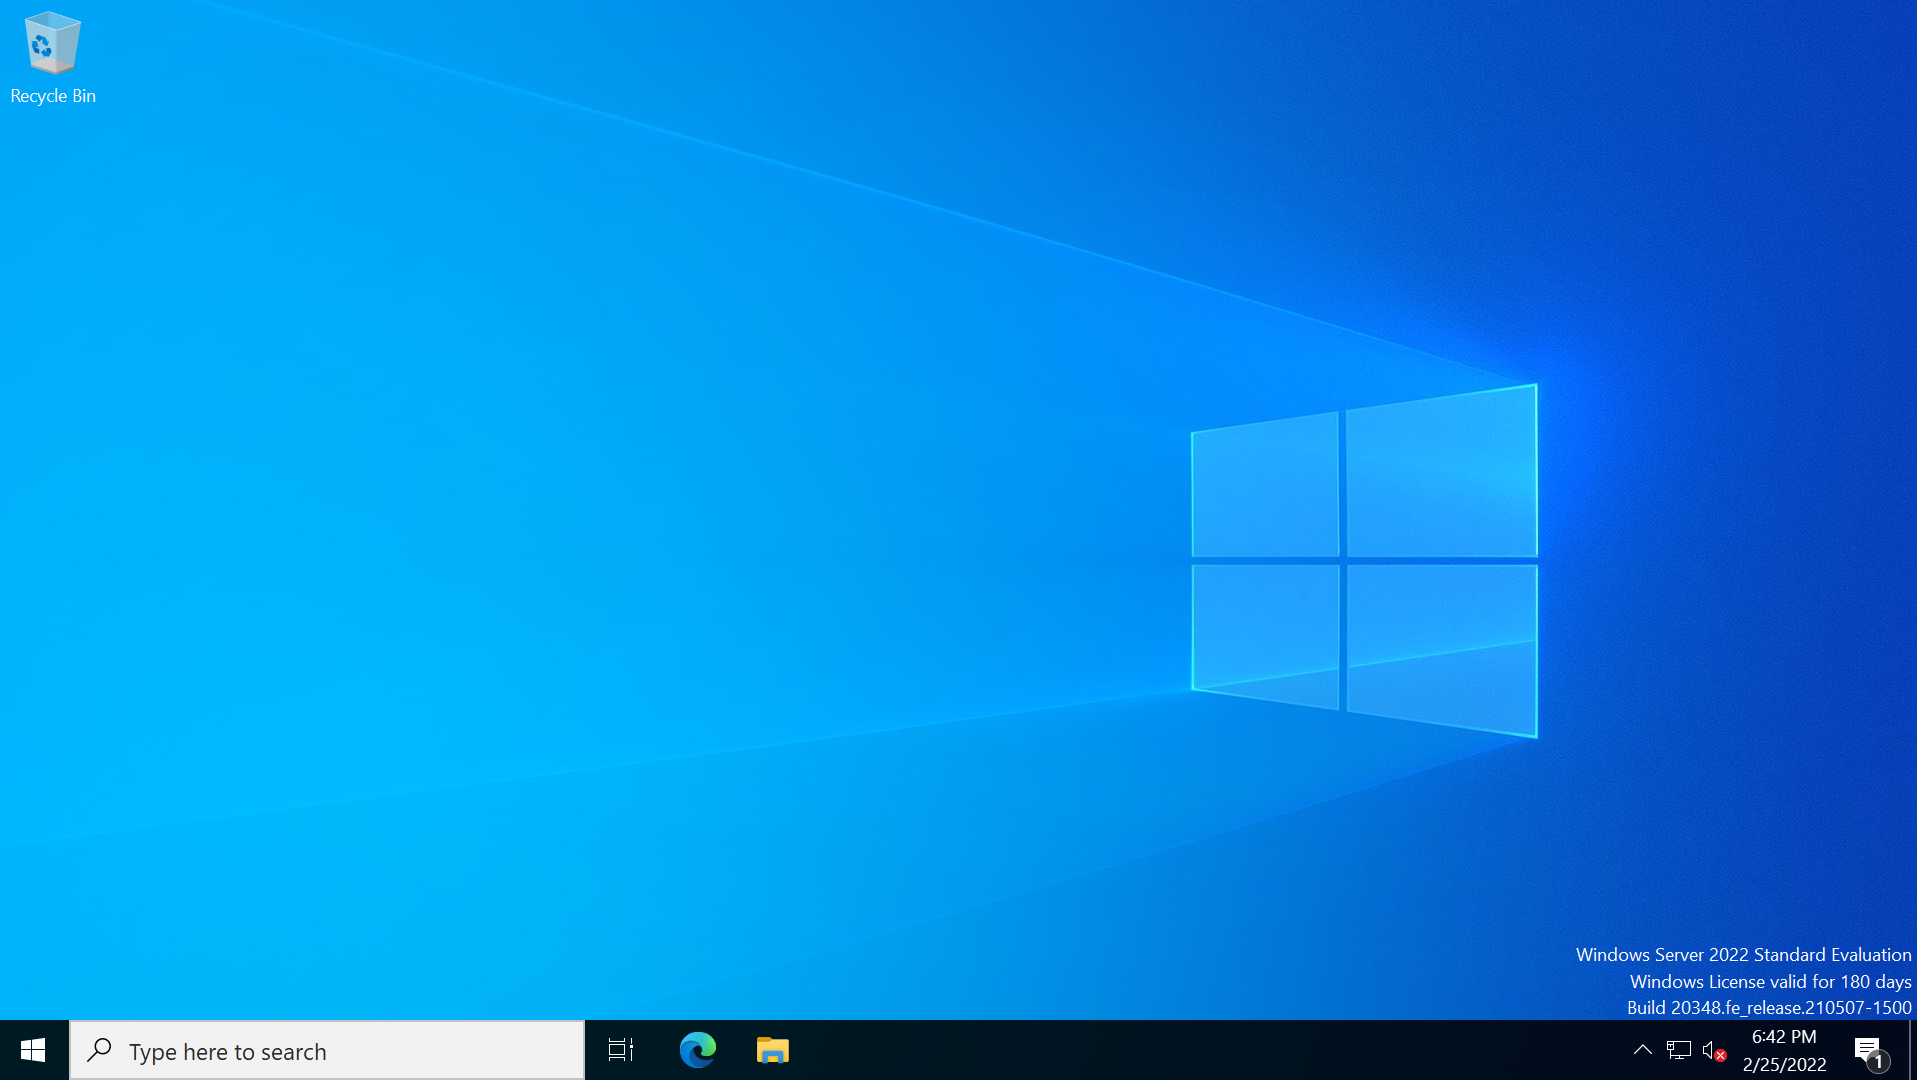
When the build and the Windows installation steps have completed, you can access the console using the Windows Remote Desktop application. Remote Desktop login should work with the Floating IP associated with the instance:
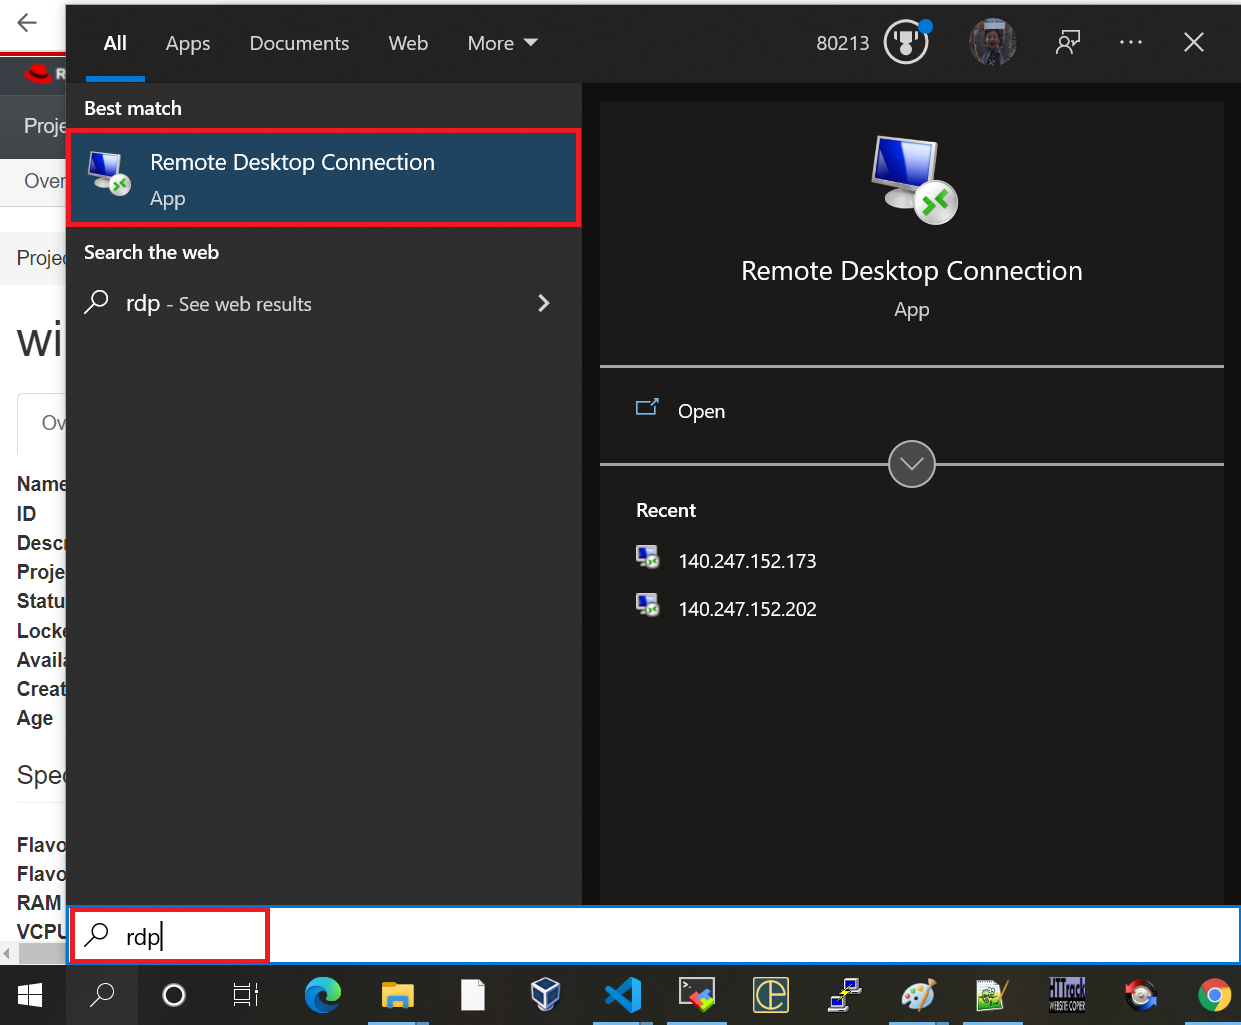
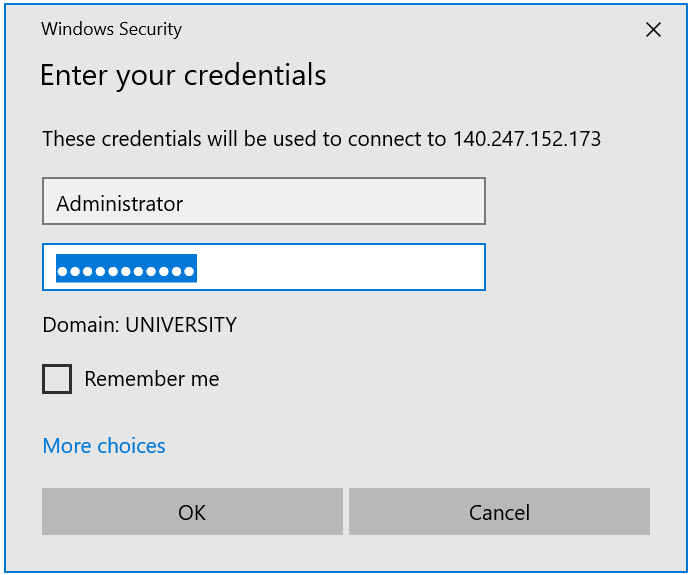
What is the user login for Windows Server 2022?
The default username is "Administrator," and the password is the one you set using the user data PowerShell script during the launch.
Storage and Volume
-
System disks are the first disk based on the flavor disk space and are generally used to store the operating system created from an image when the virtual machine is booted.
-
Volumes are persistent virtualized block devices independent of any particular instance. Volumes may be attached to a single instance at a time, but may be detached or reattached to a different instance while retaining all data, much like a USB drive. The size of the volume can be selected when it is created within the storage quota limits for the particular resource allocation.
Connect additional disk using volume
To attach additional disk to a running Windows machine you can follow this documentation. This guide provides instructions on formatting and mounting a volume as an attached disk within a Windows virtual machine.