Transfer A Volume
You may wish to transfer a volume to a different project. Volumes are specific to a project and can only be attached to one virtual machine at a time.
Important
The volume to be transferred must not be attached to an instance. This can be examined by looking into "Status" column of the volume i.e. it need to be "Available" instead of "In-use" and "Attached To" column need to be empty.
Using Horizon dashboard
Once you're logged in to NERC's Horizon dashboard.
Navigate to Project -> Volumes -> Volumes.
Select the volume that you want to transfer and then click the dropdown next to the "Edit volume" and choose "Create Transfer".
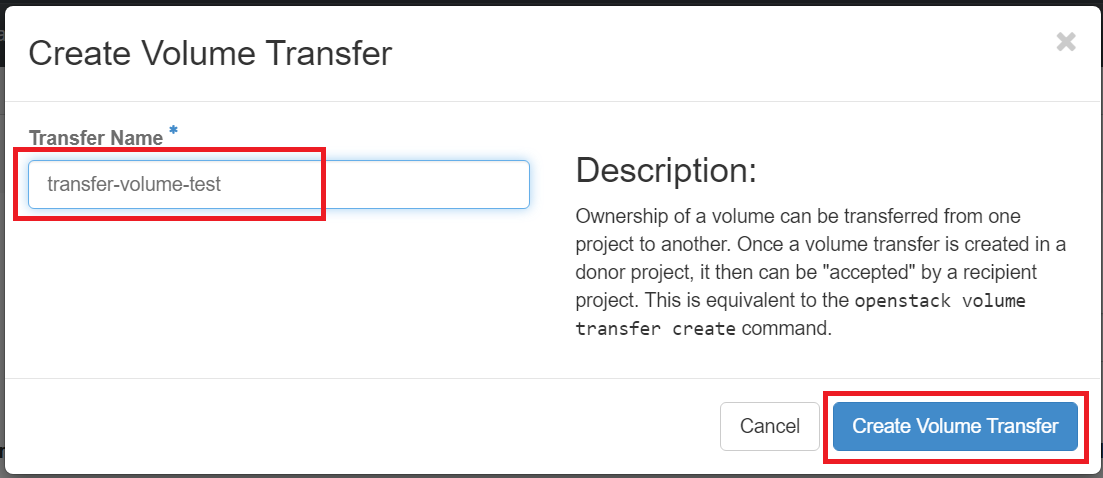
Give the transfer a name.
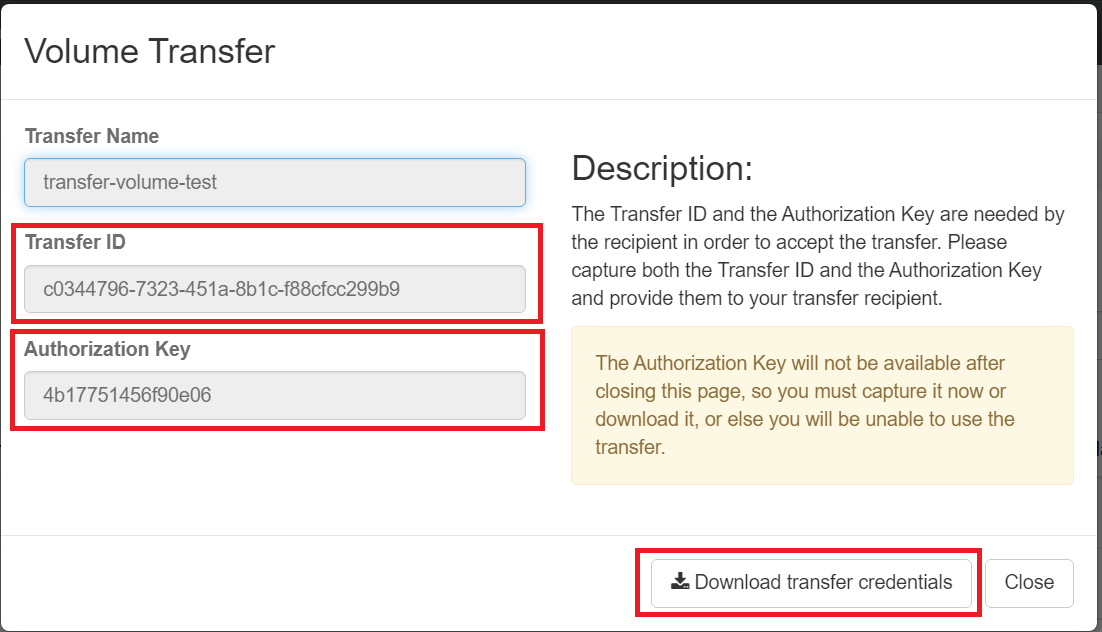
You will see a screen like shown below. Be sure to capture the Transfer ID and the Authorization Key.
Important Note
You can always get the transfer ID later if needed, but there is no way to retrieve the key.
If the key is lost before the transfer is completed, you will have to cancel the pending transfer and create a new one.
Then the volume will show the status like below:
Assuming you have access to the receiving project, switch to it using the Project dropdown at the top right.
If you don't have access to the receiving project, give the transfer ID and Authorization Key to a collaborator who does, and have them complete the next steps.
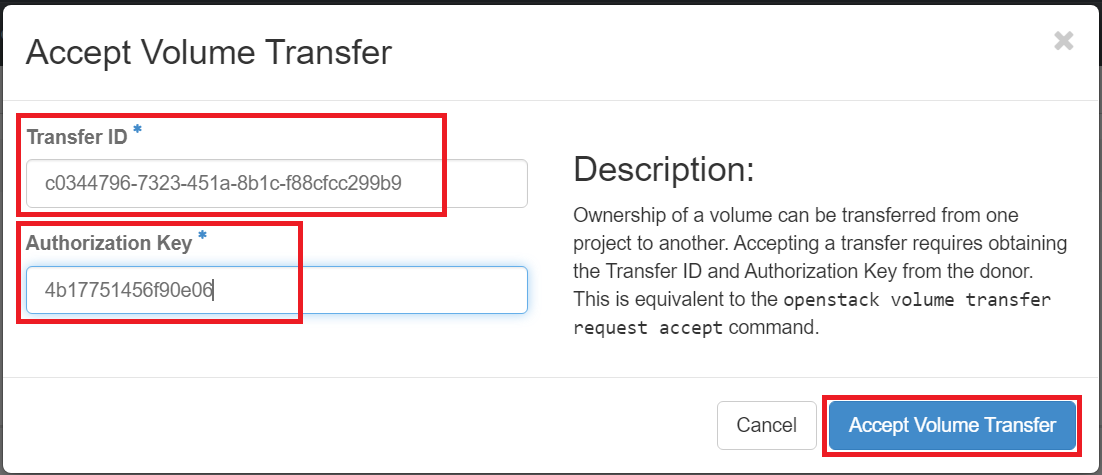
In the receiving project, go to the Volumes tab, and click "Accept Transfer" button as shown below:
Enter the "Transfer ID" and the "Authorization Key" that were captured when the transfer was created in the previous project.
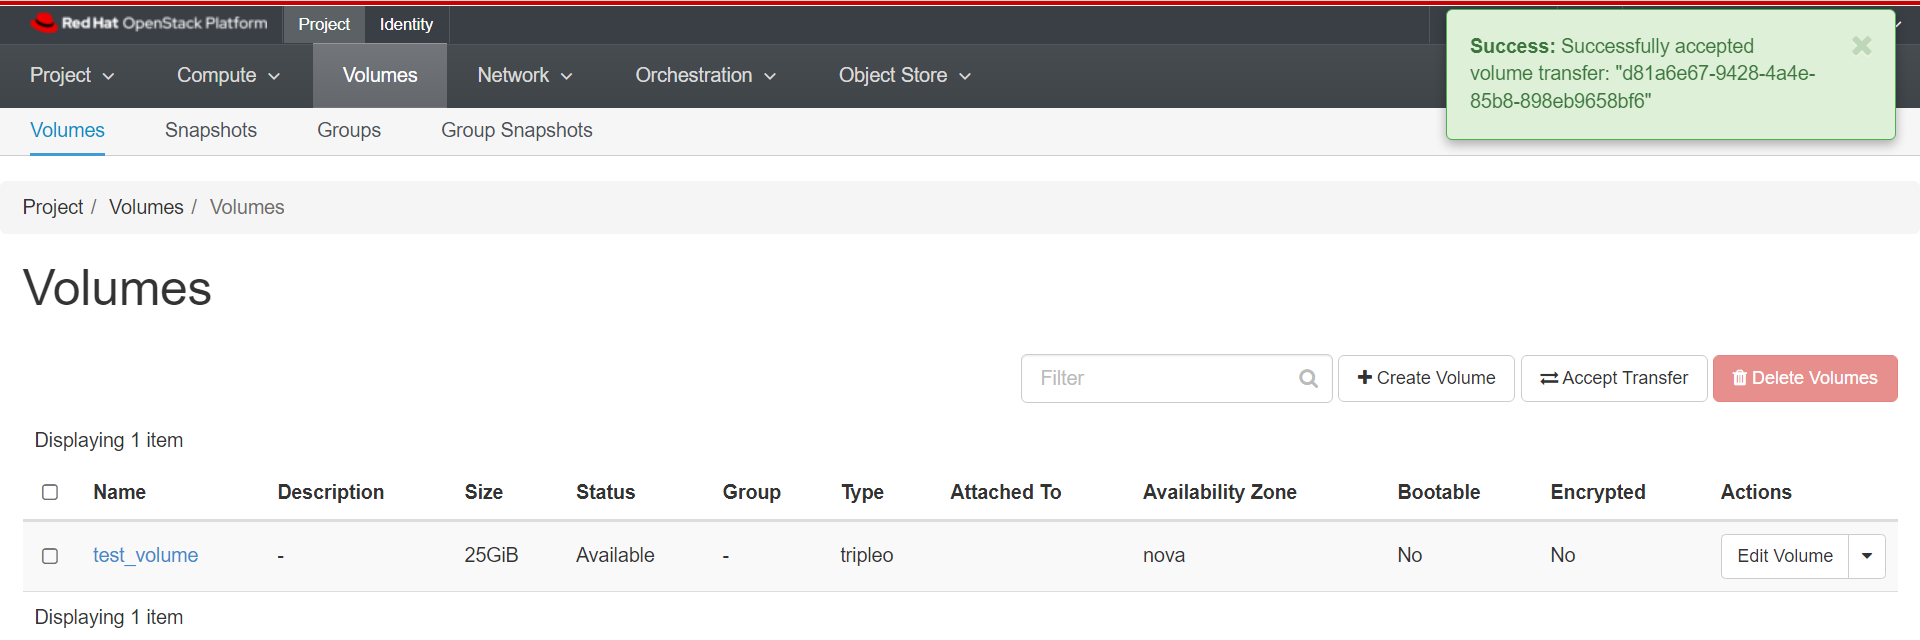
The volume should now appear in the Volumes list of the receiving project as shown below:
Important Note
Any pending transfers can be cancelled if they are not yet accepted, but there is no way to "undo" a transfer once it is complete. To send the volume back to the original project, a new transfer would be required.
Using the CLI
Prerequisites:
To run the OpenStack CLI commands, you need to have:
- OpenStack CLI setup, see OpenStack Command Line setup for more information.
Using the openstack client
- Identifying volume to transfer in your source project
openstack volume list +---------------------------+-----------+-----------+------+-------------+ | ID | Name | Status | Size | Attached to | +---------------------------+-----------+-----------+------+-------------+ | d8a5da4c-...-8b6678ce4936 | my-volume | available | 100 | | +---------------------------+-----------+-----------+------+-------------+
- Create the transfer request
openstack volume transfer request create my-volume +------------+--------------------------------------+ | Field | Value | +------------+--------------------------------------+ | auth_key | b92d98fec2766582 | | created_at | 2024-02-04T14:30:08.362907 | | id | a16494cf-cfa0-47f6-b606-62573357922a | | name | None | | volume_id | d8a5da4c-41c8-4c2d-b57a-8b6678ce4936 | +------------+--------------------------------------+
Pro Tip
If your volume name includes spaces, you need to enclose them in quotes,
i.e. "<VOLUME_NAME_OR_ID>".
For example: openstack volume transfer request create "My Volume"
- The volume can be checked as in the transfer status using
openstack volume transfer request listas follows and the volume is in statusawaiting-transferwhile runningopenstack volume show <VOLUME_NAME_OR_ID>as shown below:
openstack volume transfer request list +---------------------------+------+--------------------------------------+ | ID | Name | Volume | +---------------------------+------+--------------------------------------+ | a16494cf-...-62573357922a | None | d8a5da4c-41c8-4c2d-b57a-8b6678ce4936 | +---------------------------+------+--------------------------------------+
openstack volume show my-volume +------------------------------+--------------------------------------+ | Field | Value | +------------------------------+--------------------------------------+ ... | name | my-volume | ... | status | awaiting-transfer | +------------------------------+--------------------------------------+
- The user of the destination project can authenticate and receive the authentication key reported above. The transfer can then be initiated.
openstack volume transfer request accept --auth-key b92d98fec2766582 a16494cf-cfa0-47f6-b606-62573357922a +-----------+--------------------------------------+ | Field | Value | +-----------+--------------------------------------+ | id | a16494cf-cfa0-47f6-b606-62573357922a | | name | None | | volume_id | d8a5da4c-41c8-4c2d-b57a-8b6678ce4936 | +-----------+--------------------------------------+
- And the results confirmed in the volume list for the destination project.
openstack volume list +---------------------------+-----------+-----------+------+-------------+ | ID | Name | Status | Size | Attached to | +---------------------------+-----------+-----------+------+-------------+ | d8a5da4c-...-8b6678ce4936 | my-volume | available | 100 | | +---------------------------+-----------+-----------+------+-------------+


