Decommission Your NERC OpenStack Resources
You can decommission all of your NERC OpenStack resources sequentially as outlined below.
Prerequisite
-
Backup: Back up any critical data or configurations stored on the resources that going to be decommissioned. This ensures that important information is not lost during the process. You can refer to this guide to initiate and carry out data transfer to and from the virtual machine.
-
Shutdown Instances: If applicable, Shut Off any running instances to ensure they are not actively processing data during decommissioning.
-
Setup OpenStack CLI, see OpenStack Command Line setup for more information.
Delete all VMs
For instructions on deleting instance(s), please refer to this documentation.
Delete volumes and snapshots
For instructions on deleting volume(s), please refer to this documentation.
To delete snapshot(s), if that snapshot is not used for any running instance.
Navigate to Project -> Volumes -> Snapshots.
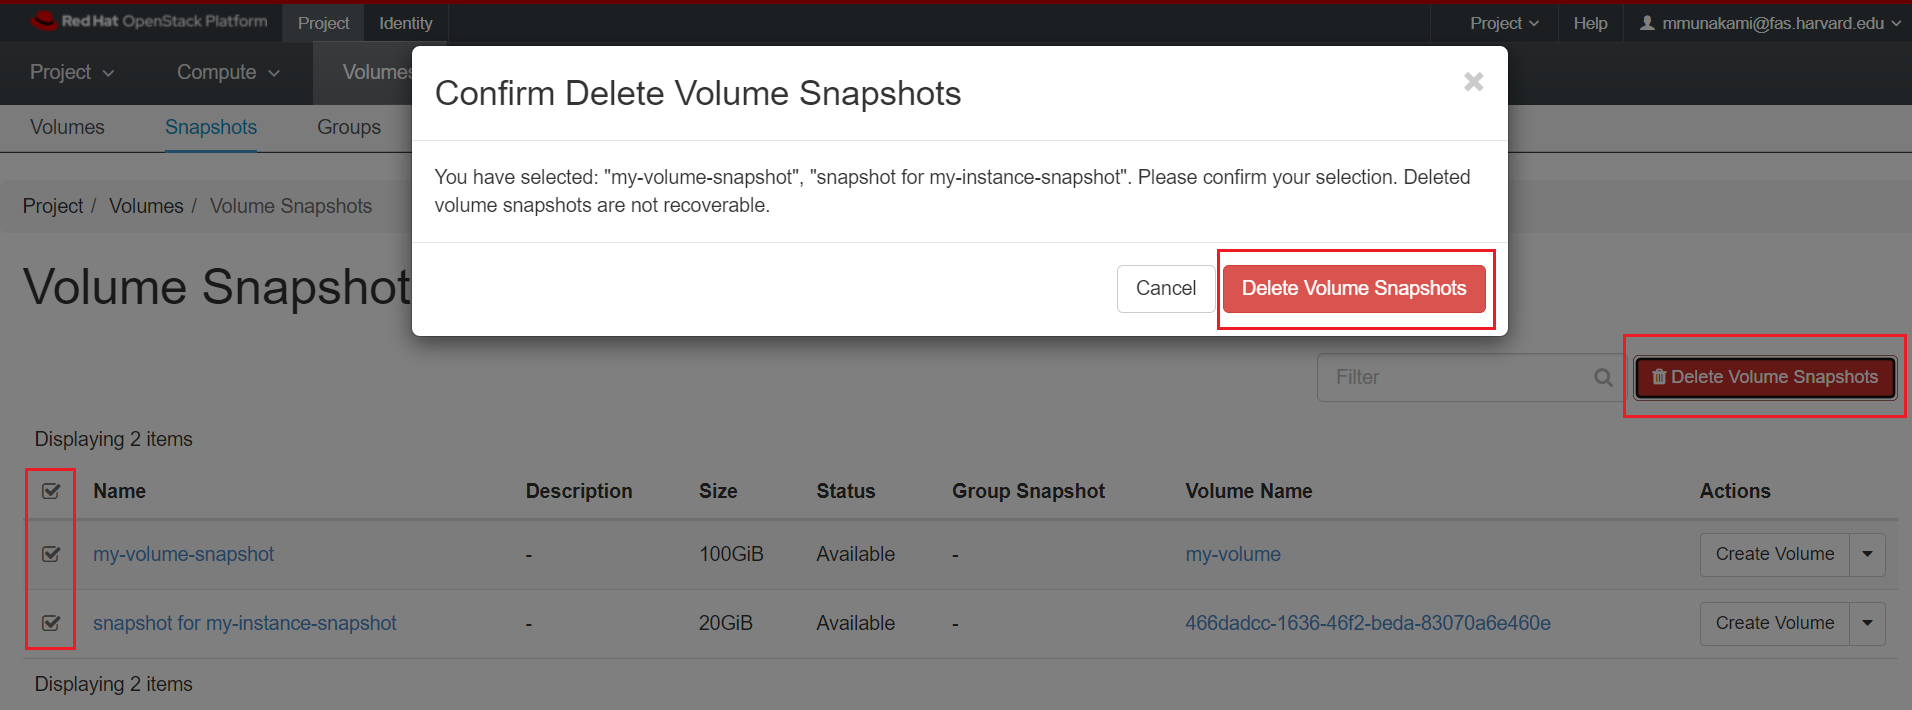
Unable to Delete Snapshots
First delete all volumes and instances (and its attached volumes) that are created using the snapshot first, you will not be able to delete the volume snapshots.
Delete all custom built Images and Instance Snapshot built Images
Navigate to Project -> Compute -> Images.
Select all of the custom built that have Visibility set as "Private" images to delete.
Delete your all private Networks, Routers and Internal Interfaces on the Routers
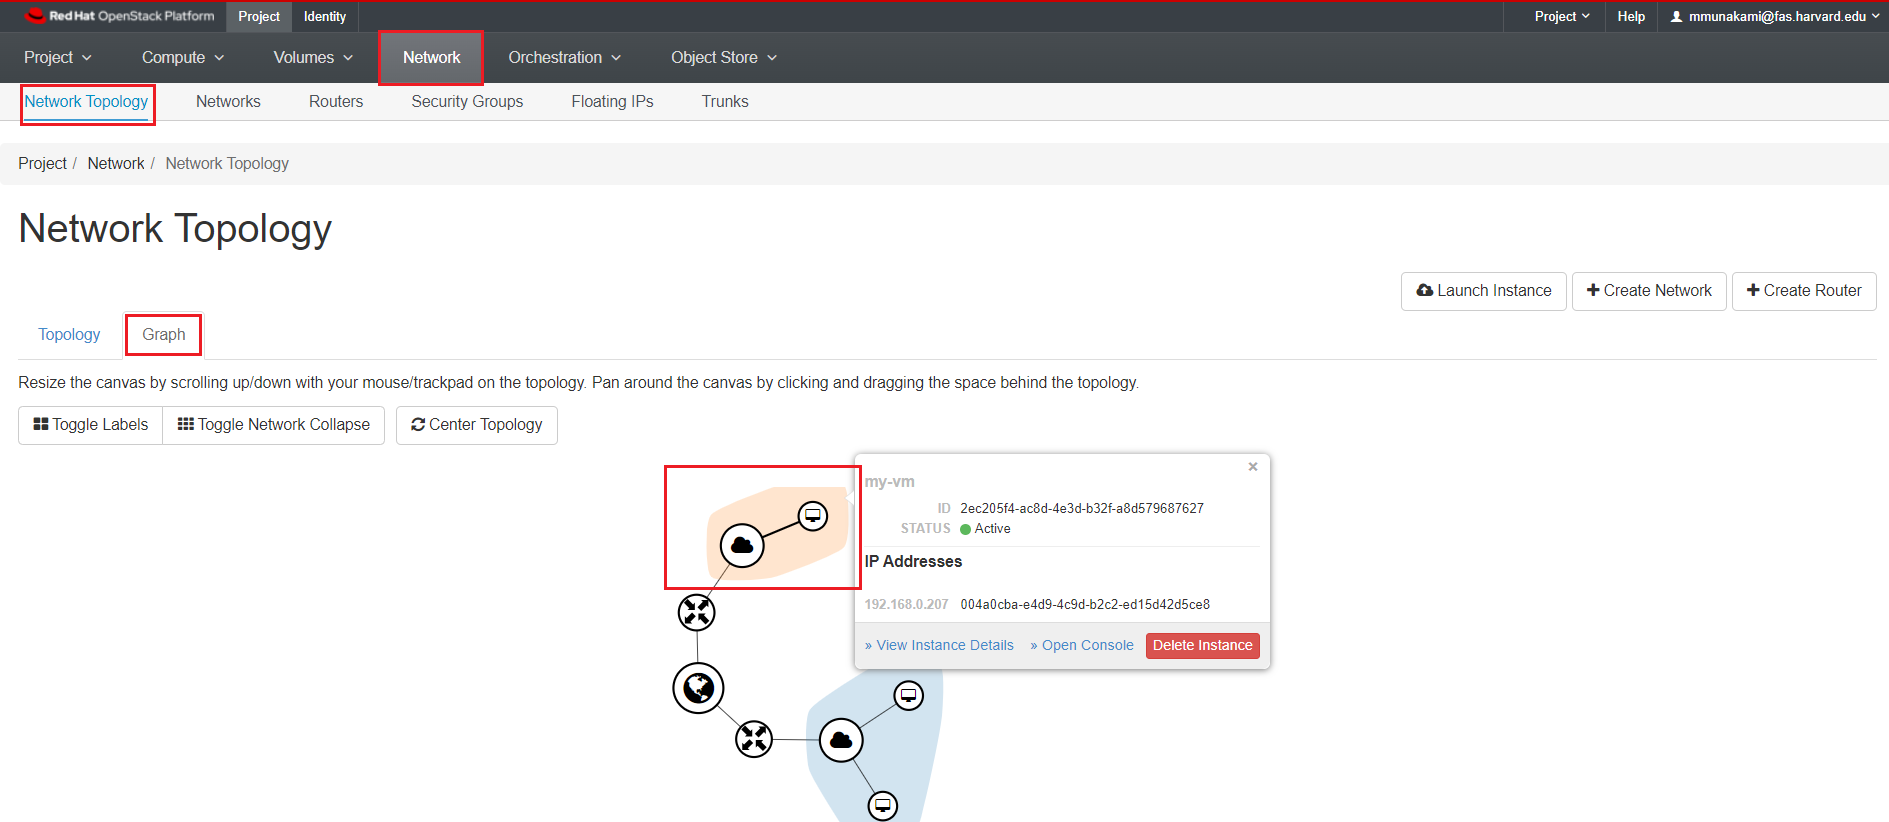
To review all Network and its connectivities, you need to:
Navigate to Project -> Network -> Network Topology.
This will shows all view of current Network in your project in Graph or Topology view. Make sure non instances are connected to your private network, which is setup by following this documentation. If there are any instances then refer this to delete those VMs.
First, delete all other Routers used to create private networks, which is setup by following this documentation except default_router from:
Navigate to Project -> Network -> Routers.
First, delete all other Routers used to create private networks except default_network and provider then only you will be able to delete the Networks from:
Navigate to Project -> Network -> Networks.
Unable to Delete Networks
First delete all instances and then delete all routers then only you will be able to delete the associated private networks.
Release all Floating IPs
Navigate to Project -> Network -> Floating IPs.
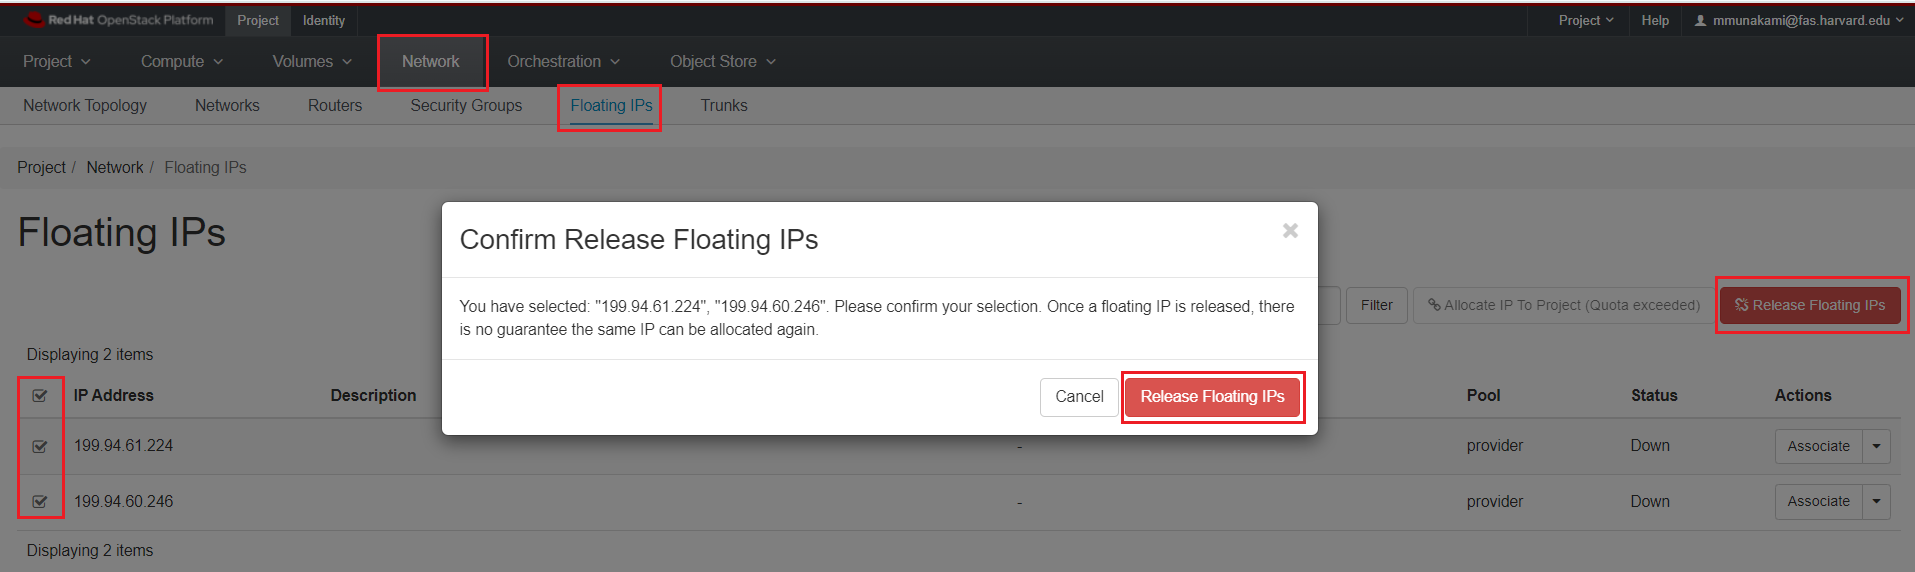
For instructions on releasing your allocated Floating IP back into the NERC floating IP pool, please refer to this documentation.
Clean up all added Security Groups
First, delete all other security groups except default also make sure the default security group does not have any extra rules. To view all Security Groups:
Navigate to Project -> Network -> Security Groups.
Unable to Delete Security Groups
First delete all instances and then only you will be able to delete the security groups. If a security group is attached to a VM, that security group will not be allowed to delete.
Delete all of your stored Key Pairs
Navigate to Project -> Compute -> Key Pairs.
Unable to Delete Key Pairs
First delete all instances that are using the selected Key Pairs then only you will be able to delete them.
Delete all buckets and objects
For instructions on deleting bucket(s) along with all objects, please refer to this documentation.
To delete snapshot(s), if that snapshot is not used for any running instance.
Navigate to Project -> Object Store -> Containers.
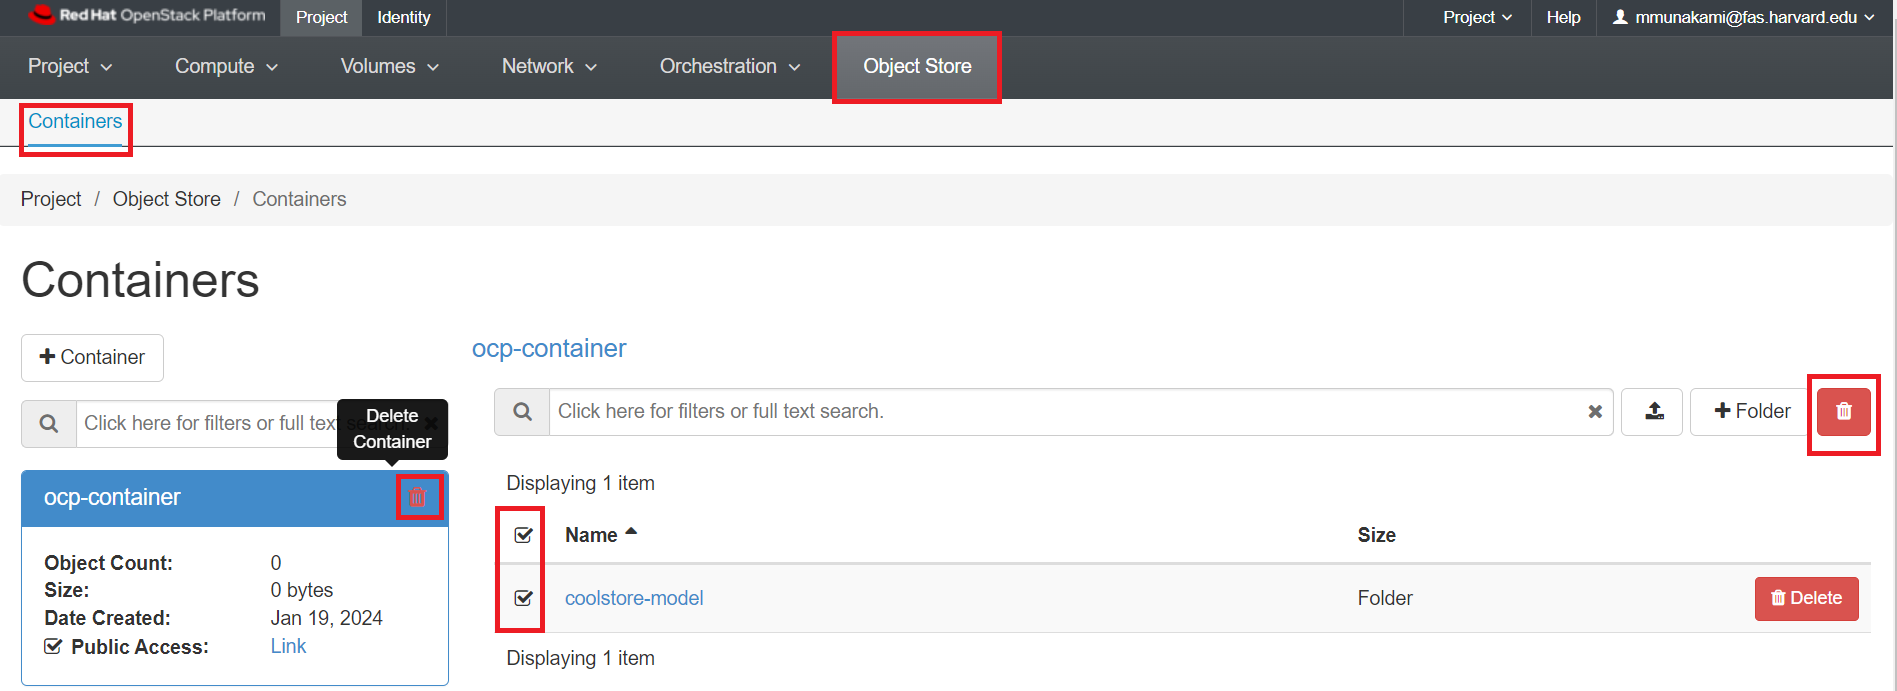
Unable to Delete Container with Objects inside
First delete all objects inside a Container first, then only you will be able to delete the container. Please make sure any critical objects data are already been remotely backed up before deleting them. You can also use openstack client to recursively delete the containers which has multi-level objects inside as described here. So, you don't need to manually delete all objects inside a container prior deleting the container. This will save a lot of your time and effort.
Optional: Remove User(s) from your ColdFront Project
Removing users from your ColdFront project via the NERC's ColdFront interface is straightforward. Simply click the "Remove Users" button for the corresponding project. This will display the following interface:
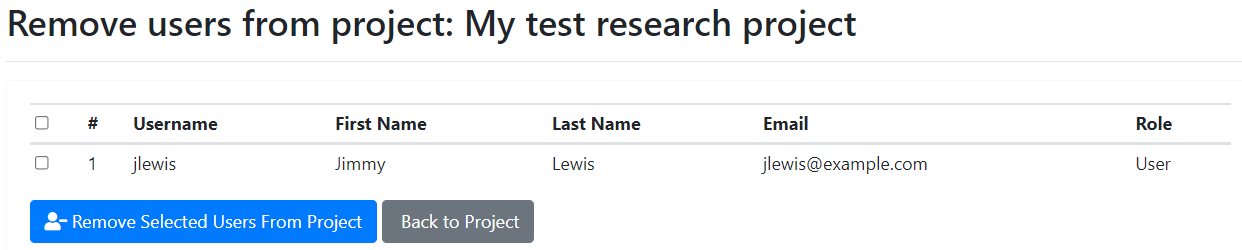
PI or project managers can select the user(s) and then click on the "Remove Selected Users From Project" button.
Very Important
If you remove a user (or users) from a project, they will automatically be removed from all allocations they were previously assigned to within that project.
Use ColdFront to reduce the Storage Quota to Zero
Each allocation, whether requested or approved, will be billed based on the pay-as-you-go model. The exception is for Storage quotas, where the cost is determined by your requested and approved allocation values to reserve storage from the total NESE storage pool. For NERC (OpenStack) Resource Allocations, storage quotas are specified by the "OpenStack Volume Quota (GiB)" and "OpenStack Swift Quota (GiB)" allocation attributes.
Even if you have deleted all volumes, snapshots, and object storage buckets and objects in your OpenStack project. It is very essential to adjust the approved values for your NERC (OpenStack) resource allocations to zero (0) otherwise you still be incurring a charge for the approved storage as explained in Billing FAQs.
To achieve this, you must submit a final change request to reduce the Storage Quotas for the "OpenStack Volume Quota (GiB)" and "OpenStack Swift Quota (GiB)" to zero (0) for your NERC (OpenStack) resource type. You can review and manage these resource allocations by visiting the resource allocations. Here, you can filter the allocation of your interest and then proceed to request a change request.
Please make sure your change request looks like this:
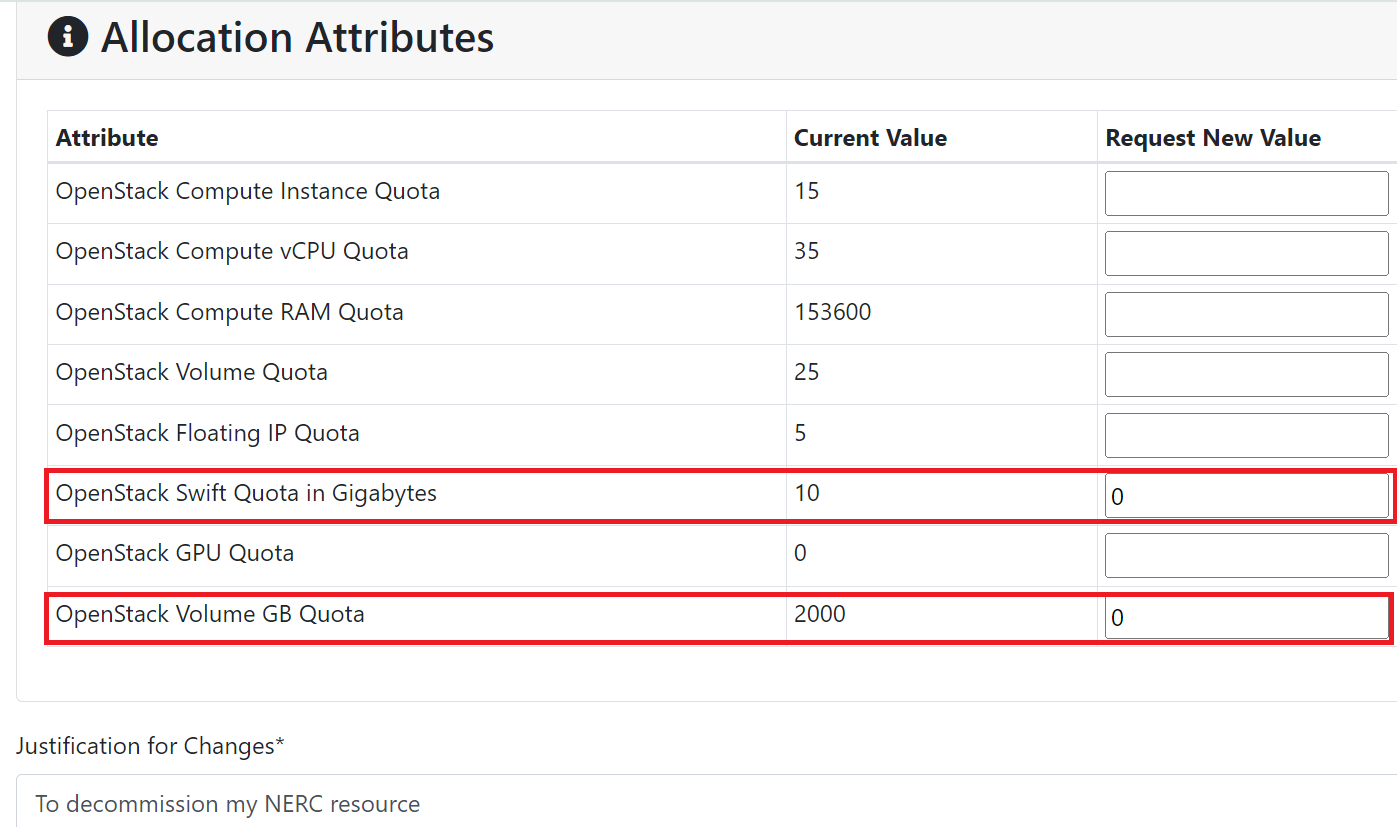
Wait until the requested resource allocation gets approved by the NERC's admin.
After approval, kindly review and verify that the quotas are accurately reflected in your resource allocation and OpenStack project. Please ensure that the approved quota values are accurately displayed as explained here.
Review your Block Storage(Volume/Cinder) Quota
Please confirm and verify that the gigabytes resource value that specifies total space in external volumes is set to a limit of zero (0) in correspondence with the approved "OpenStack Volume Quota (GiB)" of your allocation when running openstack quota show openstack client command as shown below:
openstack quota show
+-----------------------+--------+
| Resource              |  Limit |
+-----------------------+--------+
...
| gigabytes             |      0 |
...
+-----------------------+--------+
Review your Object Storage(Swift) Quota
To check the overall space used, you can use the following command
Also, please confirm and verify that the Quota-Bytes property value is set to a limit of zero (0) in correspondence with the approved "OpenStack Swift Quota (GiB)" of your allocation and also check the overall space used in Bytes is one (1) along with no Containers and Objects, when running openstack object store account show openstack client command as shown below:
openstack object store account show
+------------+---------------------------------------+
| Field      | Value                                 |
+------------+---------------------------------------+
| Account    | AUTH_5e1cbcfe729a4c7e8fb2fd5328456eea |
| Bytes      | 0                                     |
| Containers | 0                                     |
| Objects    | 0                                     |
| properties | Quota-Bytes='1'                       |
+------------+---------------------------------------+
Review your Project Usage
Several commands are available to access project-level resource utilization details. The openstack limits show --absolute command offers a comprehensive view of the most crucial resources and also allows you to view your current resource consumption.
Multiple commands are at your disposal to access project resource utilization details. The openstack limits show --absolute command offers a comprehensive view of critical resources and allows you to assess your current resource consumption.
Very Important: Ensure No Resources that will be Billed are Used
Most importantly, ensure that there is no active usage for any of your currently allocated project resources.
Please ensure the output appears as follows, with all used resources having a value of zero (0), except for totalSecurityGroupsUsed.
openstack limits show --absolute
+--------------------------+-------+
| Name                     | Value |
+--------------------------+-------+
...
| totalRAMUsed             |     0 |
| totalCoresUsed           |     0 |
| totalInstancesUsed       |     0 |
| totalFloatingIpsUsed     |     0 |
| totalSecurityGroupsUsed  |     1 |
| totalServerGroupsUsed    |     0 |
...
| totalVolumesUsed         |     0 |
| totalGigabytesUsed       |     0 |
| totalSnapshotsUsed       |     0 |
| totalBackupsUsed         |     0 |
| totalBackupGigabytesUsed |     0 |
+--------------------------+-------+
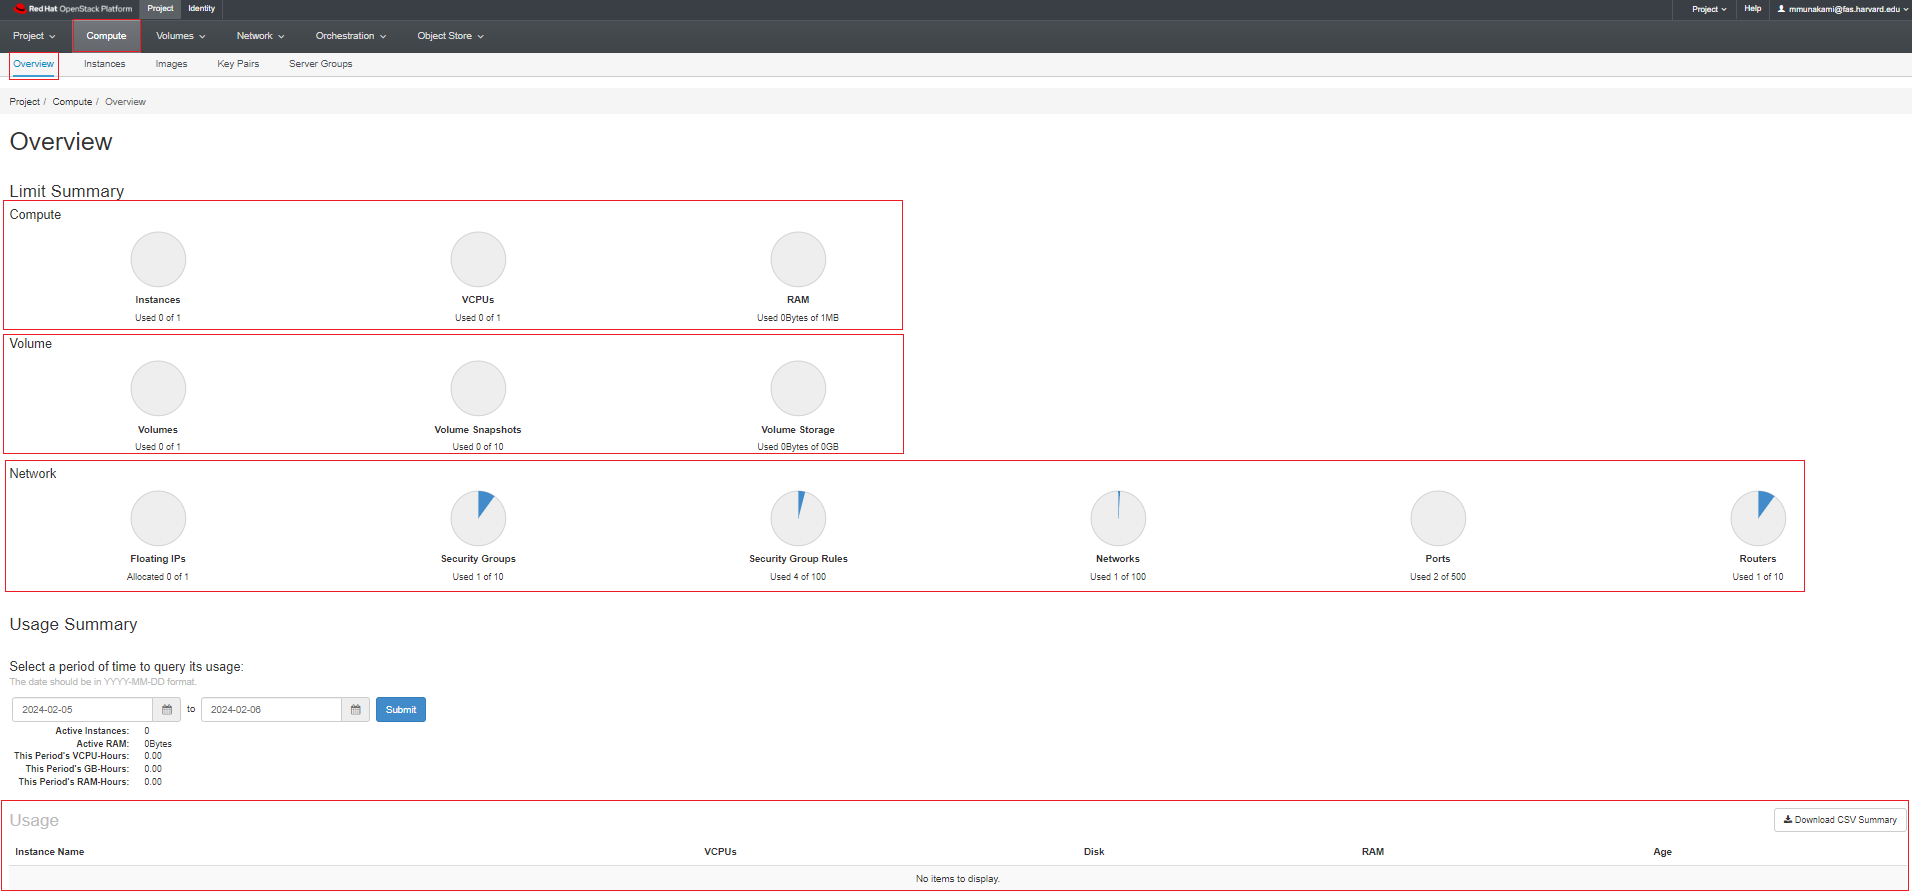
Review your Project's Resource Quota from the OpenStack Dashboard
After removing all OpenStack resources and updating the Storage Quotas to set them to zero (0), you can review and verify that these changes are reflected in your Horizon Dashboard Overview.
Navigate to Project -> Compute -> Overview.
Finally, Archive your ColdFront Project
As a PI, you will now be able to Archive your ColdFront Project via accessing NERC's ColdFront interface. Please refer to these intructions on how to archive your projects that need to be decommissioned.