Format And Mount The Volume
Prerequisites:
Before formatting and mounting the volume, you need to have already created a new volume as referred here and attached it to any running VM, as described here.
For Linux based virtual machine
To verify that the newly created volume, "my-volume", exists and is attached to a VM, "test-vm", run this openstack client command:
openstack volume list
+--------------------------------------+-----------------+--------+------+----------------------------------+
| ID                                   | Name            | Status | Size | Attached to                      |
+--------------------------------------+-----------------+--------+------+----------------------------------+
| 563048c5-d27b-4397-bb4e-034e0f4d9fa7 |                 | in-use |   20 | Attached to test-vm on /dev/vda  |
| 5b5380bd-a15b-408b-8352-9d4219cf30f3 | my-volume       | in-use |   20 | Attached to test-vm on /dev/vdb  |
+--------------------------------------+-----------------+--------+------+----------------------------------+
The volume has a status of "in-use" and "Attached To" column shows which instance it is attached to, and what device name it has.
This will be something like /dev/vdb but it can vary depending on the state of your instance, and whether you have attached volumes before.
Make note of the device name of your volume.
SSH into your instance. You should now see the volume as an additional disk in the output of sudo fdisk -l or lsblk or cat /proc/partitions.
# lsblk
NAME    MAJ:MIN RM  SIZE RO TYPE MOUNTPOINT
...
vda     254:0    0   10G  0 disk
├─vda1  254:1    0  9.9G  0 part /
├─vda14 254:14   0    4M  0 part
└─vda15 254:15   0  106M  0 part /boot/efi
vdb     254:16   0    1G  0 disk
Here, we see the volume as the disk vdb, which matches the /dev/vdb/ we previously noted in the "Attached To" column.
Create a filesystem on the volume and mount it. In this example, we will create an ext4 filesystem:
Run the following commands as root user:
The volume is now available at the mount point:
lsblk
NAME    MAJ:MIN RM  SIZE RO TYPE MOUNTPOINT
...
vda     254:0    0   10G  0 disk
├─vda1  254:1    0  9.9G  0 part /
├─vda14 254:14   0    4M  0 part
└─vda15 254:15   0  106M  0 part /boot/efi
vdb     254:16   0    1G  0 disk /mnt/test_volume
Very Important Information
Please note that this mounted drive is not persistent if your VM is stopped or rebooted in the future. After each reboot, you will need to run the mounting command mount /dev/vdb /mnt/test_volume again. To enable automatic mounting at system startup, please follow the steps as outlined here.
If you place data in the directory /mnt/test_volume, detach the volume, and mount it to another instance, the second instance will have access to the data.
Important Note
In this case it's easy to spot because there is only one additional disk attached to the instance, but it's important to keep track of the device name, especially if you have multiple volumes attached.
Mounting on system startup
Mounts can be set to occur automatically during system initialization so that mounted file systems will persist even after the VM reboot.
Configure mounting of the disk to your directory
To configure mounting of the /dev/vdb disk to your /mnt/test_volume directory:
First, get the UUID of the device:
sudo blkid /dev/vdb
The output should look similar to:
/dev/vdb: UUID="1234-5678-ABCD-EF00" BLOCK_SIZE="4096" TYPE="ext4"
Note
Please note the UUID.
Now open the file /etc/fstab using your favorite command line text editor for editing. You will need sudo privileges for that. For example, if you want to use nano, execute this command:
sudo nano /etc/fstab
Add the following line to the /etc/fstab file at the end (replace the UUID with what you noted before). This will mount the disk automatically on every reboot.
UUID=1234-5678-ABCD-EF00 /mnt/test_volume ext4 defaults 0 2
Important Information
If you just want to test your mounting command written in /etc/fstab without "Rebooting" the VM you can also do that by running sudo mount -a. If there's no error, your mount is working and will persist after reboot.
Reboot your VM:
sudo reboot
Confirm the mount:
df -h | grep /mnt/test_volume
For Windows virtual machine
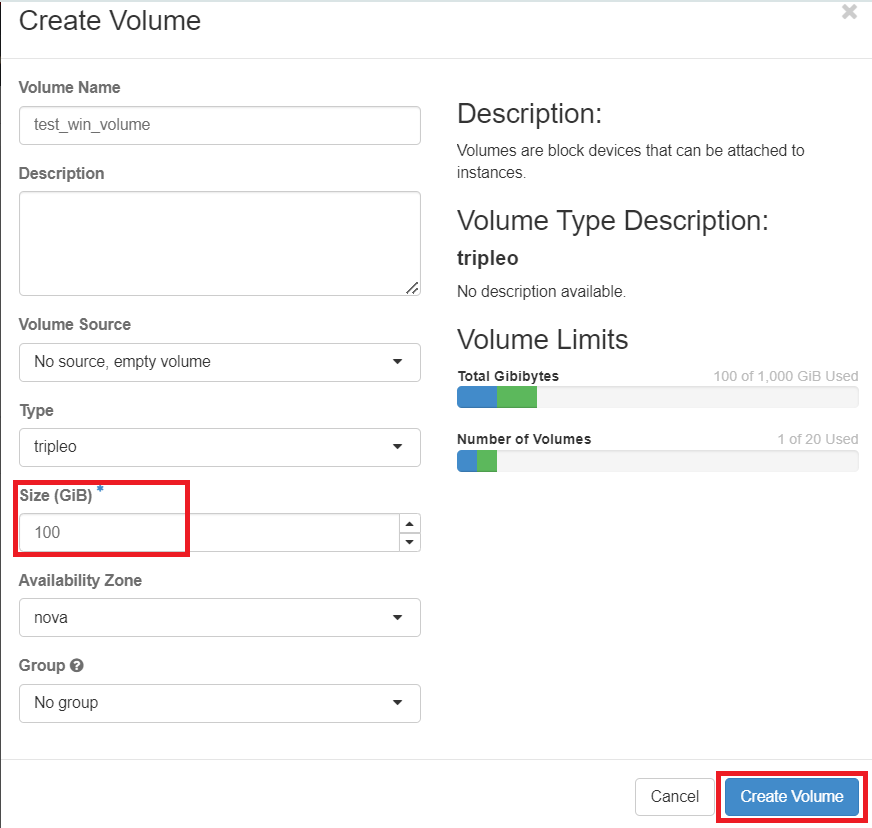
Here, we create an empty volume following the steps outlined in this documentation.
Please make sure you are creating volume of the size 100 GiB:
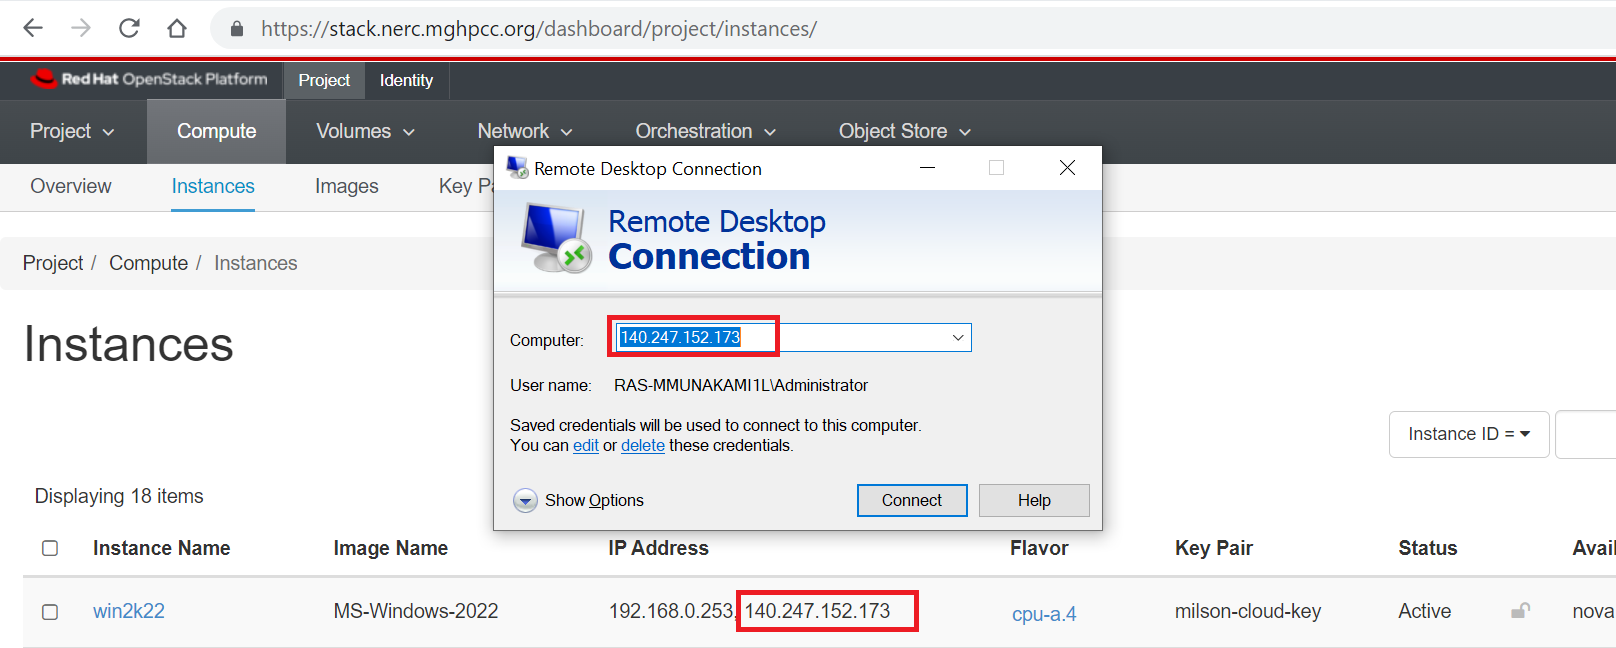
Then attach the newly created volume to a running Windows VM:

Login remote desktop using the Floating IP attached to the Windows VM:
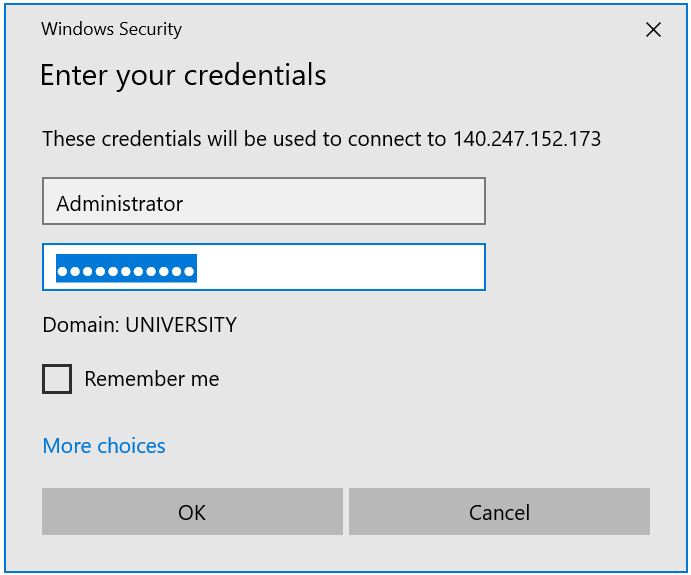
What is the user login for Windows Server 2022?
The default username is "Administrator," and the password is the one you set using the user data PowerShell script during the launch as described here.
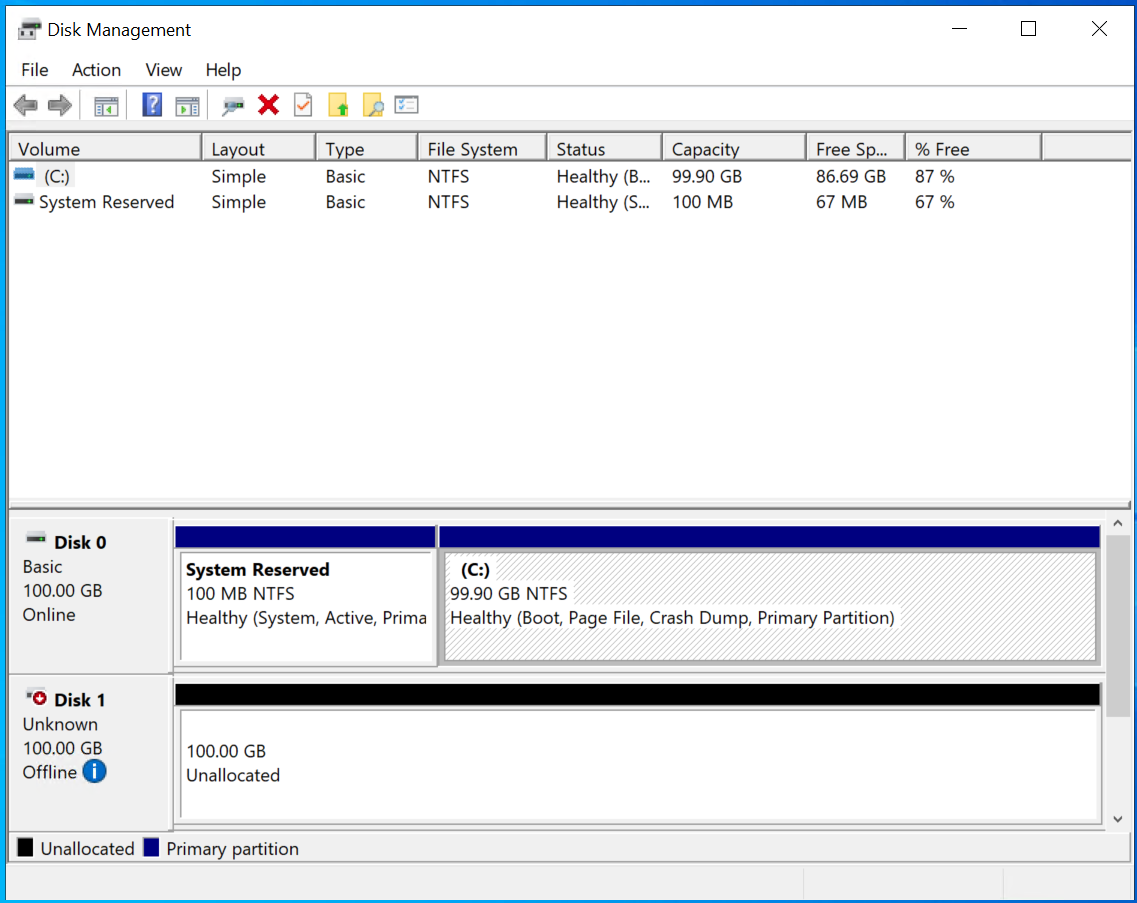
Once connected search for "Disk Management" from Windows search box. This will show all attached disk as Unknown and Offline as shown here:
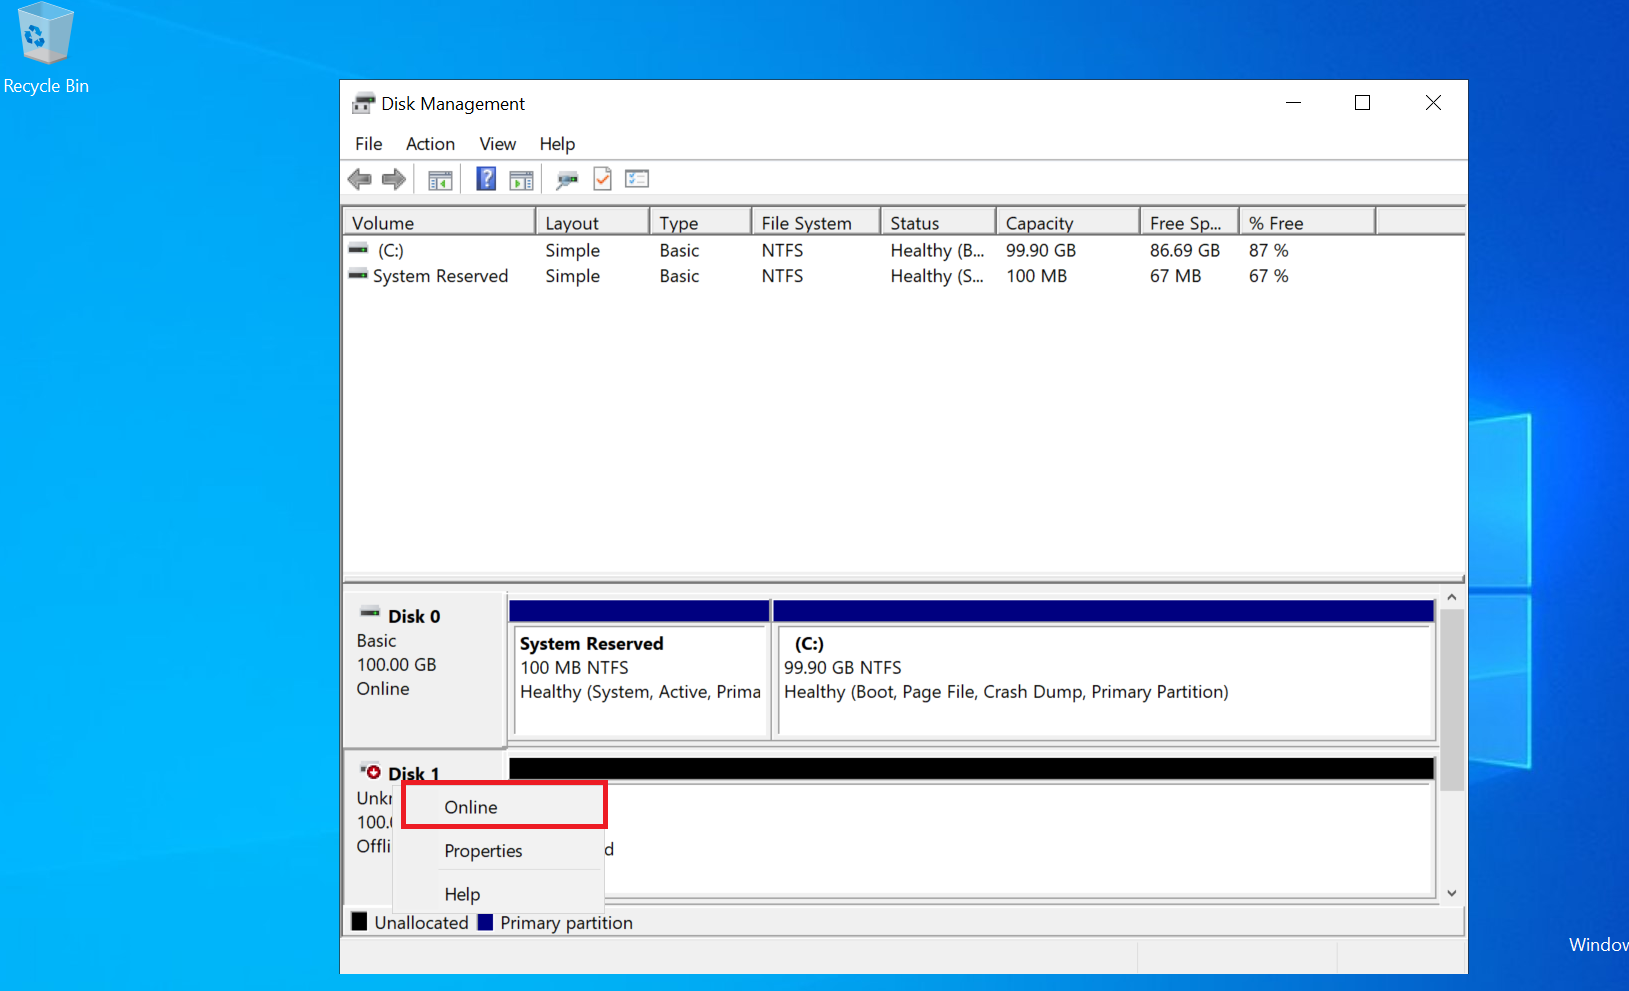
In Disk Management, select and hold (or right-click) the disk you want to initialize, and then select "Initialize Disk". If the disk is listed as Offline, first select and hold (or right-click) the disk, and then select "Online".
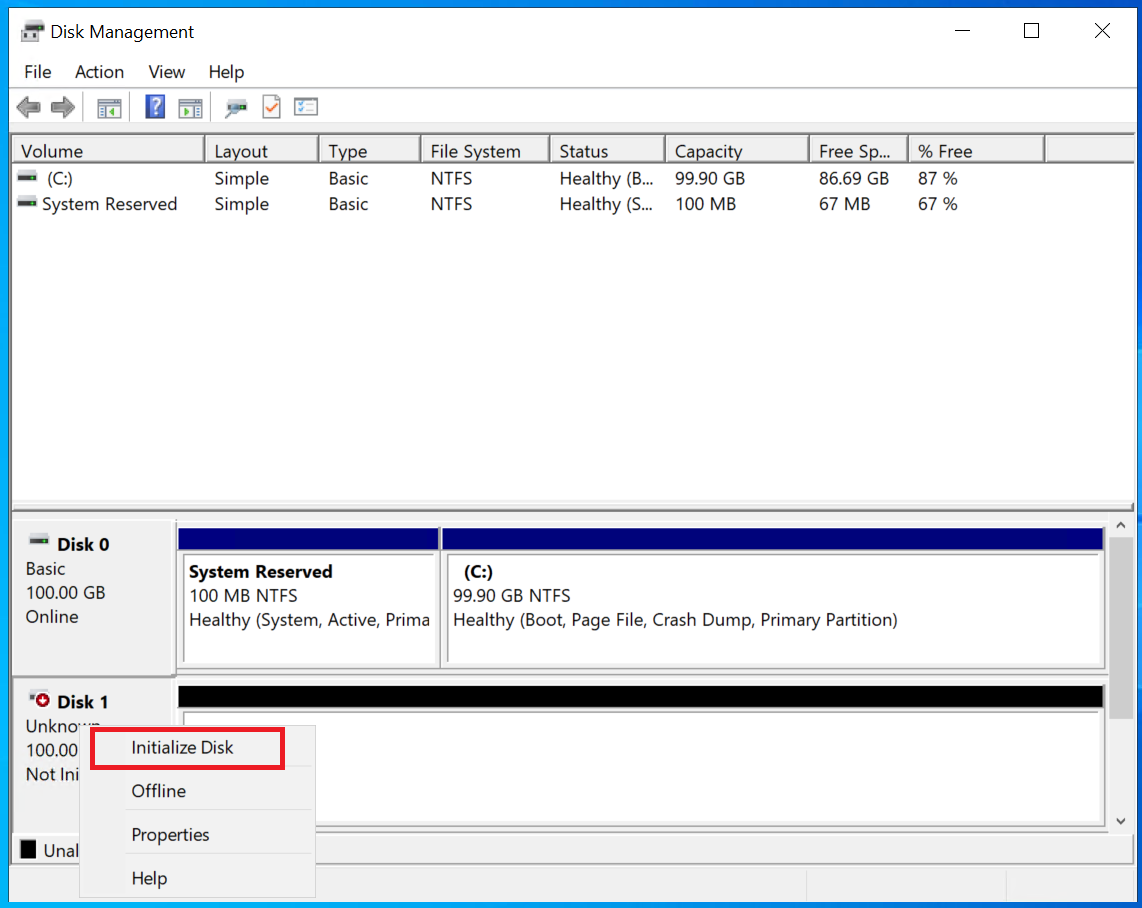
In the Initialize Disk dialog box, make sure the correct disk is selected, and then choose OK to accept the default partition style. If you need to change the partition style (GPT or MBR), see Compare partition styles - GPT and MBR.

Format the New Volume:
-
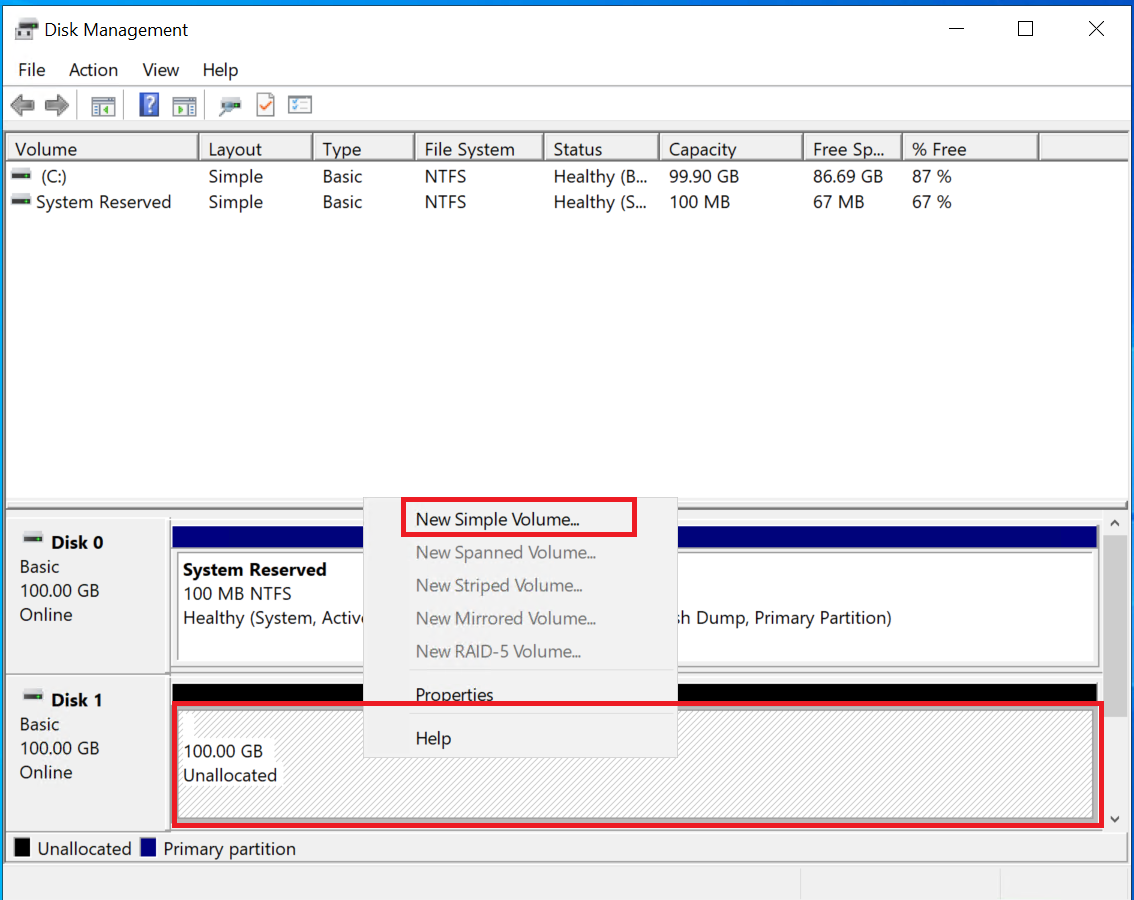
Select and hold (or right-click) the unallocated space of the new disk.
-
Select "New Simple Volume" and follow the wizard to create a new partition.
-
Choose the file system (usually NTFS for Windows).
-
Assign a drive letter or mount point.
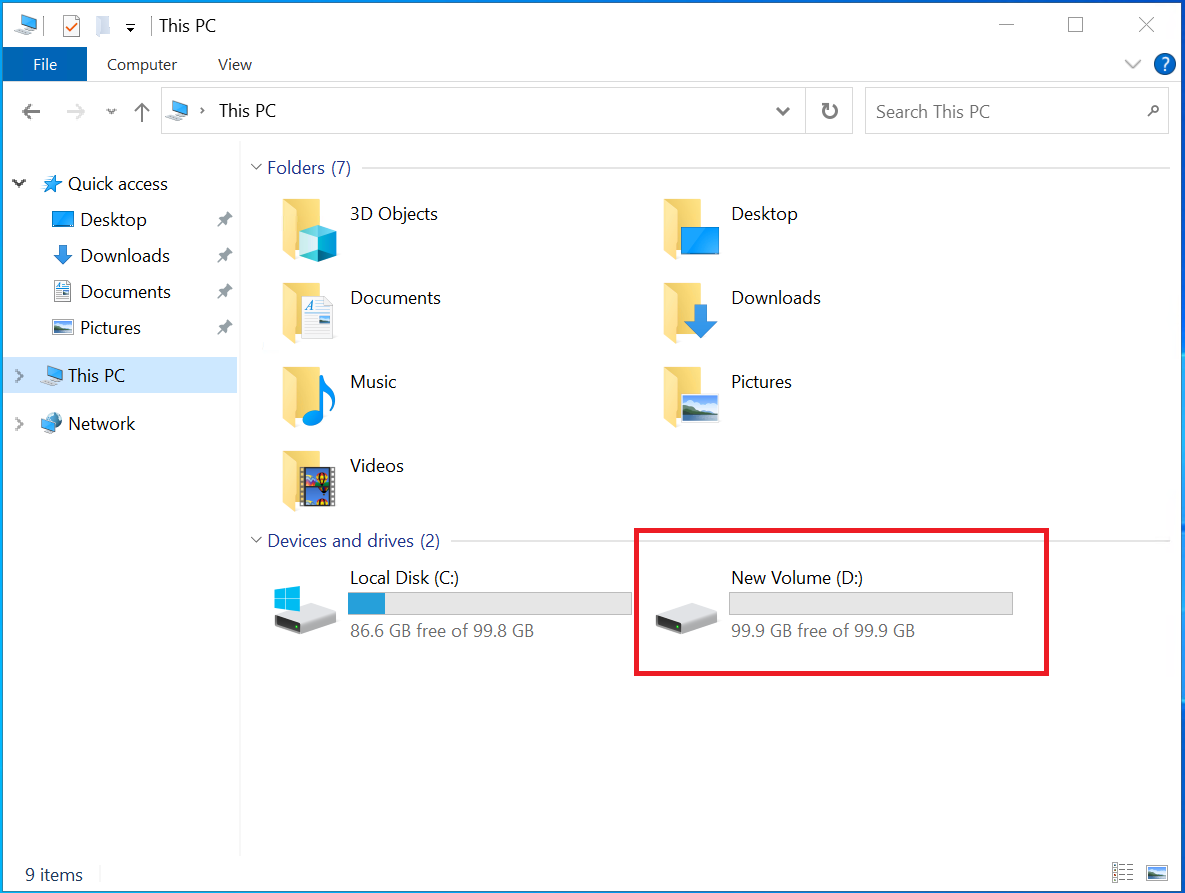
Complete Formatting:
-
Complete the wizard to format the new volume.
-
Once formatting is complete, the new volume should be visible in File Explorer as shown below: