Explore the JupyterLab Environment
When your workbench is ready and the status changes to Running, click the open icon ( ) next to your workbench's name, or click the workbench name directly to access your environment:

How can I start or stop a Workbench?
If the status of the workbench is Stopped, in the Status column for the workbench, click Start. The Status column changes from Stopped to Starting when the workbench server is starting, and then to Running when the workbench has successfully started.
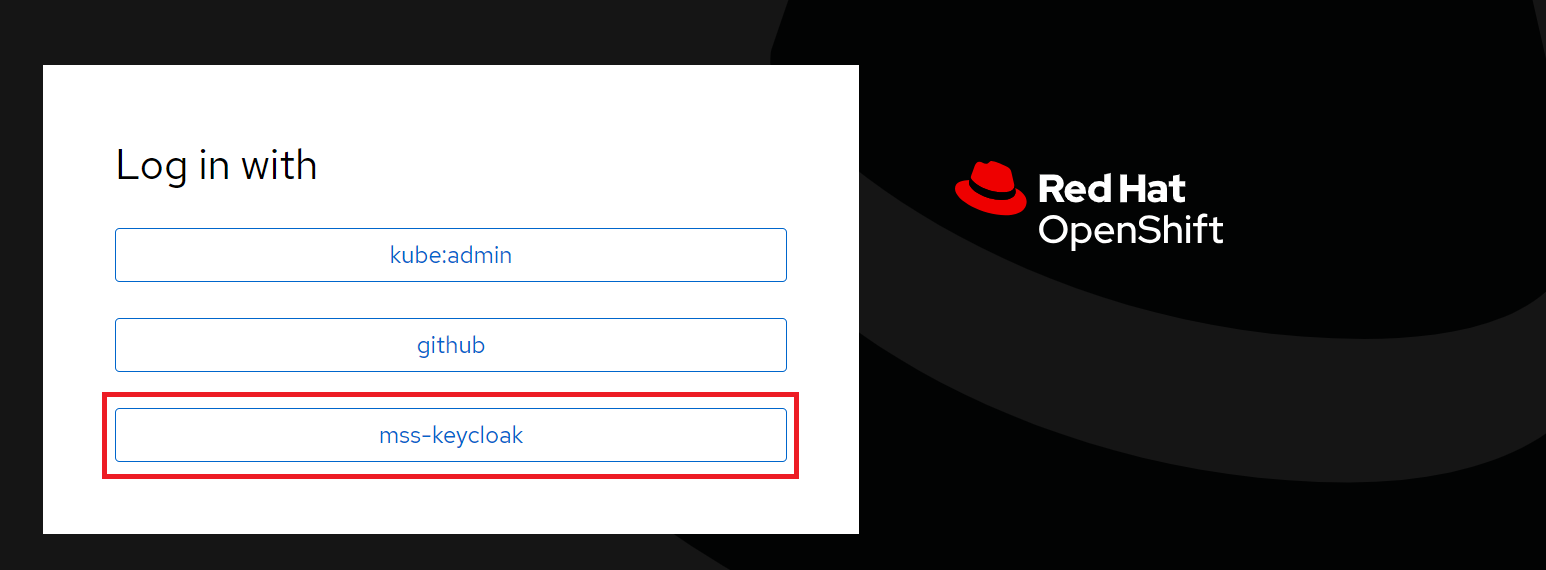
Make sure you are selecting "mss-keycloak" once shown:
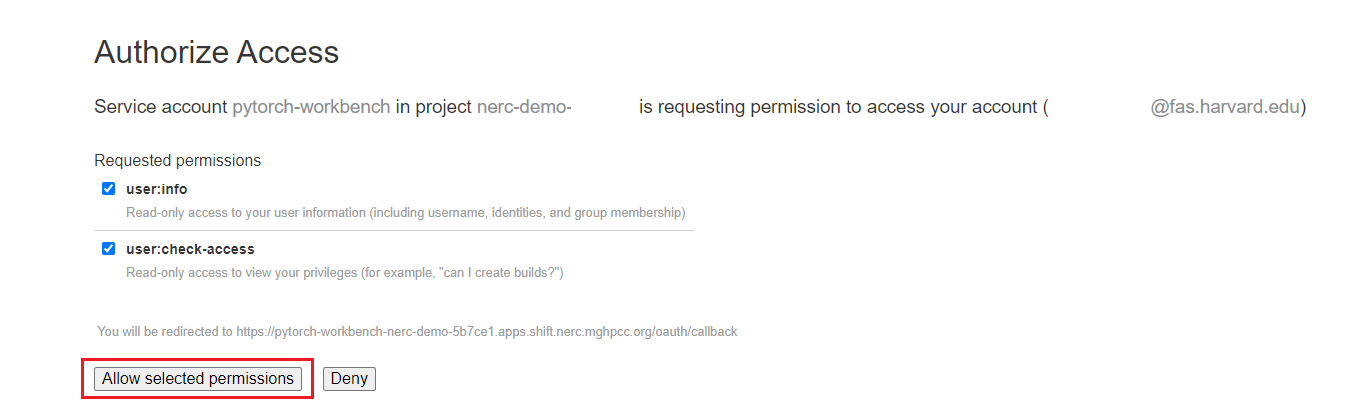
Authorize the requested permissions if needed:
This will initiate your JupyterLab environment based on the Jupyter Image you have selected. JupyterLab offers a shared interactive integrated development environment.
Once you successfully authenticate, you should see the NERC RHOAI JupyterLab Web Interface as shown below:
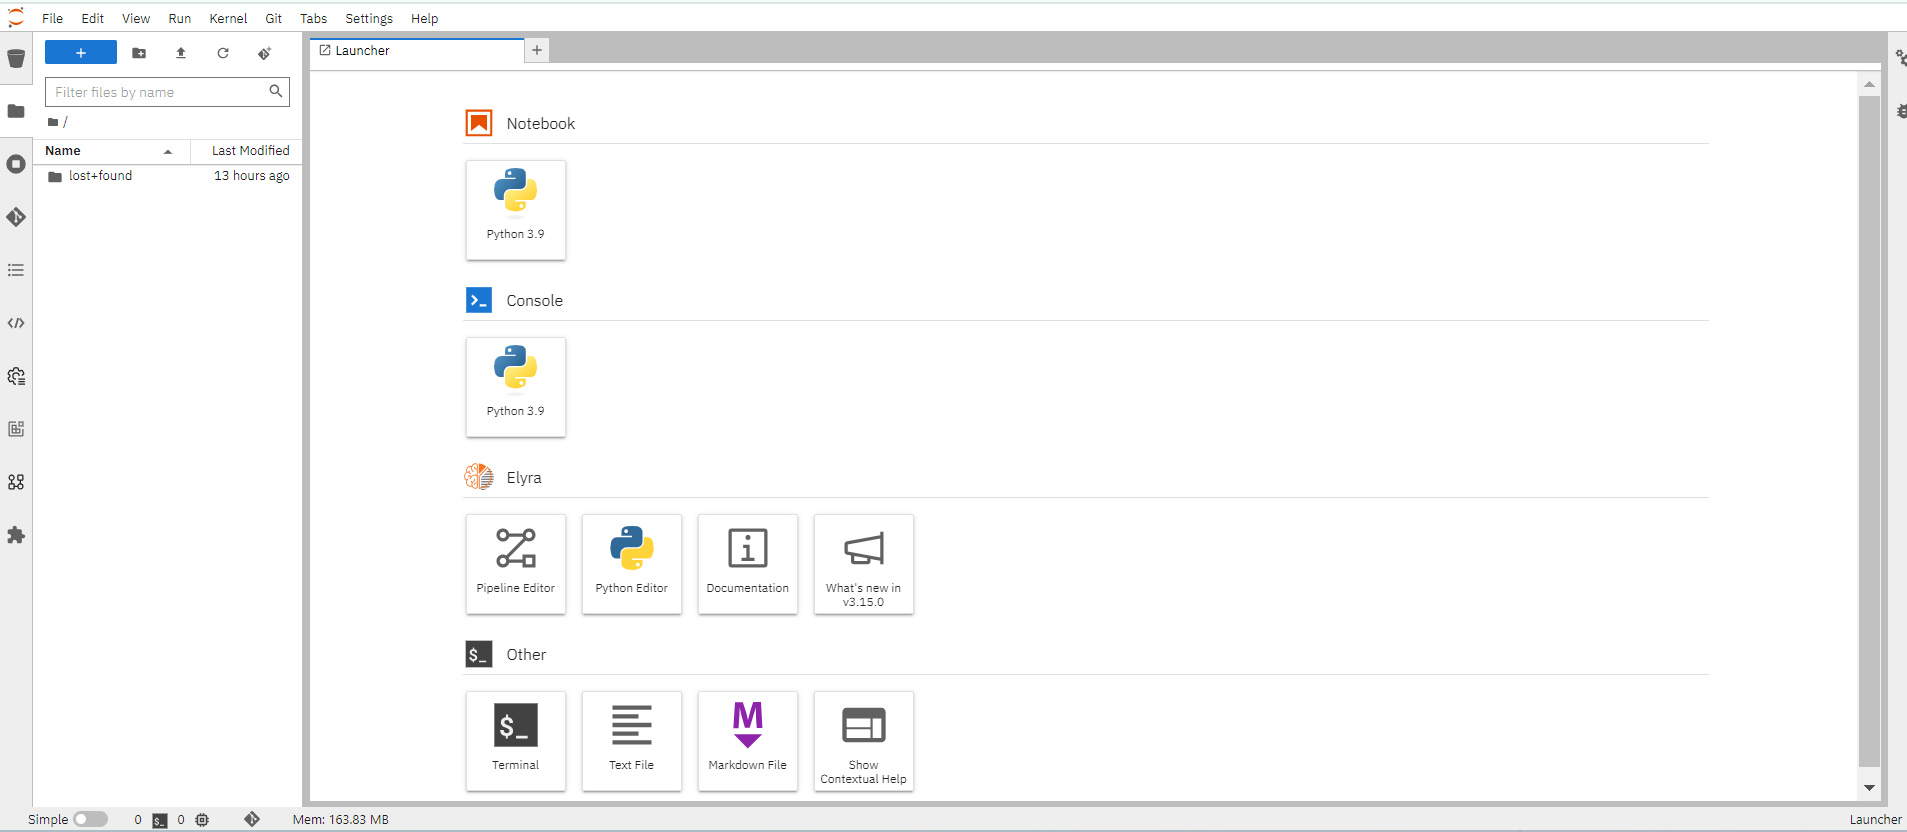
The Jupyter environment is currently empty. To begin, populate it with content using Git. On the left side of the navigation pane, locate the Name explorer panel, where you can create and manage your project directories.
Learn More About Working with Notebooks
For detailed guidance on using notebooks on NERC RHOAI JupyterLab, please refer to this documentation.
Clone a GitHub Repository
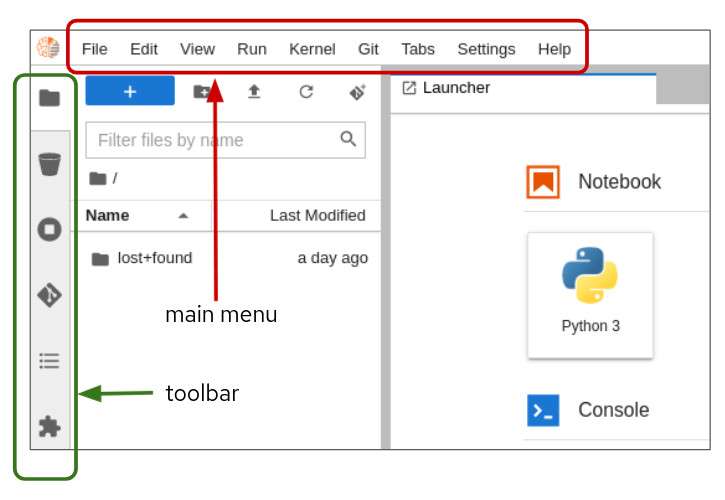
You can clone a Git repository in JupyterLab through the left-hand toolbar or the Git menu option in the main menu as shown below:
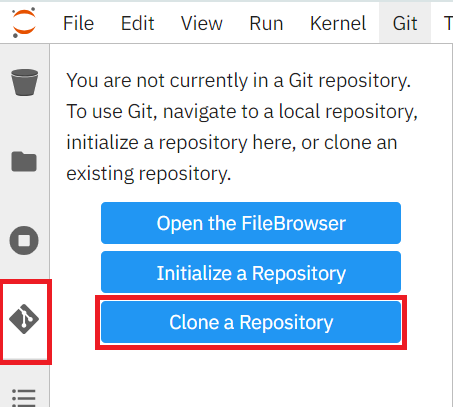
Let's clone a repository using the left-hand toolbar. Click on the Git icon, shown in below:

Then click on Clone a Repository as shown below:
Enter the git repository URL, which points to the end-to-end ML workflows demo project i.e. https://github.com/nerc-project/nerc_rhoai_mlops.
Then click Clone button, as shown below:

Alternatively, you can clone any Public Git repository directly by clicking on the Git Clone icon in the toolbar, as shown below:
![]()
What is MLOps?
Machine learning operations (MLOps) are a set of practices that automate and simplify machine learning (ML) workflows and deployments. MLOps encompasses the tools, platforms, and processes required to build, train, deploy, monitor, and continuously improve AI/ML models for cloud-native applications.
To learn more about the end-to-end reference design for MLOps, read the blog: Enterprise MLOps Reference Design.
Cloning takes a few seconds, after which you can double-click and navigate to the newly-created folder that contains your cloned Git repository.
Exploring the Example NERC MLOps Project
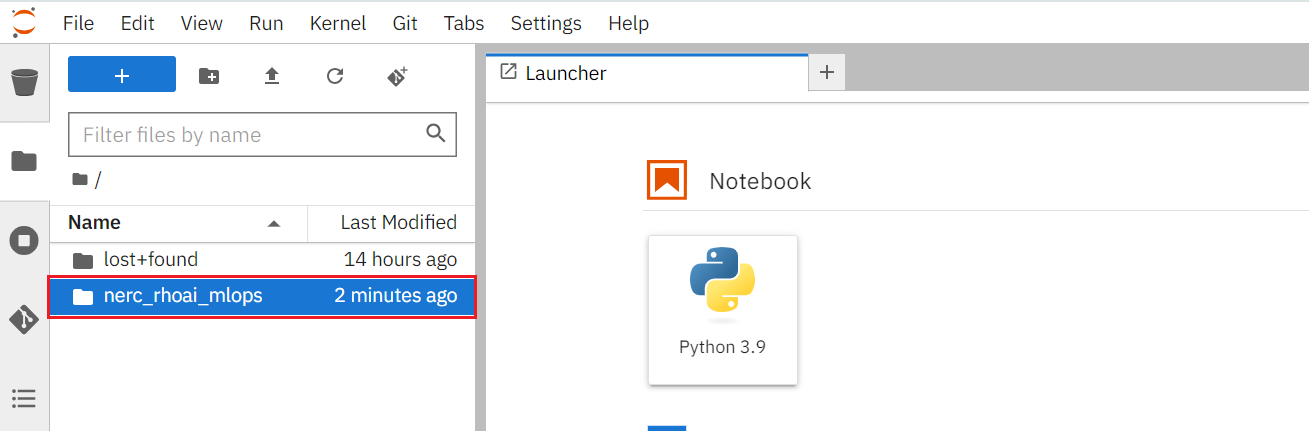
You will be able to find the newly-created folder named nerc_rhoai_mlops based on the Git repository name, as shown below:
Working with notebooks
What's a notebook?
A notebook is an environment where you have cells that can display formatted text, or code.
This is an empty cell:

And a cell where we have entered some Python code:

-
Code cells contain Python code that can be run interactively. It means that you can modify the code, then run it, but only for this cell, not for the whole content of the notebook! The code will not run on your computer or in the browser, but directly in the environment you are connected to NERC RHOAI.
-
To run a code cell, you simply select it (select the cell, or on the left side of it), and select the Run/Play button from the toolbar (you can also press
CTRL+Enterto run a cell, orShift+Enterto run the cell and automatically select the following one).
The Run button on the toolbar:

As you will see, you then get the result of the code that was run in that cell (if the code produces some output), as well as information on when this particular cell has been run.
When you save a notebook, the code as well as all the results are saved! So you can always reopen it to look at the results without having to run all the program again, while still having access to the code that produced this content.
More about Notebook
Notebooks are so named because they are just like a physical Notebook. It is exactly like if you were taking notes about your experiments (which you will do), along with the code itself, including any parameters you set. You see the output of the experiment inline (this is the result from a cell once it is run), along with all the notes you want to take (to do that, you can switch the cell type from the menu from Code to Markup).
Sample Jupyter Notebook files
In your Jupyter environment, you can navigate and select any Jupyter notebook files by double-clicking them in the file explorer on the left side. Double-click the notebook file to launch it. This action will open another tab in the content section of the environment, on the right.
Here, you can find three primary starter notebooks for setting up the intelligent application: 01_sandbox.ipynb, 02_model_training_basics.ipynb, 03_remote_inference_grpc.ipynb, and 04-remote_inference_rest.ipynb within the root folder path of nerc_rhoai_mlops.
You can click and run 01_sandbox.ipynb to verify the setup JupyterLab environment can run python code properly.
Also, you can find the "samples" folder within the root folder path of nerc_rhoai_mlops. For learning purposes, double-click on the "samples" folder under the newly-created folder named nerc_rhoai_mlops. Within the "samples" folder, you'll find some starter Jupyter notebook files: Intro.ipynb, Lorenz.ipynb, and gpu.ipynb. These files can be used to test basic JupyterLab functionalities. You can explore them at your own pace by running each of them individually. Please feel free to experiment, run the different cells, add some more code. You can do what you want - it is your environment, and there is no risk of breaking anything or impacting other users. This environment isolation is also a great advantage brought by NERC RHOAI.
How to get access to the NERC RHOAI Dashboard from JupyterLab Environment?
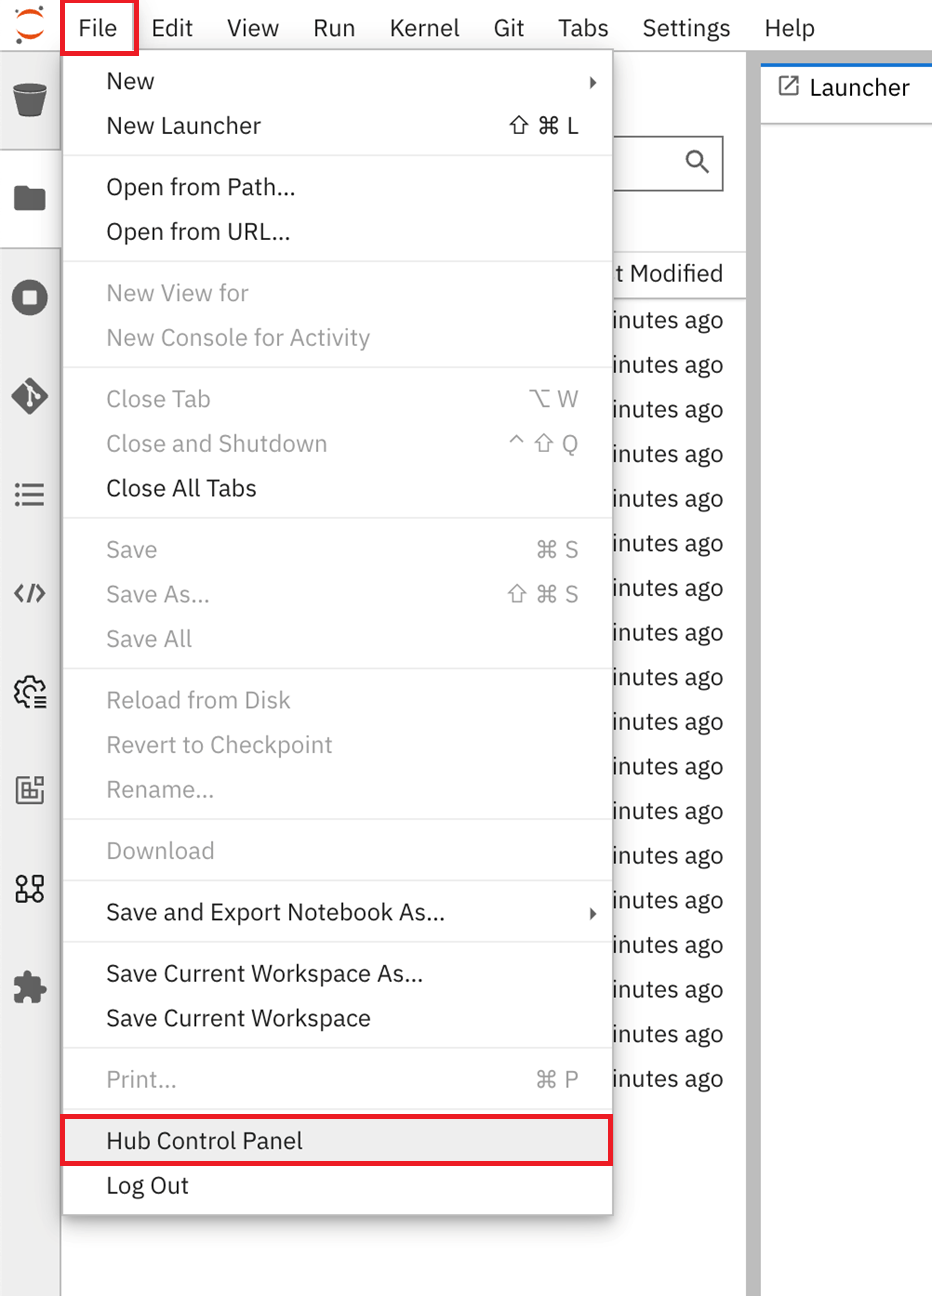
If you had closed the NERC RHOAI dashboard, you can access it from your currently opened JupyterLab IDE by clicking on File -> Hub Control Panel as shown below:
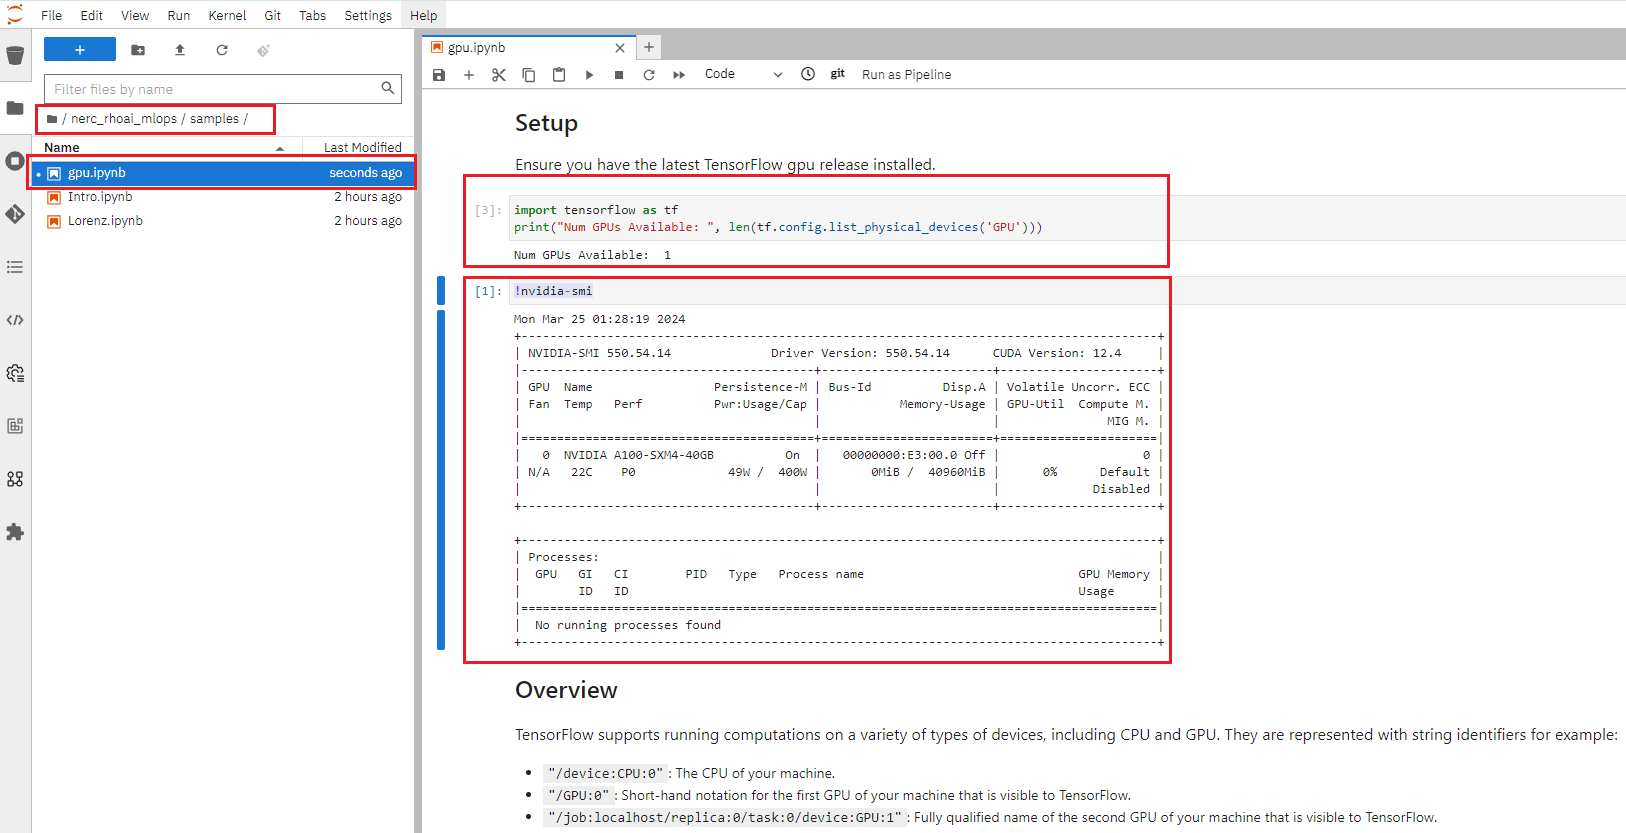
Testing for GPU Code
As we have setup the workbench specifing the desired Accelerator as NVIDIA V100 GPU and Number of accelerators: "1", we will be able to test GPU based code running gpu.ipynb notebook file as shown below:
Training a model
Within the root folder path of nerc_rhoai_mlops, find a sample Jupyter notebook file 02_model_training_basics.ipynb that demonstrates how to train a model within the NERC RHOAI. To run it you need to double click it and execute the "Run" button to run all notebook cells at once. This is used to train your model for "Basic classification of clothing images" by importing the publicly available Fashion MNIST dataset and using TensorFlow. This process will take some time to complete. At the end, it will generate and save the model my-model.keras within the root folder path of nerc_rhoai_mlops.
The Machine Learning Model File Hosted on A Bucket.
The model we are going to use is an object detection model that is able to isolate and recognize T-shirts, bottles, and hats in pictures. Although the process is globally the same one as what we have seen in the Training a model section, this model has already been trained as it takes a few hours with the help of a GPU to do it.
The resulting model has been saved in the ONNX format, an open standard for machine learning interoperability, which is one we can use with OpenVINO and RHOAI model serving.
In this tutorial, the fine-tuned model has been stored and is available for download on the NERC OpenStack Object Storage container, as described here. However, you can also set up your own S3 backend to store the model by using a script to configure local S3 storage (MinIO), as explained here.
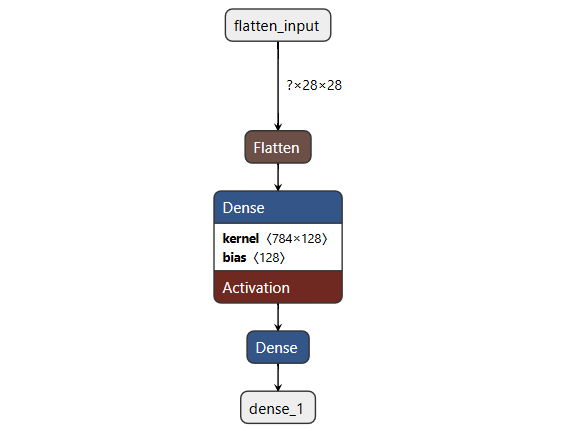
Visualizing the Machine Learning Model
You can use Netron, a cross-platform machine learning model visualization tool, to explore, analyze, and share the structure of your model by simply uploading a supported machine learning model file.
For example: