How to access, download, and analyze data for S3 usage
Prerequisites:
Prepare your Jupyter notebook server, you need to have:
- Select the correct data science project and create workbench, see Populate the data science project for more information.
Please ensure that you start your Jupyter notebook server with options as depicted in the following configuration screen. This screen provides you with the opportunity to select a notebook image and configure its options, including the Accelerator and Number of accelerators (GPUs).
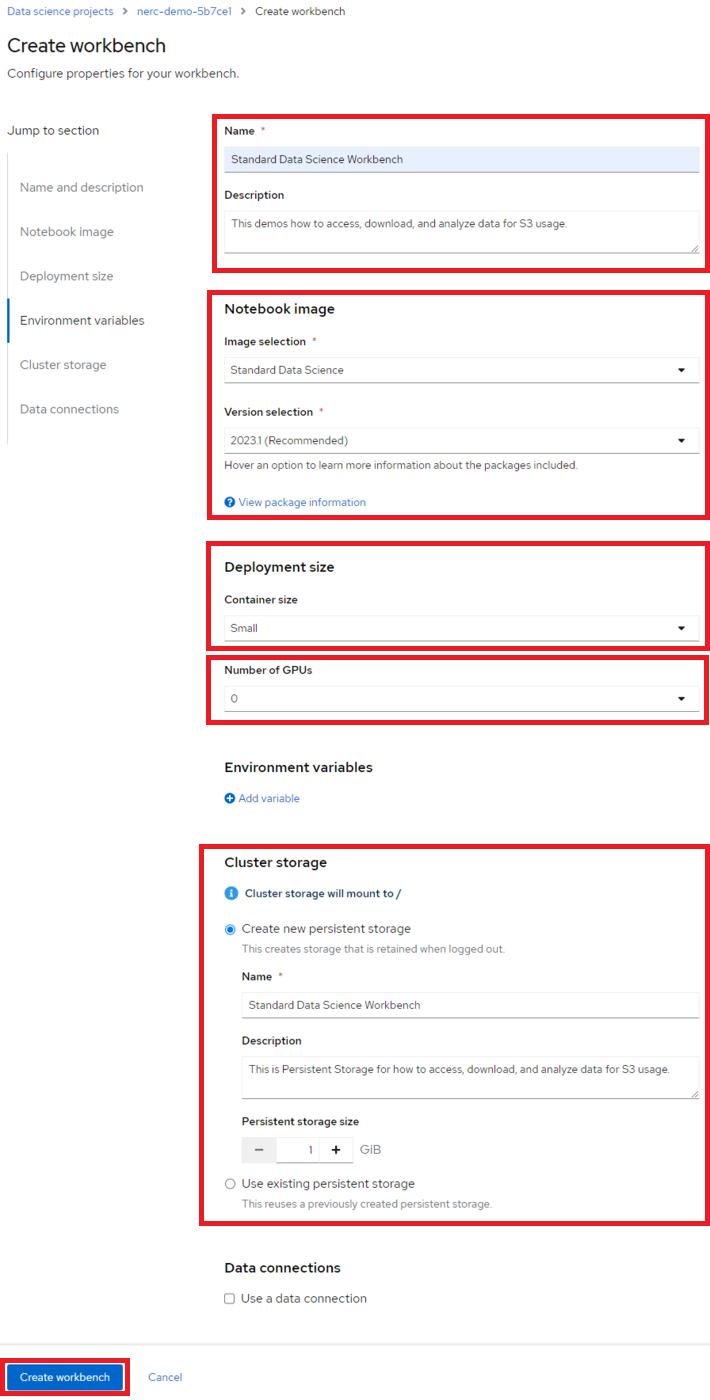
For our example project, let's name it "Standard Data Science Workbench". We'll select the Jupyter | Data Science | CPU | Python 3.12 image with Recommended Version (selected by default), choose a Deployment size of Small, Accelerator as None (no GPU is needed for this setup), and allocate a Cluster storage space of 1GB.
If this procedure is successful, you have started your Jupyter notebook server. When your workbench is ready and the status changes to Running, click the open icon ( ) next to your workbench's name, or click the workbench name directly to access your environment:

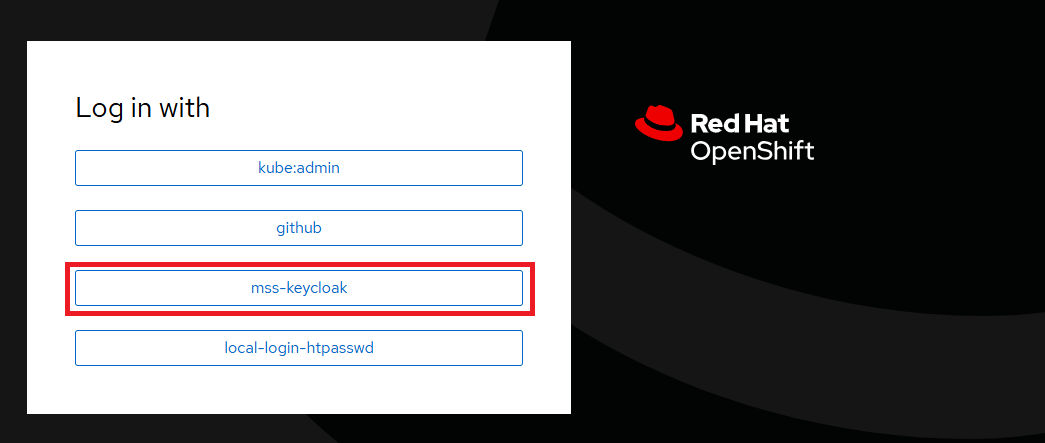
Once you have successfully authenticated by clicking "mss-keycloak" when prompted, as shown below:
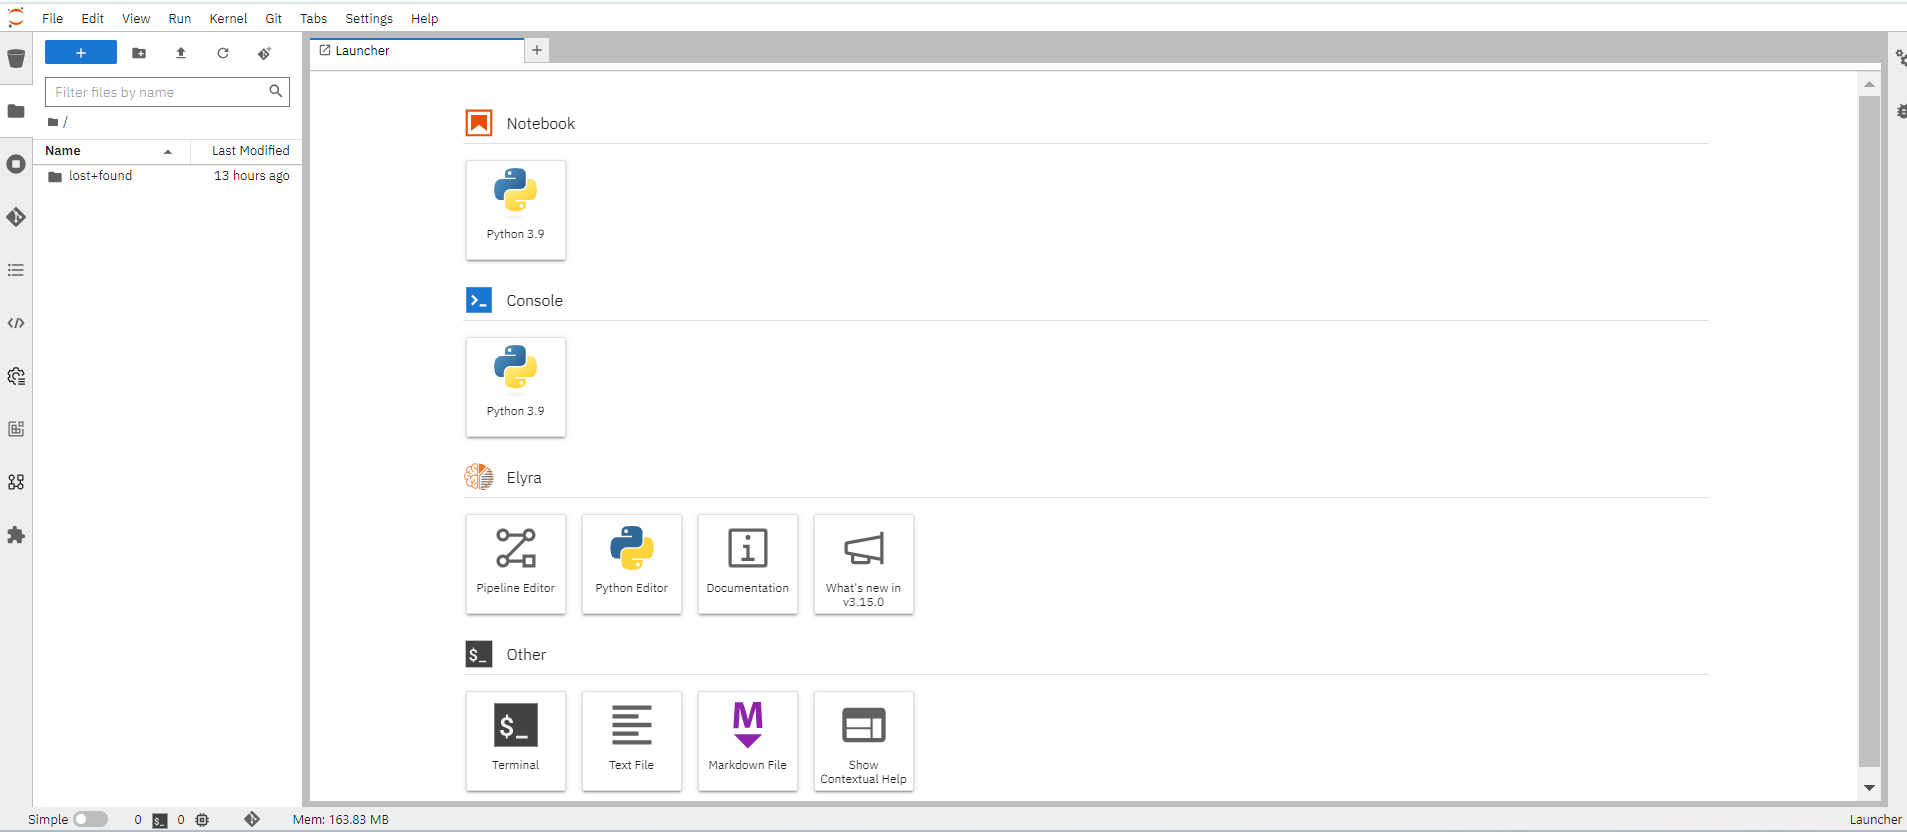
Next, you should see the NERC RHOAI JupyterLab Web Interface, as shown below:
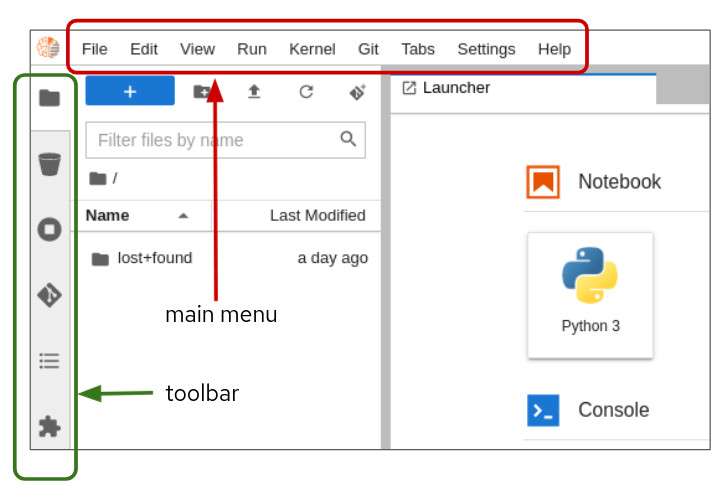
The Jupyter environment is currently empty. To begin, populate it with content using Git. On the left side of the navigation pane, locate the Name explorer panel, where you can create and manage your project directories.
Learn More About Working with Notebooks
For detailed guidance on using notebooks on NERC RHOAI JupyterLab, please refer to this documentation.
Clone a GitHub Repository
You can clone a Git repository in JupyterLab through the left-hand toolbar or the Git menu option in the main menu as shown below:
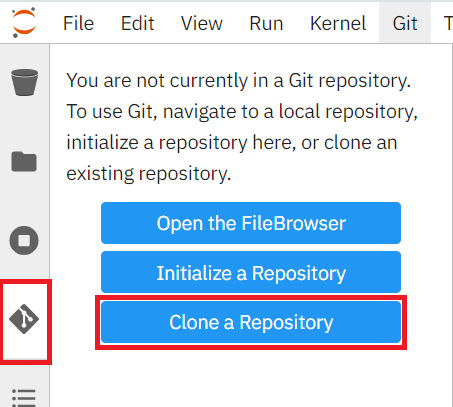
Let's clone a repository using the left-hand toolbar. Click on the Git icon, shown in below:

Then click on Clone a Repository as shown below:
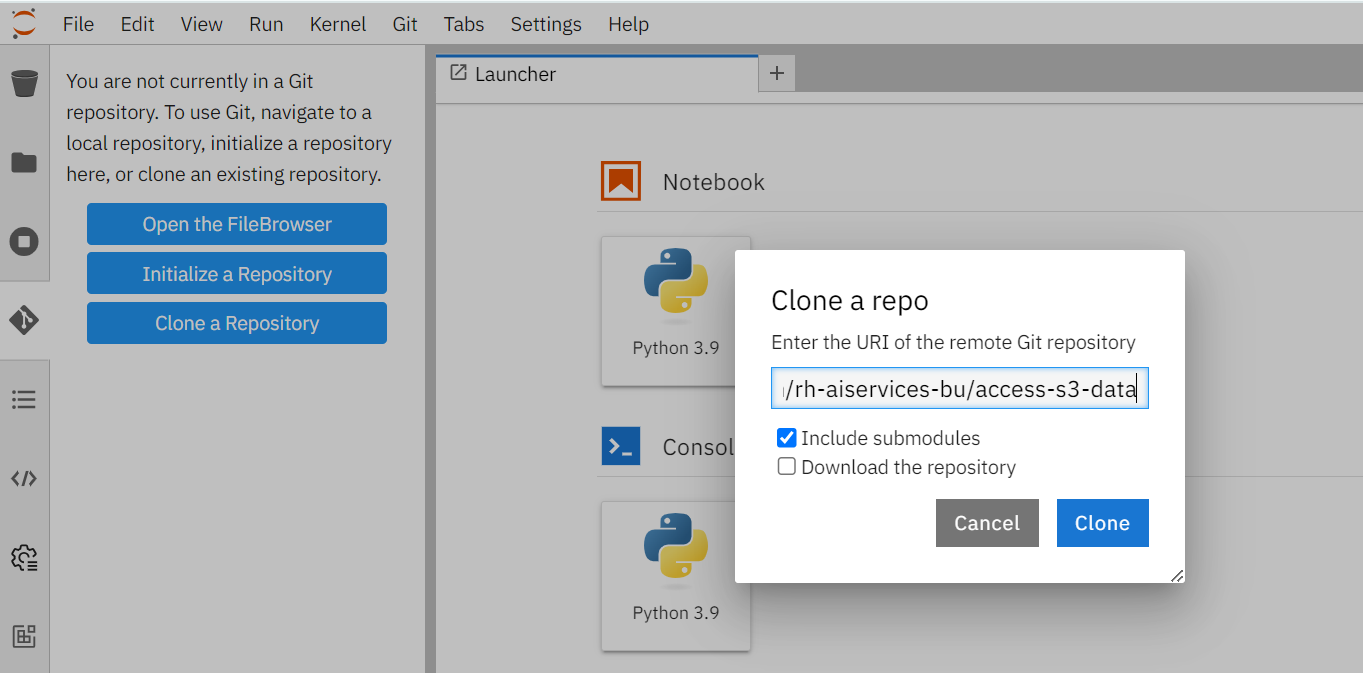
Enter the git repository URL, which points to the end-to-end ML workflows demo project i.e. https://github.com/rh-aiservices-bu/access-s3-data.
Then click Clone button, as shown below:
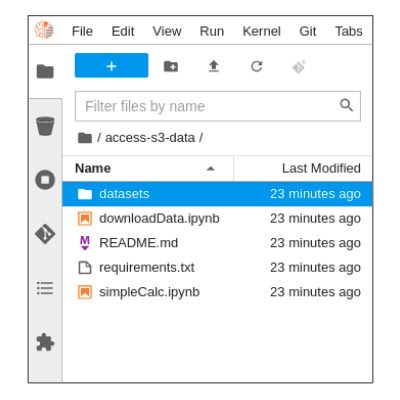
Cloning takes a few seconds, after which you can double-click and navigate to the newly-created folder i.e. access-s3-data that contains your cloned Git repository.
You will be able to find the newly-created folder named access-s3-data based on the Git repository name, as shown below:
Access and download S3 data
In the Name menu, double-click the downloadData.ipynb notebook in the file explorer on the left side to launch it. This action will open another tab in the content section of the environment, on the right.
Run each cell in the notebook, using the Shift-Enter key combination, and pay attention to the execution results. Using this notebook, we will:
-
Make a connection to an AWS S3 storage bucket
-
Download a CSV file into the "datasets" folder
-
Rename the downloaded CSV file to "newtruckdata.csv"
View your new CSV file
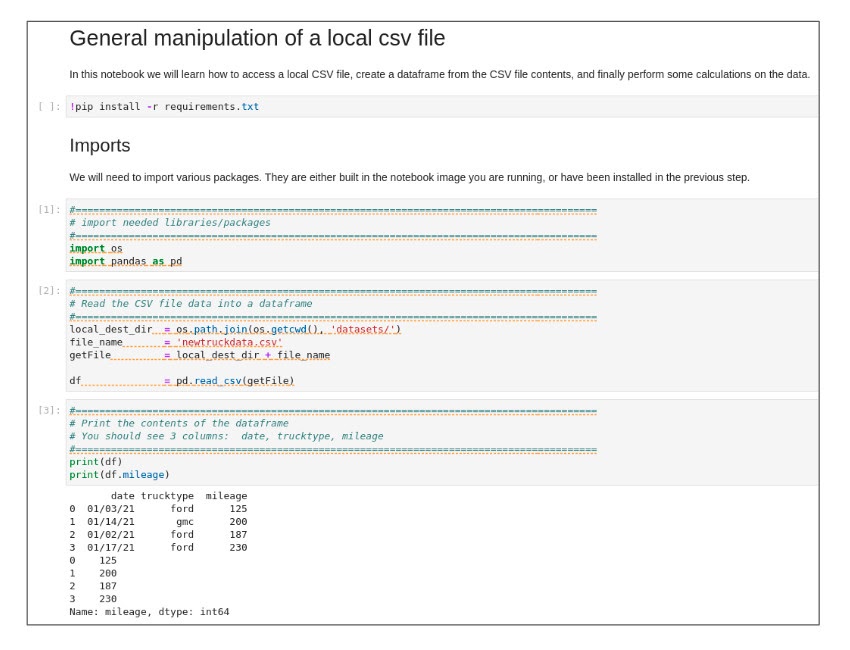
Inside the "datasets" directory, double-click the "newtruckdata.csv" file. File contents should appear as shown below:
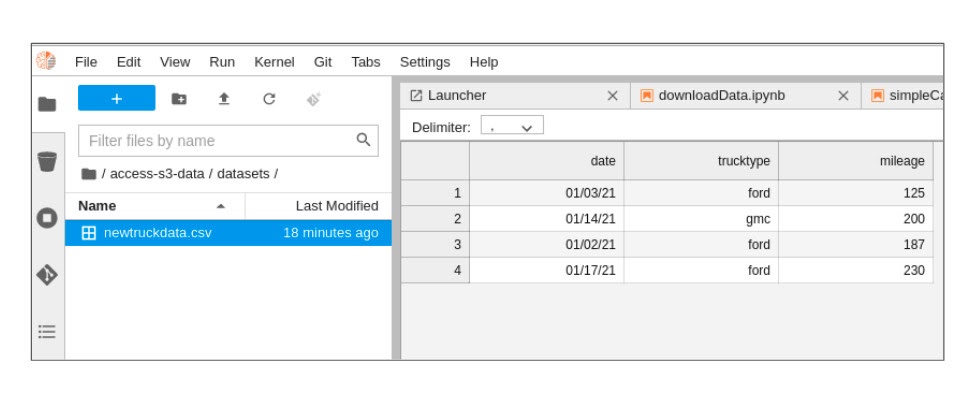
The file contains the data you will analyze and perform some analytics.
Getting ready to run analysis on your new CSV file
Since you now have data, you can open the next Jupyter notebook, simpleCalc.ipynb, and perform the following operations:
-
Create a dataframe.
-
Perform simple total and average calculations.
-
Print the calculation results.
Analyzing your S3 data access run results
Double-click the simpleCalc.ipynb Python file. When you execute the cells in the notebook, results appear like the ones shown below:
The cells in the above figure show the mileage of four vehicles. In the next cell, we calculate total mileage, total rows (number of vehicles) and the average mileage for all vehicles. Execute the "Perform Calculations" cell to see basic calculations performed on the data as shown below:
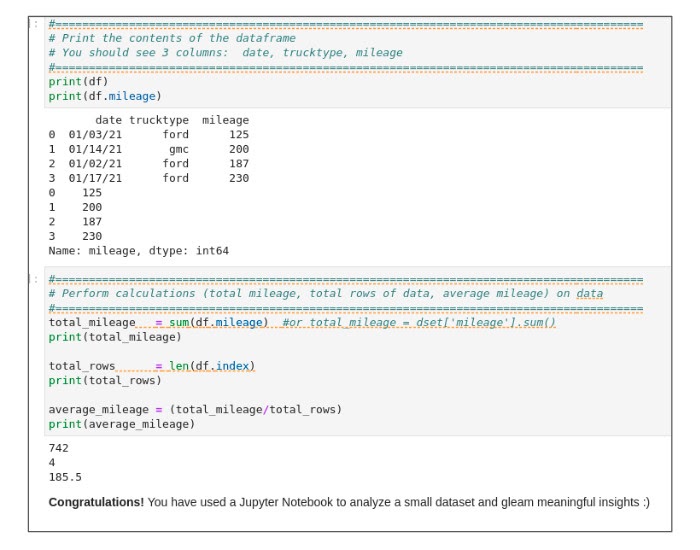
Calculations show the total mileage as 742, for four vehicles, and an average mileage of 185.5.
Success! You have added analyzed your run results using the NERC RHOAI.
Working with data in an S3-compatible object store
For detailed instructions on how to connect to and use data from an S3-compatible object store in your workbench, see this Red Hat documentation: Working with Data in an S3-Compatible Object Store.