Web Console Overview
The NERC's OpenShift Container Platform (OCP) provides a web-based console that enables users to perform common management tasks such as building and deploying applications. It now features a single unified view within the OpenShift console, offering a more comprehensive and cohesive interface for all tasks. This enhancement simplifies navigation and allows developers and administrators to manage their environments seamlessly from one centralized dashboard.
You can find it at https://console.apps.shift.nerc.mghpcc.org.
Very Important: What is the Web Console URL for NERC Academic (EDU) OpenShift?
Access the NERC Academic (EDU) OpenShift web console at: https://console.apps.edu.nerc.mghpcc.org
The web console provides tools to access and manage your application code and data.
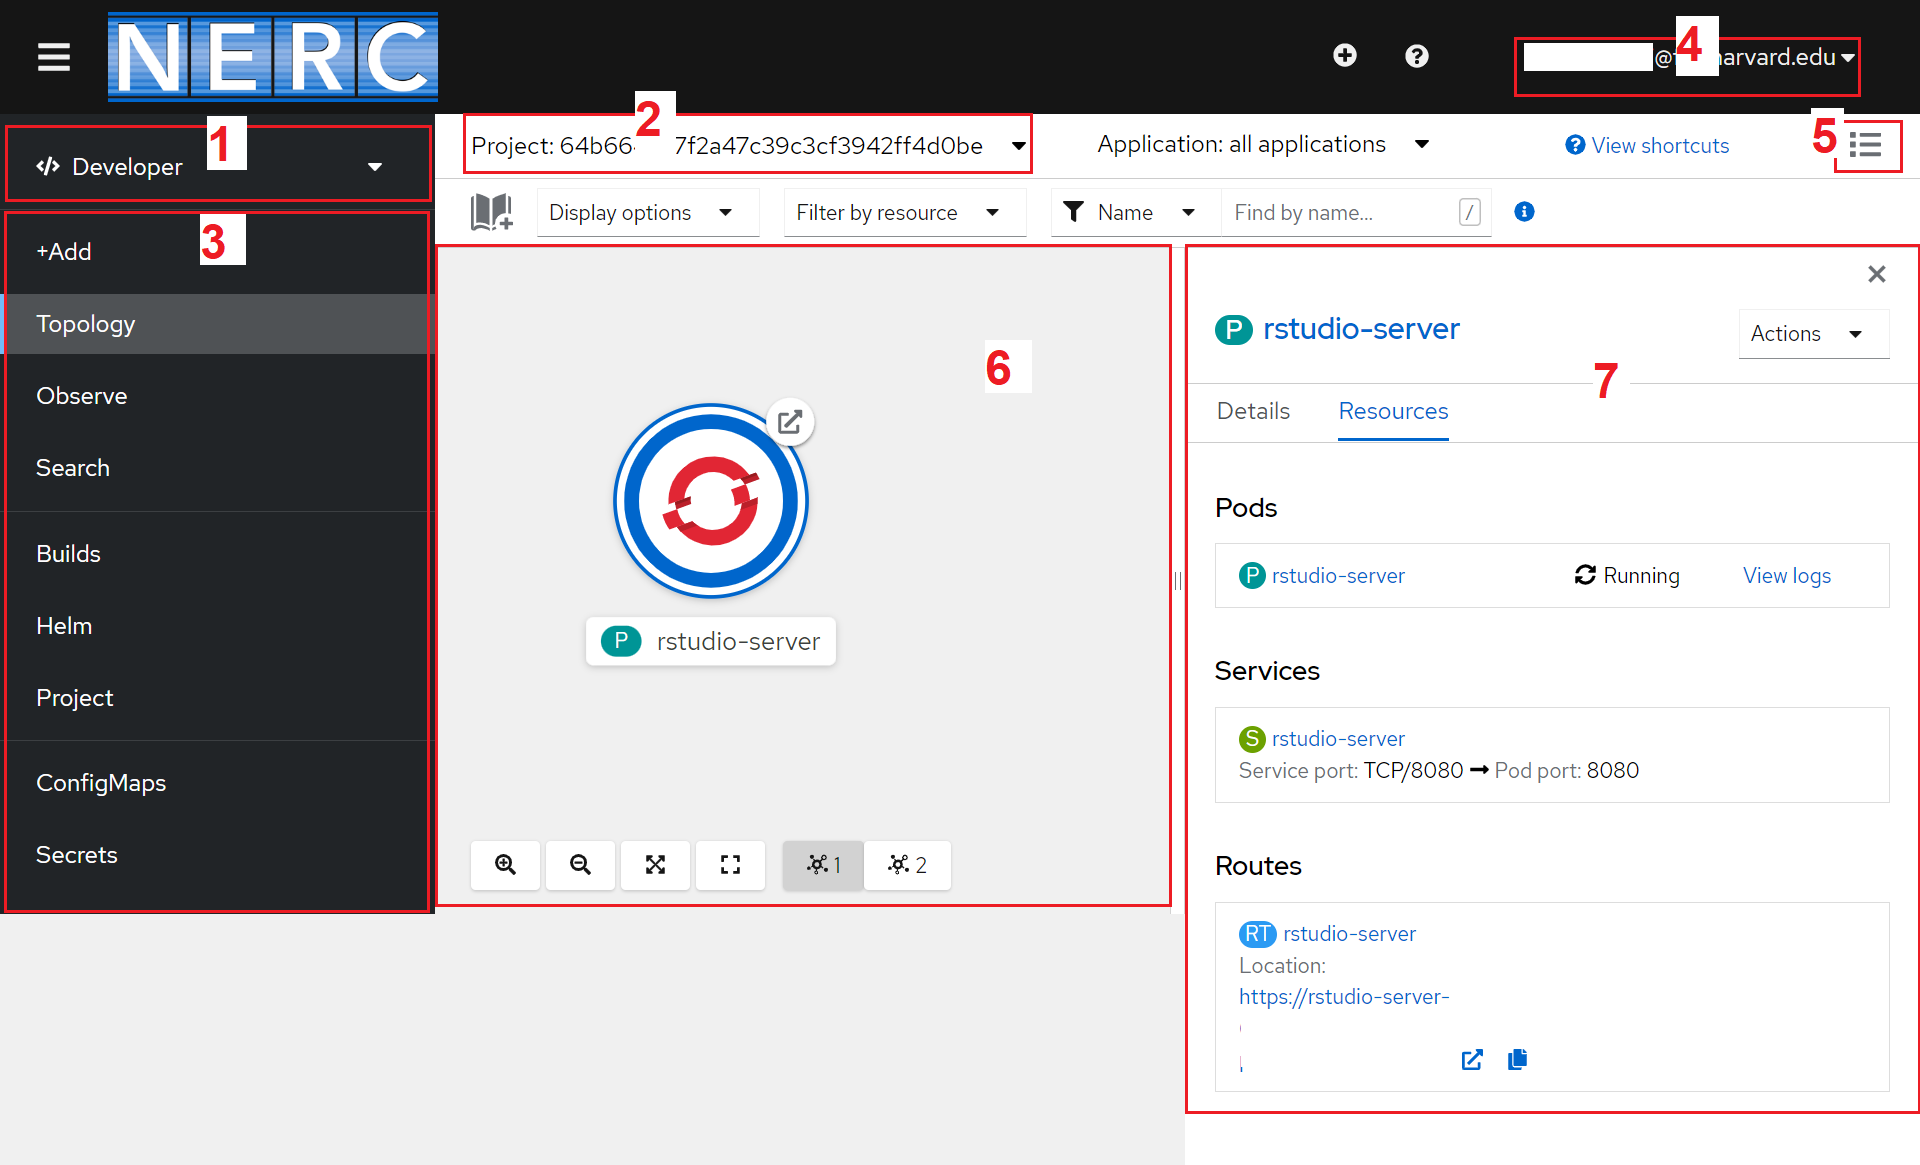
Below is a sample screenshot of the web interface with labels describing different sections of the NERC's OpenShift Web Console:
-
Navigation Menu - Menu options to access different tools and settings for a project. The list will change depending on which Perspective view you are in.
-
Project List - Drop-down to select a different project. Based on user's active and approved resource allocations this projects list will be updated.
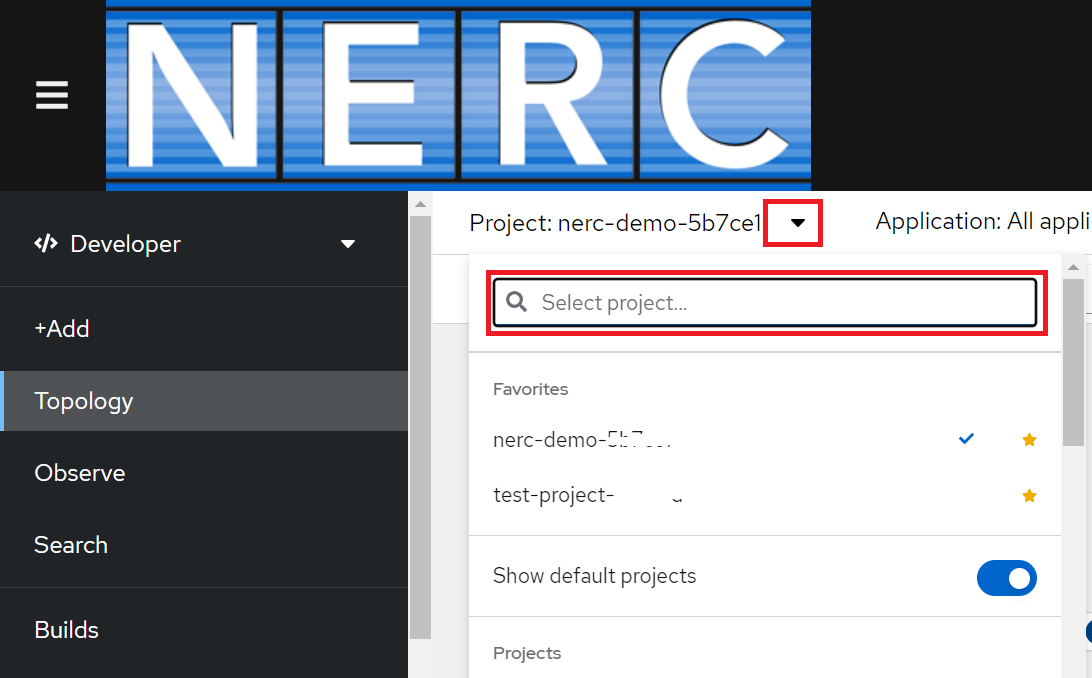
This allows you to view the overview of the currently selected project from the drop-down list and also details about it including resource utilization and resource quotas, as shown below:
Important Note
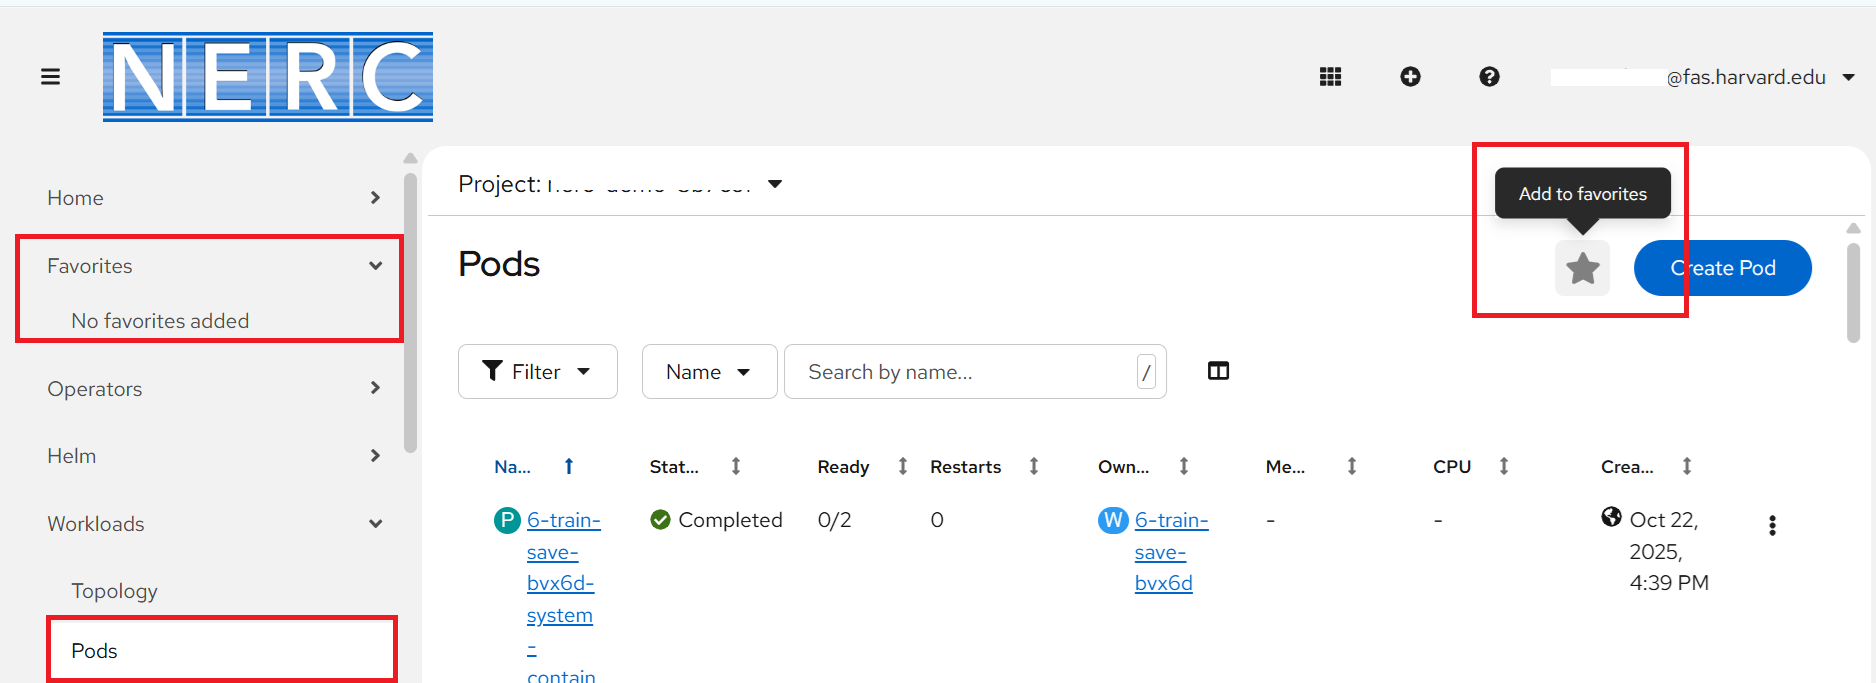
You can identify the currently selected project with tick mark and also you can click on star icon to keep the project under your Favorites list:

-
User Preferences - Shown the option to get and copy the OpenShift Command Line oc login command and set your individual console preferences including default views, language, import settings, and more.
-
View Switcher - This three dot menu is used to switch between List View and Graph view of all your applications.
-
Main Panel - Displays basic application information. Clicking on the application names in the main panel expands the Details Panel (6).
-
Details Panel - Displays additional information about the application selected from the Main Panel. This includes detailed information about the running application, applications builds, routes, and more. Tabs at the top of this panel will change the view to show additional information such as Details and Resources.
Navigation Menu
On the left side of the navigation pane, the web console provides a comprehensive set of tools for managing your projects and applications.
Home
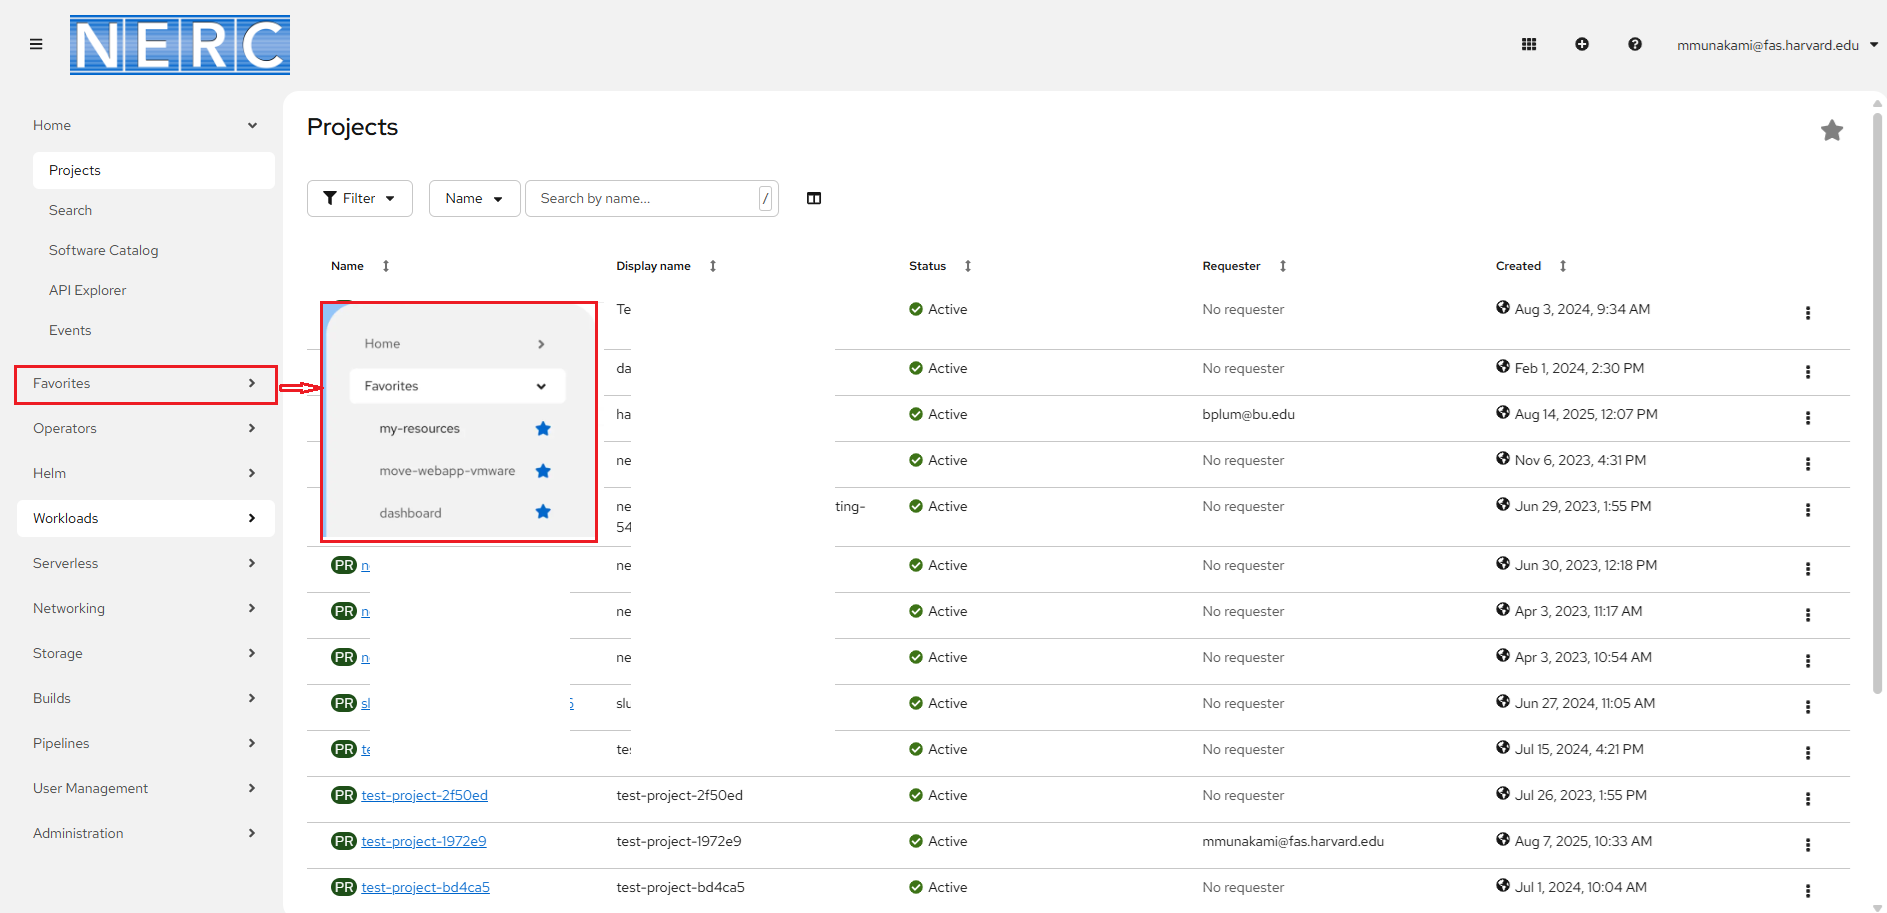
Projects
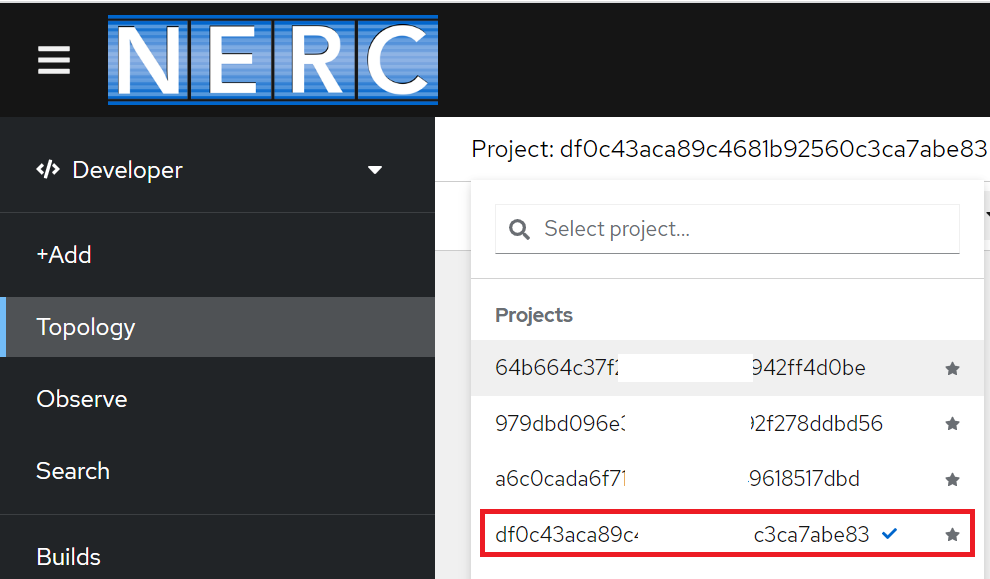
Clicking on the Home -> Projects menu which is displayed near the top left side will show the list of projects you are in. You can search and select the project by clicking on the project name in that list as shown below:
Search
Clicking on the Home -> Search menu allows you to search any resources based on search criteria like Label or Name.
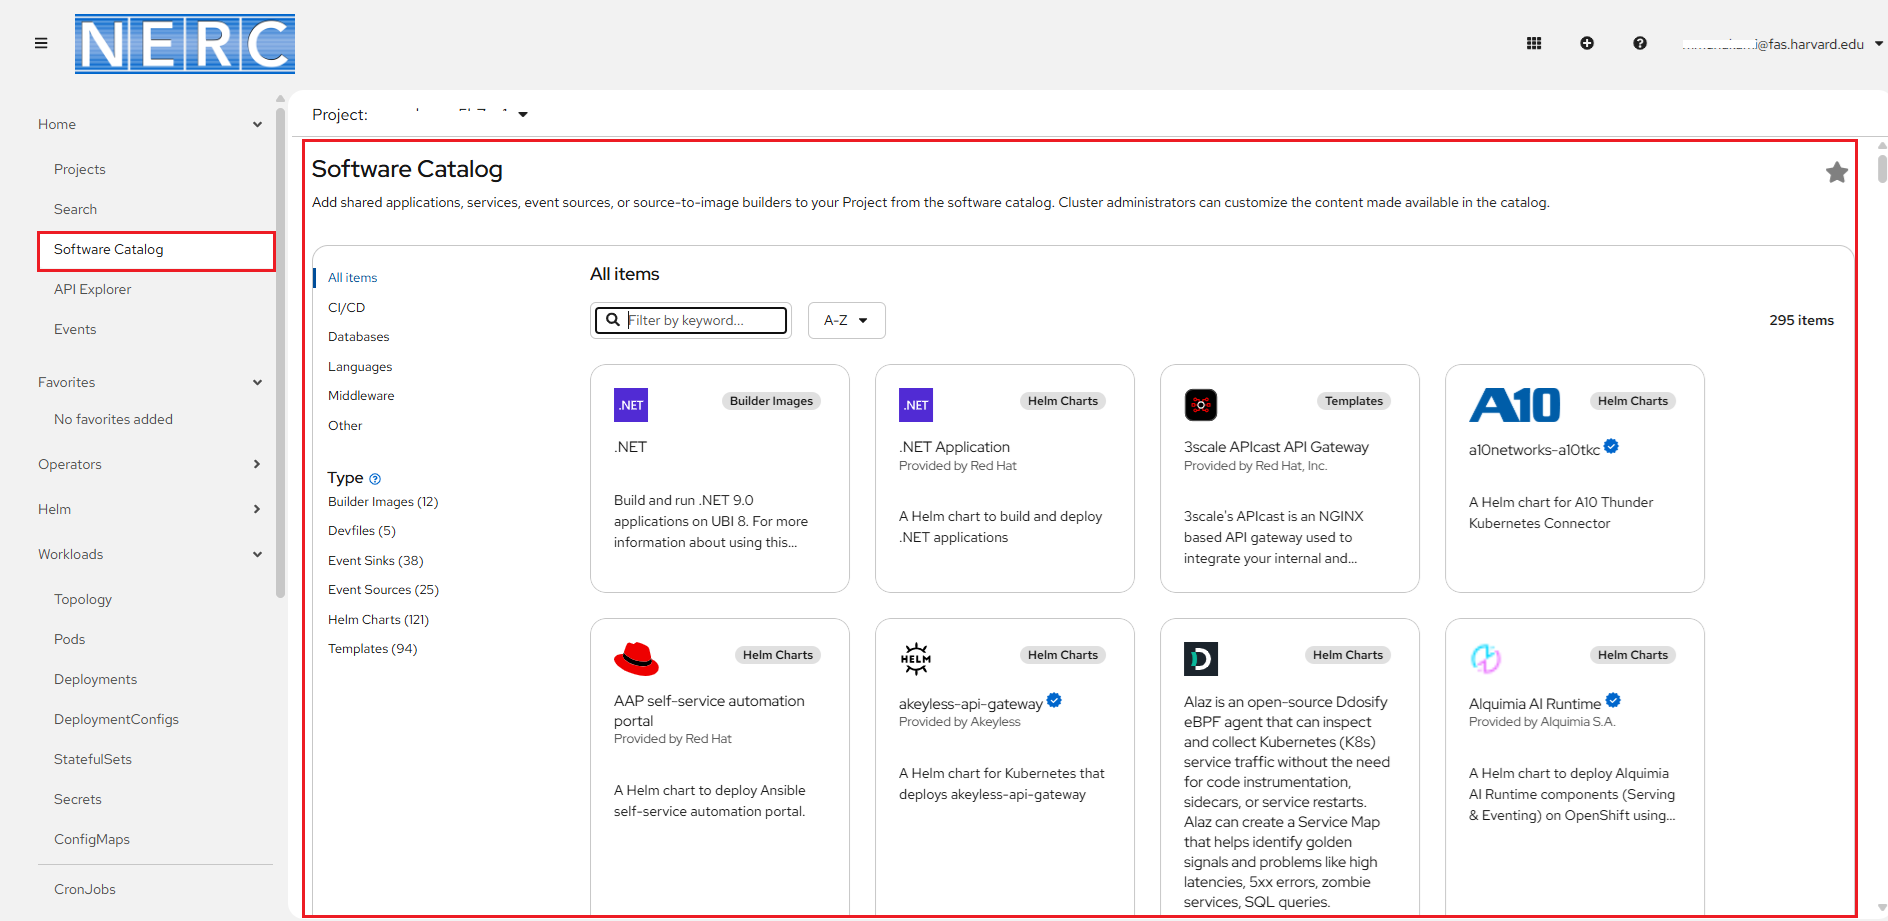
Software Catalog
Easily discover, explore, and deploy tools from a centralized catalog built to streamline your workflow
-
Centralizes all available software for faster discovery and access.
-
Improved categorization for easier browsing.
-
Supports consistent deployment flows.
Events
Clicking on the Home -> Events menu provides you with a Dashboard to view the resource usage and also other metrics and events that occured on your project. Here you can identify, monitor, and inspect the usage of Memory, CPU, Network, and Storage in your project.
Favorites
Pin frequently used items to the top for quick access whenever you need them.
-
Reduce time spent searching for commonly used pages and resources.
-
Customize the interface to match your personal workflow.
Helm
You can enable the Helm Charts here. Helm Charts is the pacakge manager that help to easily manage definitions, installations and upgrades of you complex application. It also shows catalog of all available helm charts for you to use by installing them.
Workloads
Topology
The Topology view in the the web console provides a visual representation of all the applications within a project, their build status, and the components and services associated with them. If you have no workloads or applications in the project, the Topology view displays the available options to create applications.
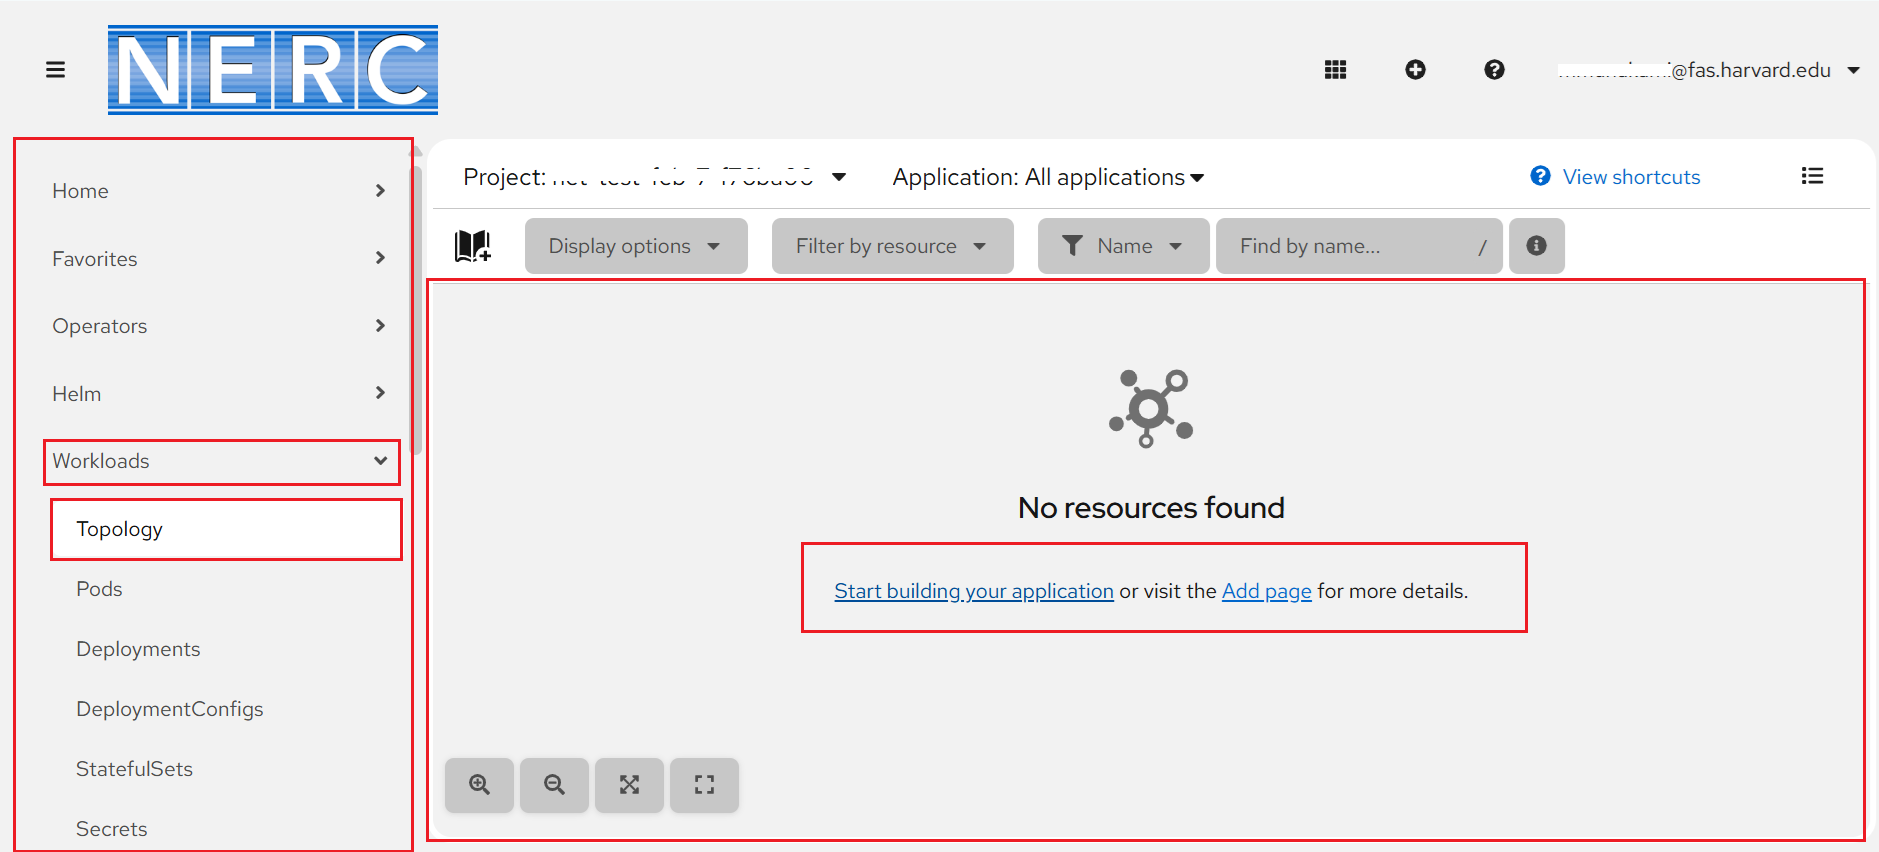
If you have existing workloads, the Topology view graphically displays your workload nodes. The Topology view provides you the option to monitor your applications using the List view. Use the List view icon (![]() ) to see a list of all your applications and use the Graph view icon (
) to see a list of all your applications and use the Graph view icon (![]() ) to switch back to the graph view.To read more about how to view the topology of your application please read this official documentation from Red Hat.
) to switch back to the graph view.To read more about how to view the topology of your application please read this official documentation from Red Hat.
Secrets
This allows you to view or create Secrets that allows to inject sensitive data into your application as files or environment variables.
ConfigMaps
This menu allows you to view or create a new ConfigMap by entering manually YAML or JSON definitions, or by dragging and dropping a file into the editor.
Storage
Read more about Storage here.
Builds
This menu provides tools for building and deploying applications. You can use it to create and manage build configurations using YAML syntax, as well as view the status and logs of your builds.
Administration
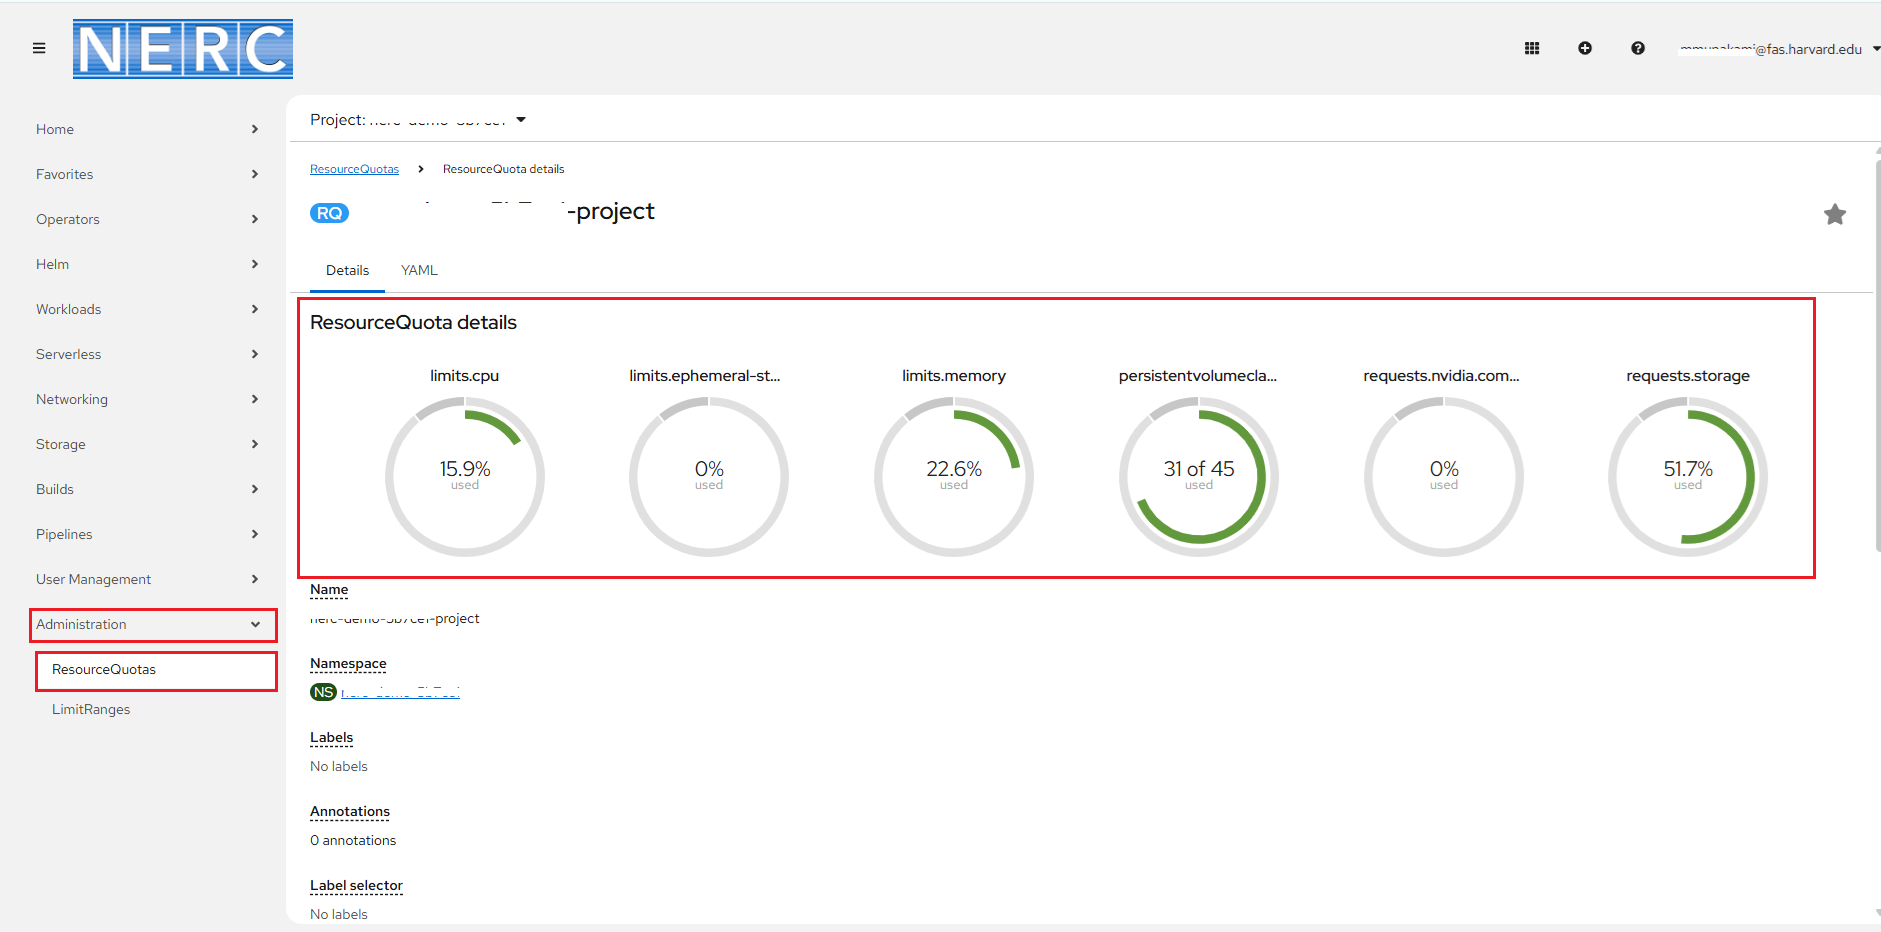
Resource Quotas
You can also view the resource quota for your project in the web console by navigating to Administration -> ResourceQuotas, as shown below:
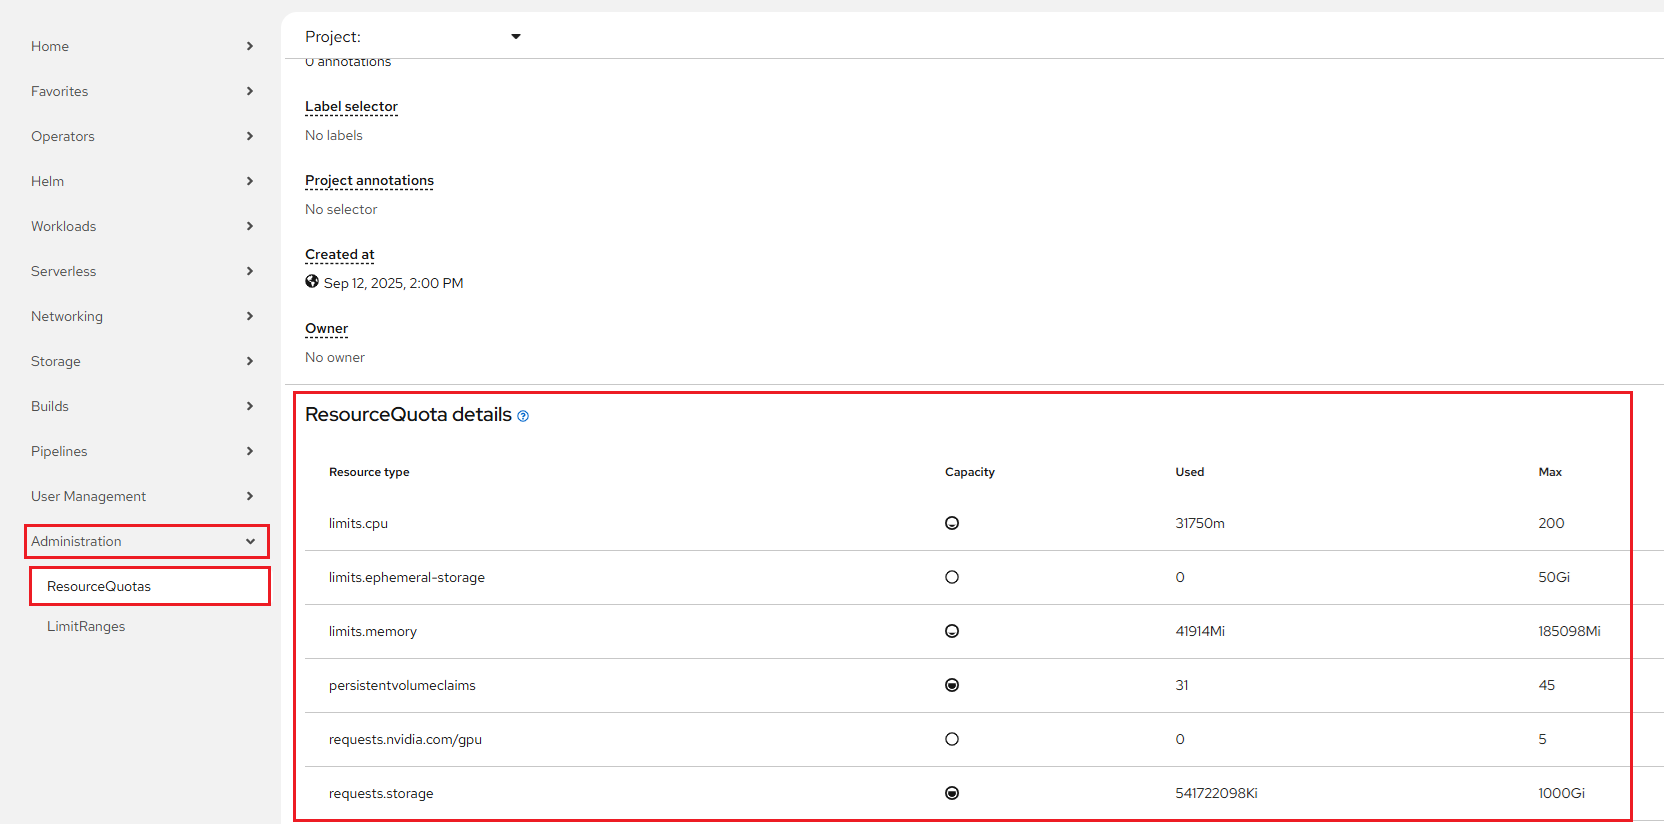
If you scroll down to the Resource Quota Details section for the pods resource type, you can view the used and maximum resources as shown below:
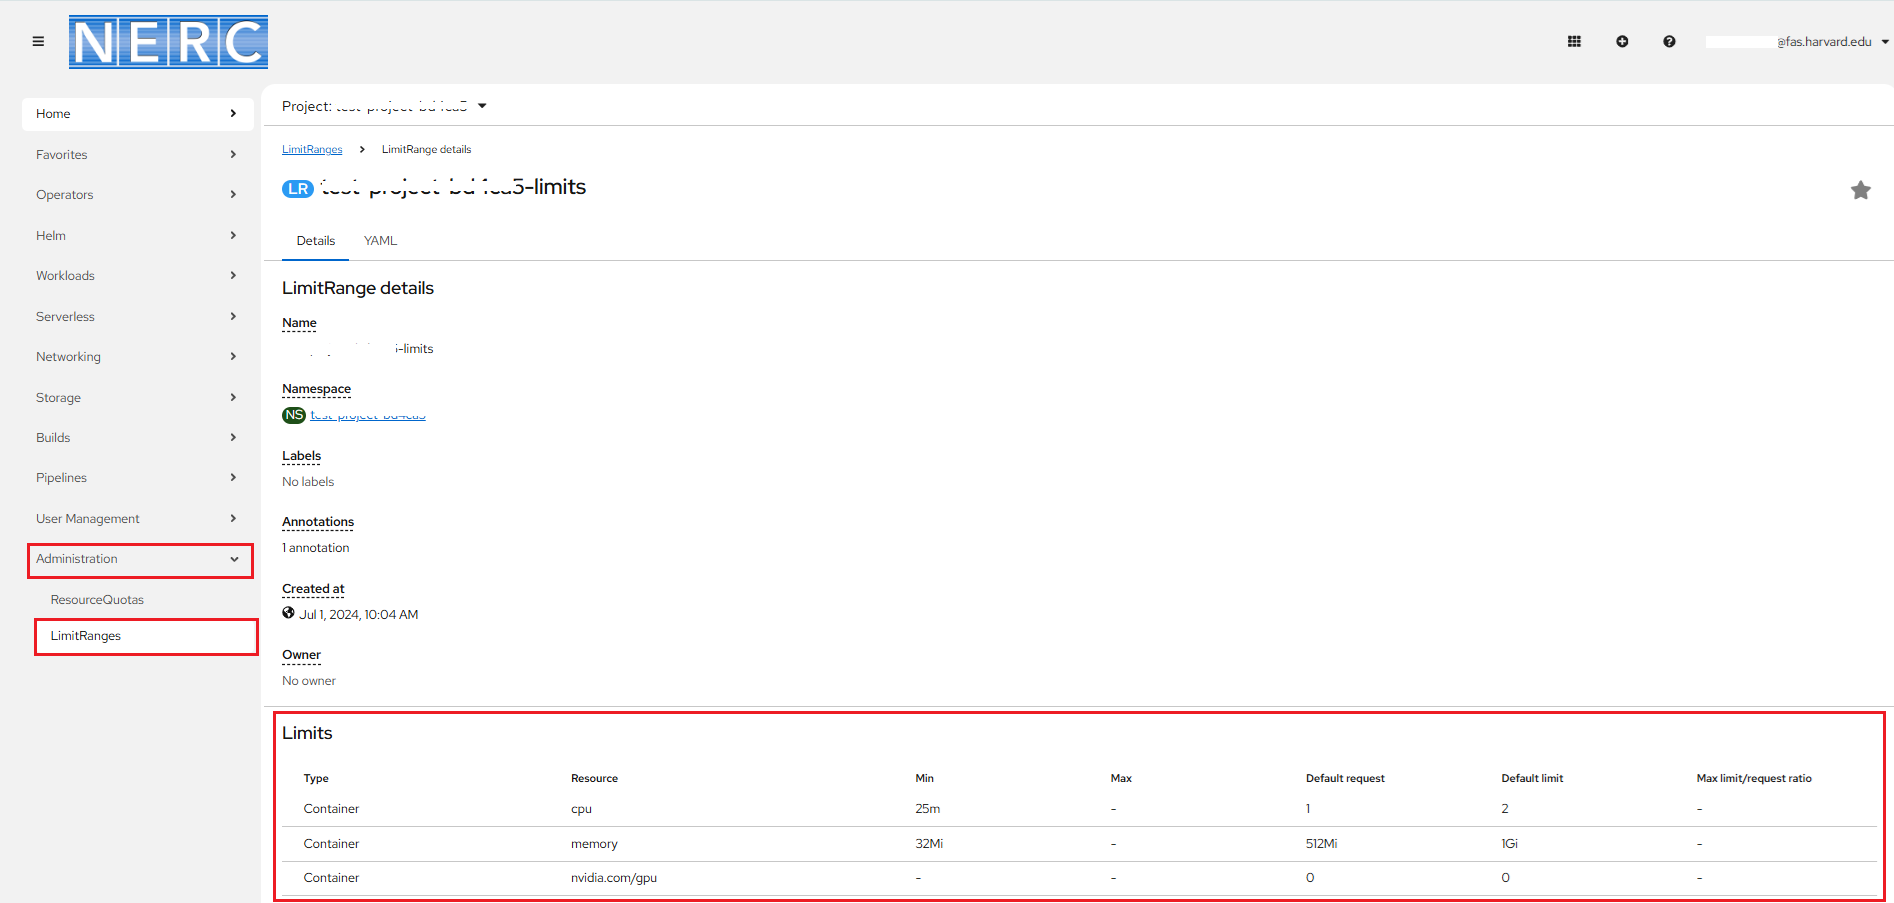
Limit Ranges
You can also be able to view the current limit range for your project by going into the Administration -> LimitRange menu as shown below: