Test the Model in the NERC RHOAI
Now that the model server is ready to receive requests, we can test it.
How to get access to the NERC RHOAI Dashboard from JupyterLab Environment?
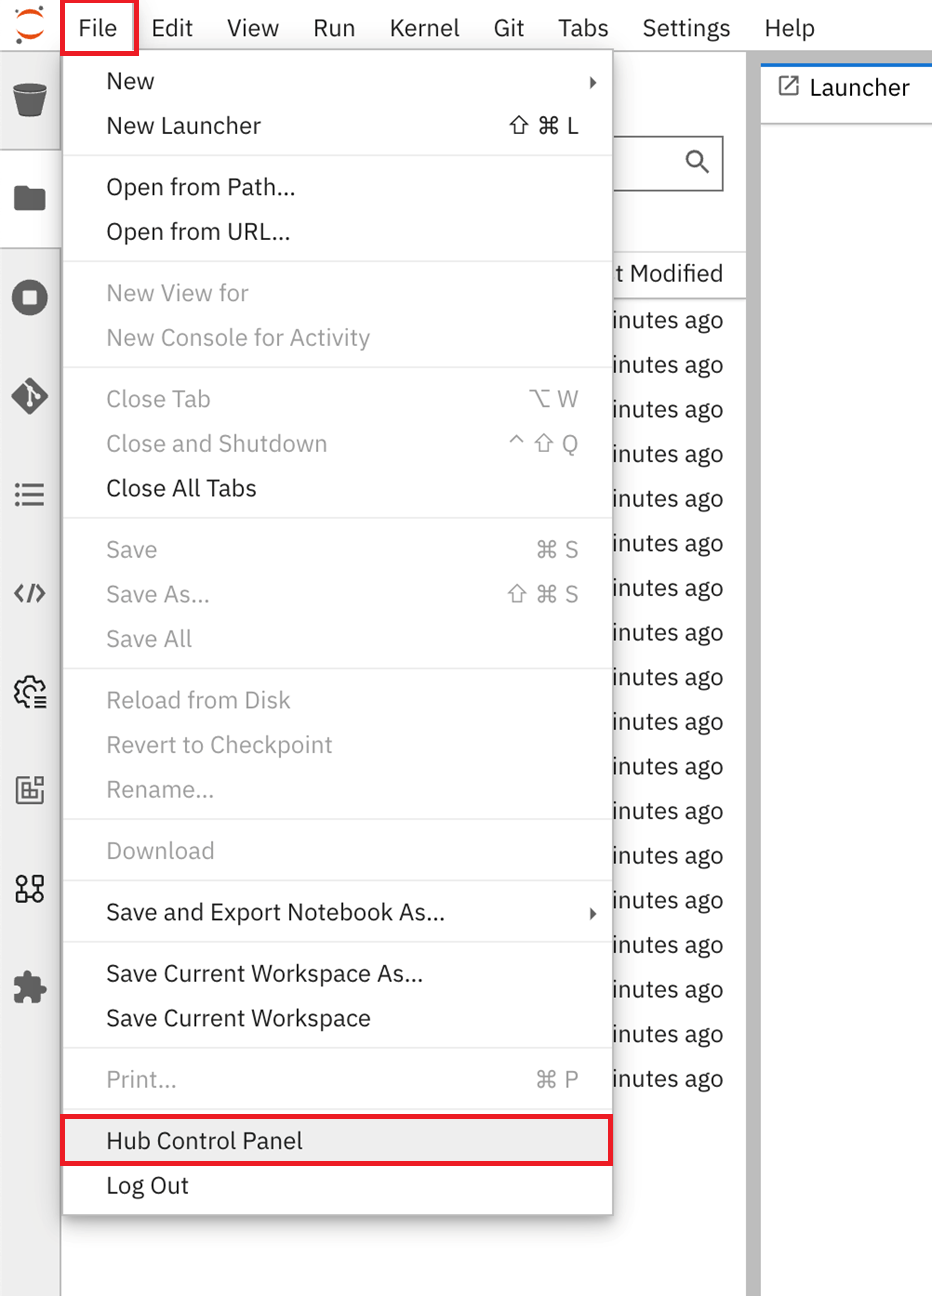
If you had closed the NERC RHOAI dashboard, you can access it from your currently opened JupyterLab IDE by clicking on File -> Hub Control Panel as shown below:
Using the Model Server Inference Endpoint
As described here, once your model is successfully deployed using Models, the model is accessible through the inference API endpoints as shown below:
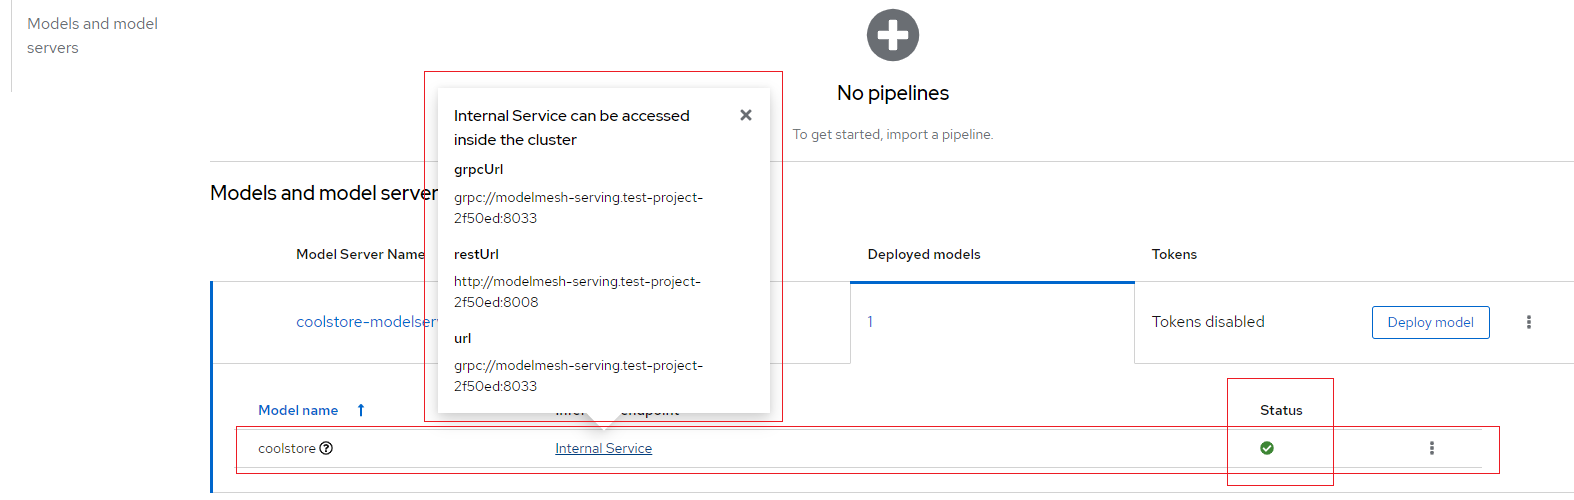
The Inference endpoint field contains an Internal Service link, click the link to open a popup that shows the URL details, and then take note of the grpcUrl and restUrl values.
Using the model server to do an inference using gRPC
-
In your project in JupyterLab, open the notebook
03_remote_inference_grpc.ipynband follow the instructions to see how the model can be queried. -
Update the
grpc_urlwith your own grpcUrl value as previously noted.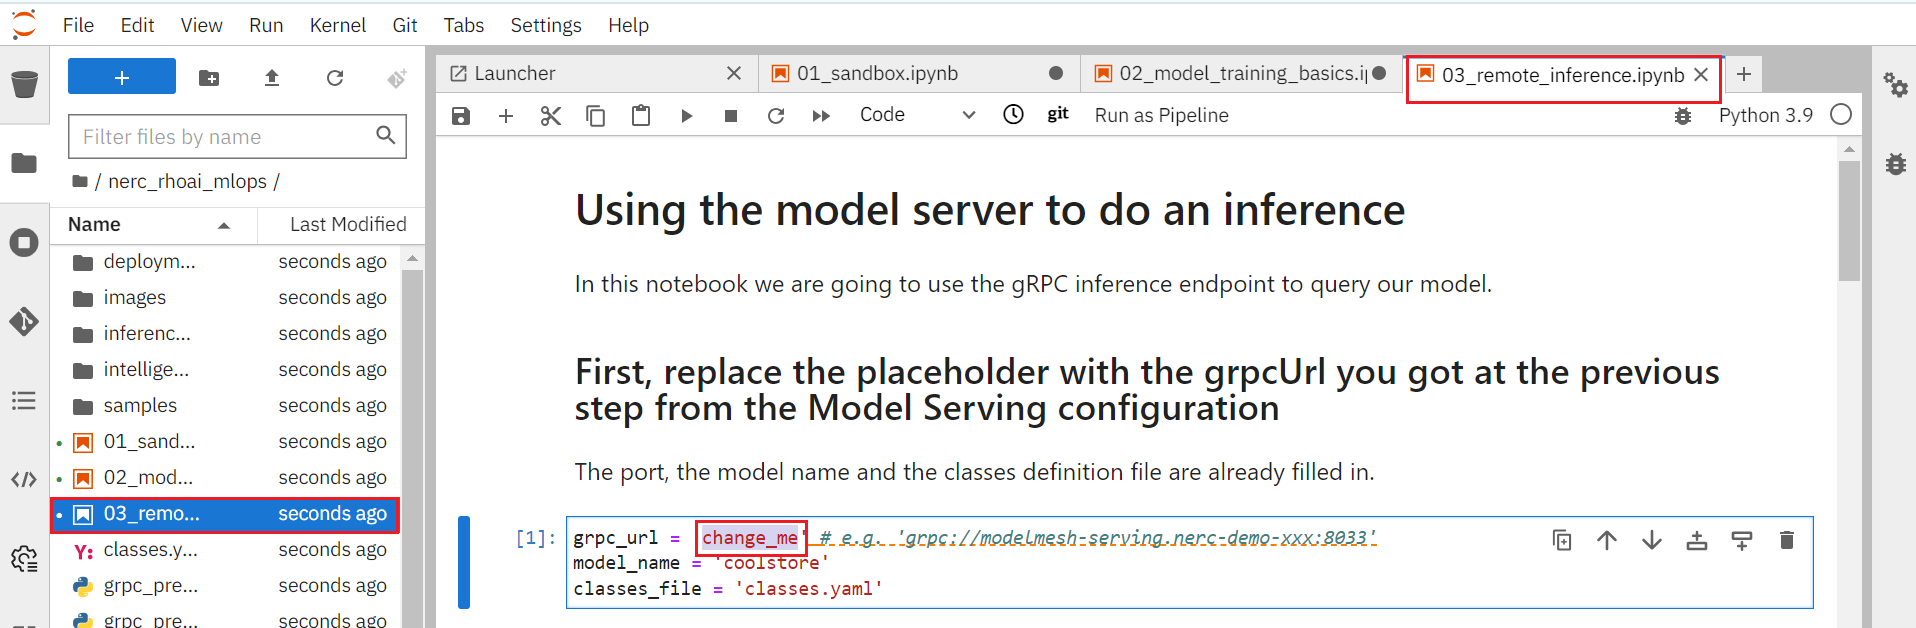
-
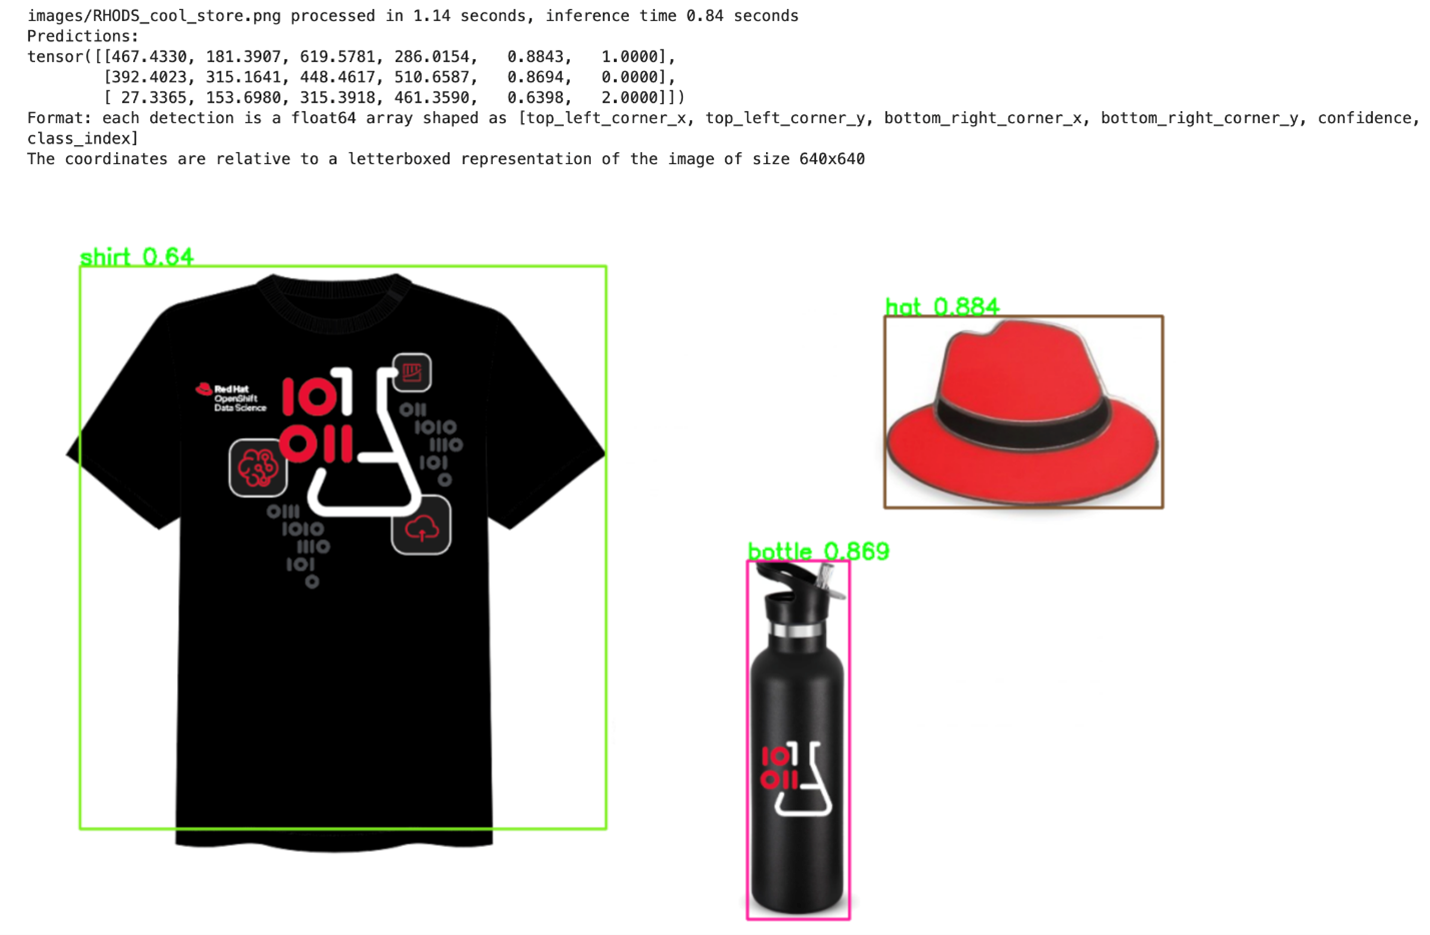
Once you've completed the notebook's instructions, the object detection model can isolate and recognize T-shirts, bottles, and hats in pictures, as shown below:
Using the model server to do an inference using REST
-
In your project in JupyterLab, open the notebook
04-remote_inference_rest.ipynband follow the instructions to see how the model can be queried. -
Update the
rest_urlwith the restUrl as previously noted.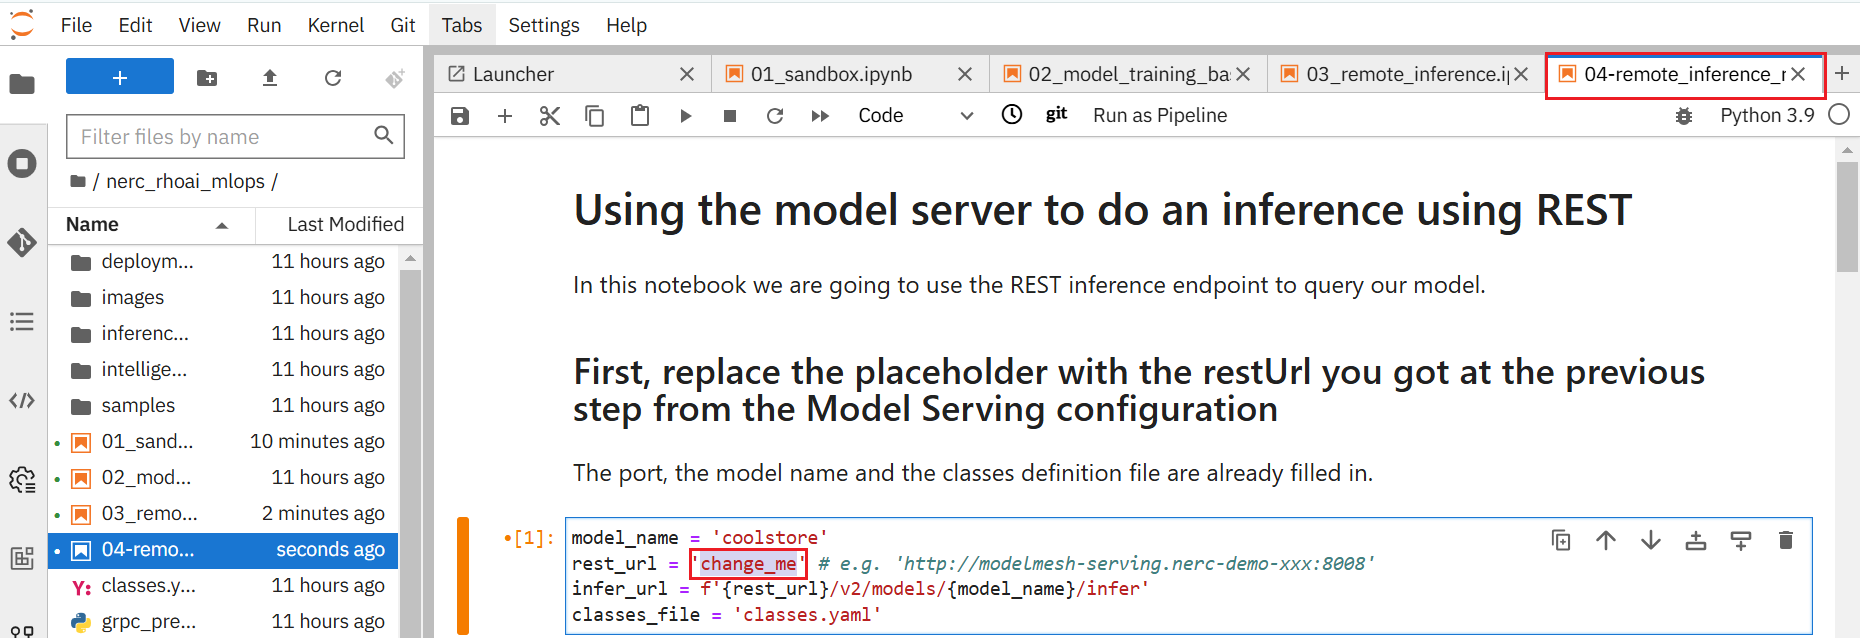
-
Once you've completed the notebook's instructions, the object detection model can isolate and recognize T-shirts, bottles, and hats in pictures, as shown below:
Building and deploying an intelligent application
The application we are going to deploy is a simple example of how you can add an intelligent feature powered by AI/ML to an application. It is a webapp that you can use on your phone to discover coupons on various items you can see in a store, in an augmented reality way.
Architecture
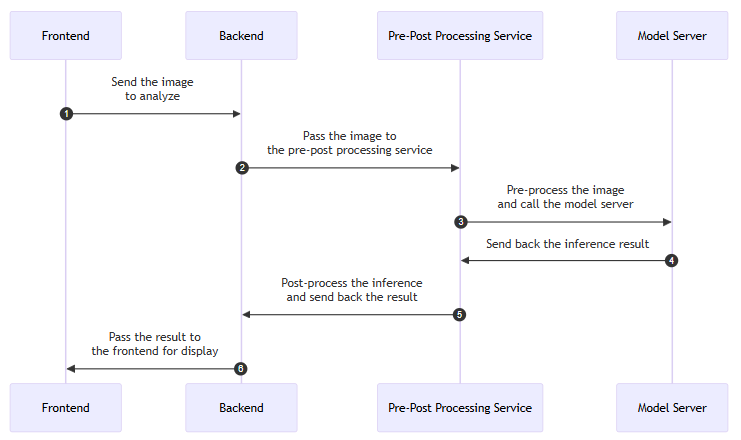
The different components of this intelligent application are:
• The Frontend: a React application, typically running in your phone's browser or a web browser on your computer.
• The Backend: a NodeJS server, serving the application and relaying API calls,
• The Pre-Post Processing Service: a Python FastAPI service, doing the image pre-processing, calling the model server API, and doing the post-processing before sending the results back.
• The Model Server: the RHOAI component serving the model as an API to do the inference.
Application Workflow Steps
-
Pass the image to the pre-post processing service
-
Pre-process the image and call the model server
-
Send back the inference result
-
Post-process the inference and send back the result
-
Pass the result to the frontend for display
Deploy the Application on NERC OpenShift
The deployment of the application is really easy, as we already created for you the necessary YAML files. They are included in the Git project we used for this example project. You can find them in the deployment folder inside your JupyterLab environment, or directly here.
To deploy the Pre-Post Processing Service service and the Application:
-
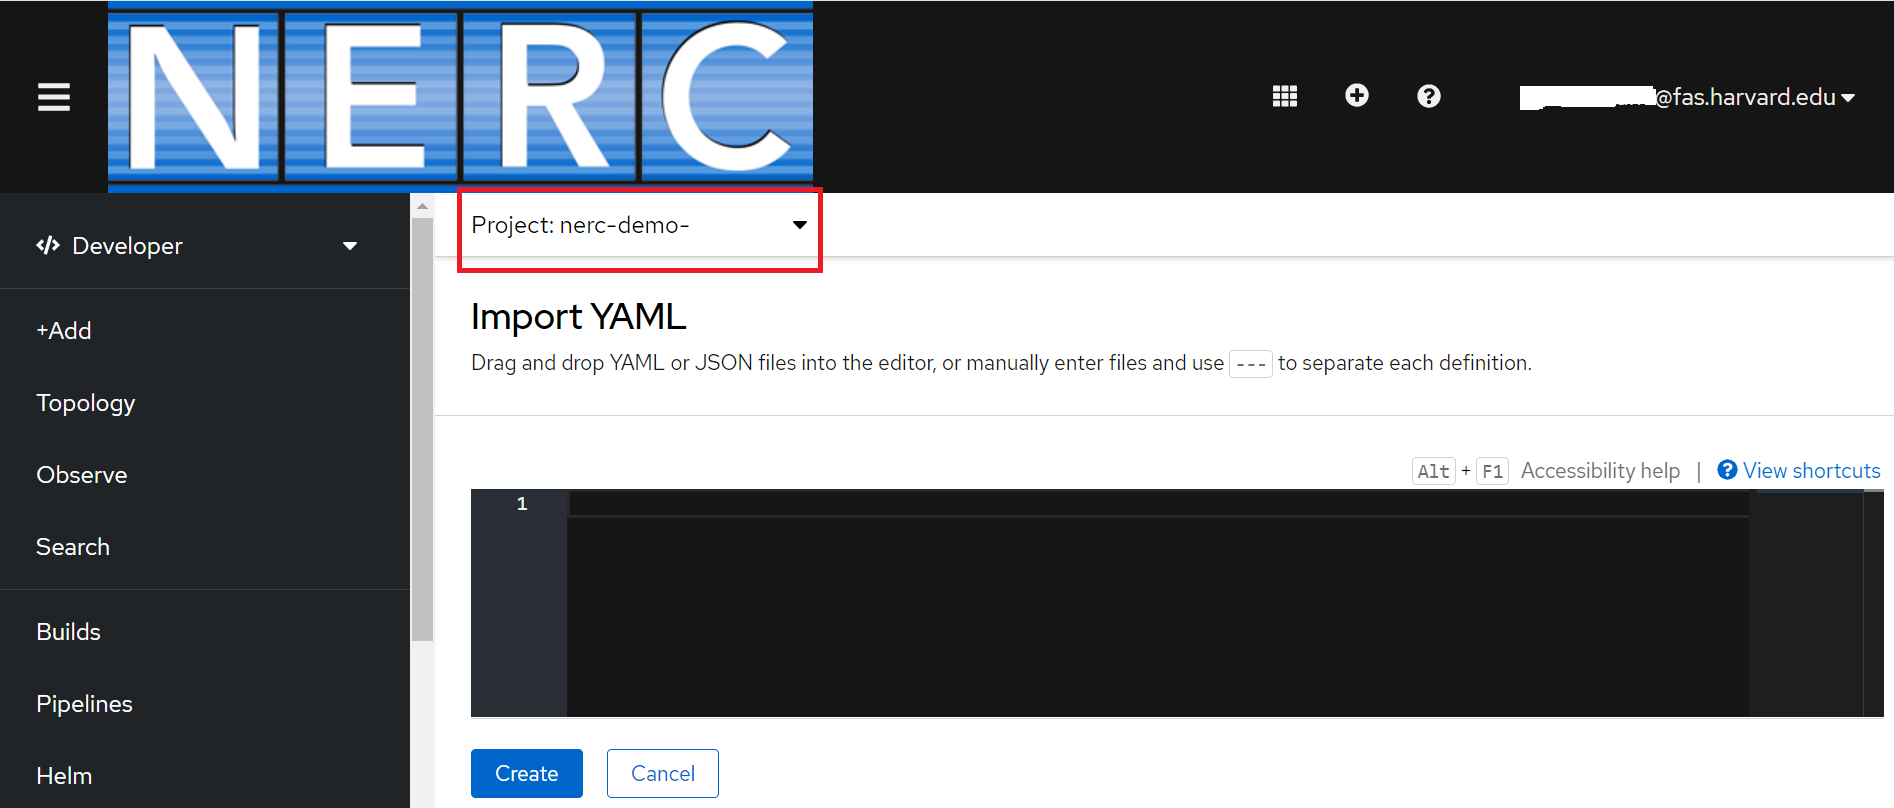
From your NERC's OpenShift Web Console, navigate to your project corresponding to the NERC RHOAI Data Science Project and select the "Import YAML" button, represented by the "+" icon in the top navigation bar as shown below:

-
Verify that you selected the correct project.
-
Either drag and drop
https://github.com/nerc-project/nerc_rhoai_mlops/blob/main/deployment/pre_post_processor_deployment.yamlor copy and paste the contents of thispre_post_processor_deployment.yamlfile into the opened Import YAML editor box. If you have named your model coolstore as instructed, you're good to go. If not, modify the value on line # 35 with the name you set. You can then click the Create button, as shown below: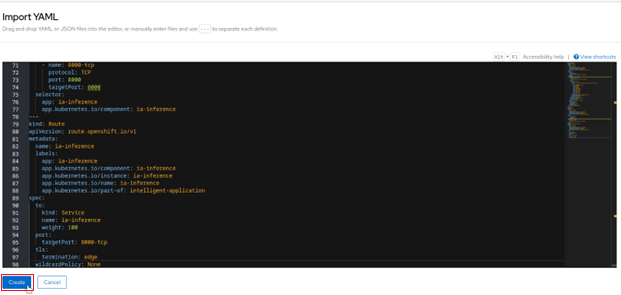
-
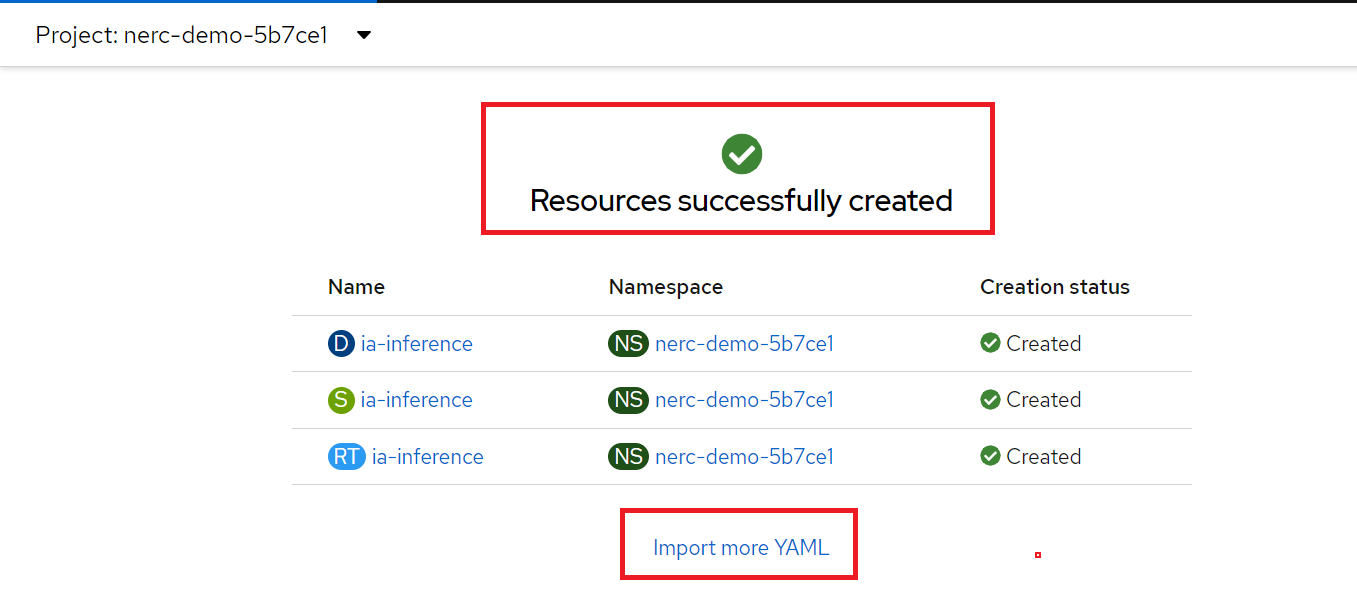
Once Resource is successfully created, you will see the following screen:
-
Click on "Import more YAML" and Copy/Paste the content of the file
intelligent_application_deployment.yamlinside the opened YAML editor. Nothing to change here, you can then click the Create button, as shown below: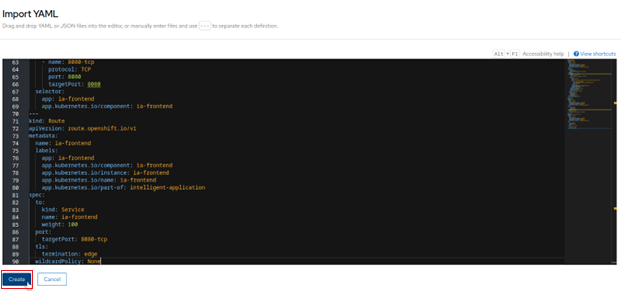
-
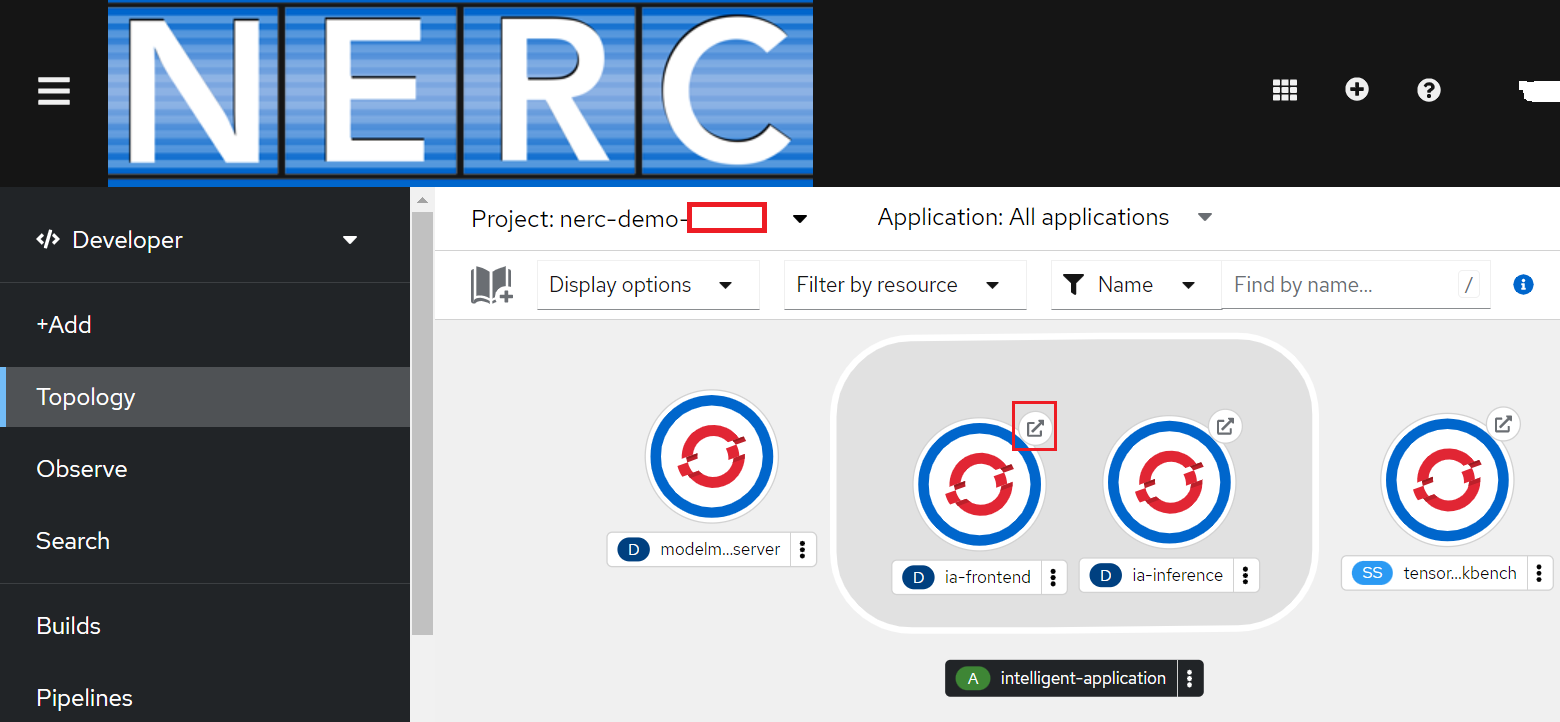
If both deployments are successful, you will be able to see both of them grouped under "intelligent-application" on the Workloads -> Topology menu, as shown below:
Use the application
The application is relatively straightforward to use. Click on the URL for the Route ia-frontend that was created.
You have first to allow it to use your camera, this is the interface you get:
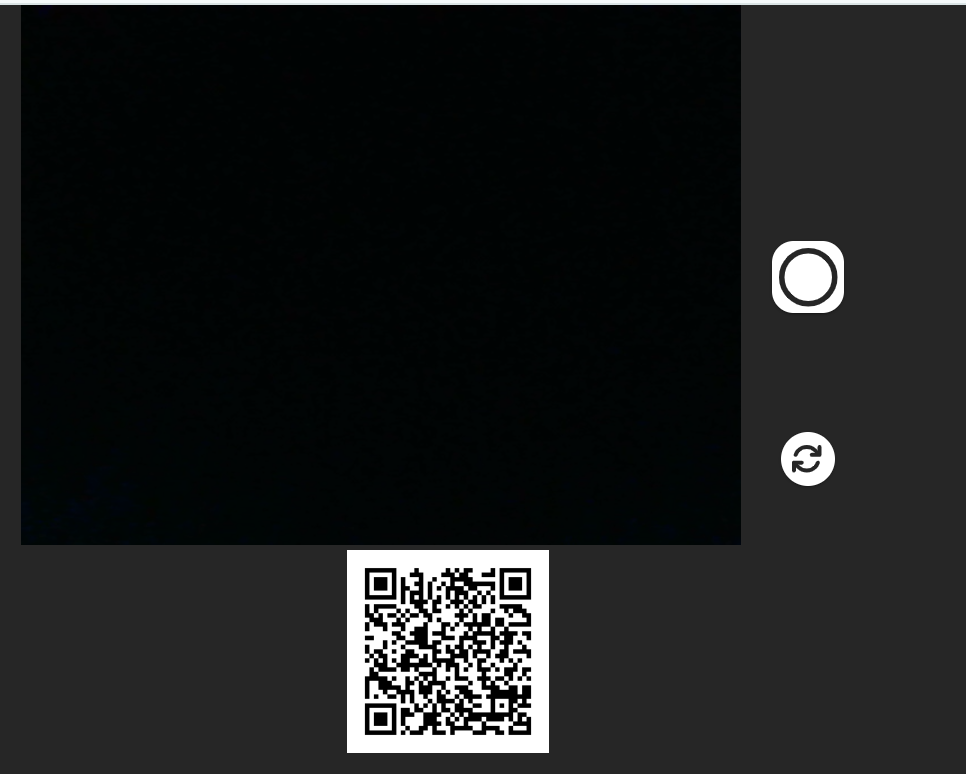
You have:
-
The current view of your camera.
-
A button to take a picture as shown here:

-
A button to switch from front to rear camera if you are using a phone:

-
A QR code that you can use to quickly open the application on a phone (much easier than typing the URL!):

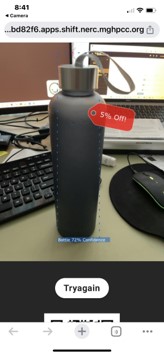
When you take a picture, it will be sent to the inference service, and you will see which items have been detected, and if there is a promotion available as shown below:
Tweak the application
There are two parameters you can change on this application:
-
On the
ia-frontendDeployment, you can modify theDISPLAY_BOXenvironment variable fromtruetofalse. It will hide the bounding box and the inference score, so that you get only the coupon flying over the item. -
On the
ia-inferenceDeployment, the one used for pre-post processing, you can modify theCOUPON_VALUEenvironment variable. The format is simply an Array with the value of the coupon for the 3 classes: bottle, hat, shirt. As you see, these values could be adjusted in real time, and this could even be based on another ML model!
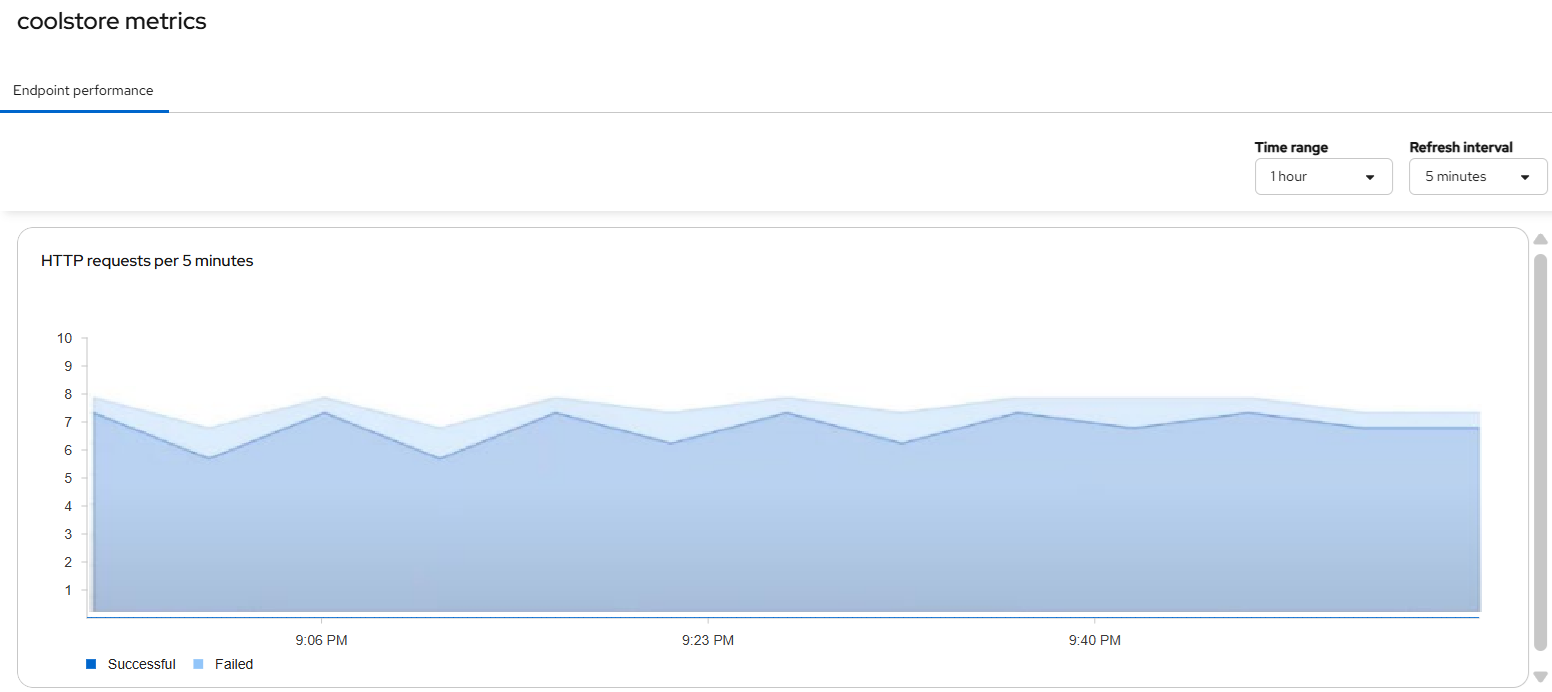
Model Performance Metrics
Access a comprehensive set of model performance metrics to build custom visualizations or integrate with your observability stack - complete with out-of-the-box performance and operations dashboards - by clicking the deployed model's name.